
Free Crochet Pattern (limited) - The Dauntless Dandelion
Written by Kristen M
Welcome to the Dauntless Dandelion pattern! This pattern is near and dear to my heart. The dandelion is the official flower of the military child. Like military children, dandelions put down strong roots wherever they are planted and are extremely difficult to destroy. They are carried by the wind and beautifully bloom wherever they fall. They are resilient, strong, and dauntless. They didn’t choose the life they have, but they embrace it and learn through their challenges. They move wherever their military parent’s job takes them. And if they do stay in one place for a while, the job usually requires their parent to travel often. Sometimes, to really scary places. Military children put on a brave face as they say goodbye over and over again but turn around to be stronger because of it. This pattern was designed specifically to honor these children.
For the last two years, this pattern has only been available as a paid PDF from my pattern shop on Etsy. However, to make it more available with the hope of military kids throughout our communities being blessed by this beautiful flower, I decided to make this a FREE pattern here on the blog for the month of April only.
After the month is over, this pattern will continue to be available as a PDF in my shop, but will no longer be available in this post as a free version. If you’d prefer the ad-free PDF version now, feel free to grab it from my shop here.
Enjoy making these resilient flowers and be sure to tag me (@junebugandjames) if you share on social media!
The Dauntless Dandelion Crochet Pattern
Materials
Color A - Bernat Blanket size 6 super bulky yarn [100% polyester, 27.3 yds/25m per 1.3oz; flower color]
Color B - Bernat Blanket size 6 super bulky yarn [100% polyester, 14.7 yds/13m per 0.7oz; stem color]
Color C - Bernat Blanket size 6 super bulky yarn [100% polyester, 14.7 yds/13m per 0.7oz; ribbon color]
12" long (any of these sizes: 3/16" - 1/4" - 3/8") wooden dowel for the stem (optional)
Hook: size L-11 (8.00mm) and 7.00mm
Pattern Details
This pattern is written in a English using U.S. crochet terms.
Gauge is not important for this pattern.
This pattern is worked in continuous rounds starting at the flower and ending after the stem. It is completely no-sew. Use st markers to mark the beg of each rnd according to the instructions. The larger hook is used to make the flower, and the smaller hook is used for the stem.
My biggest tip for you is to follow each step carefully and trust the process! You’ll be working a lot of stitches into the back loops of previous rnds and I know this can sometimes seem confusing. If you follow each step specifically, you’ll be able do it easily! If you’re having trouble finding the back loops to work into, just follow each st from the previous round and make sure you’re meeting the stitch count after ever single rnd.
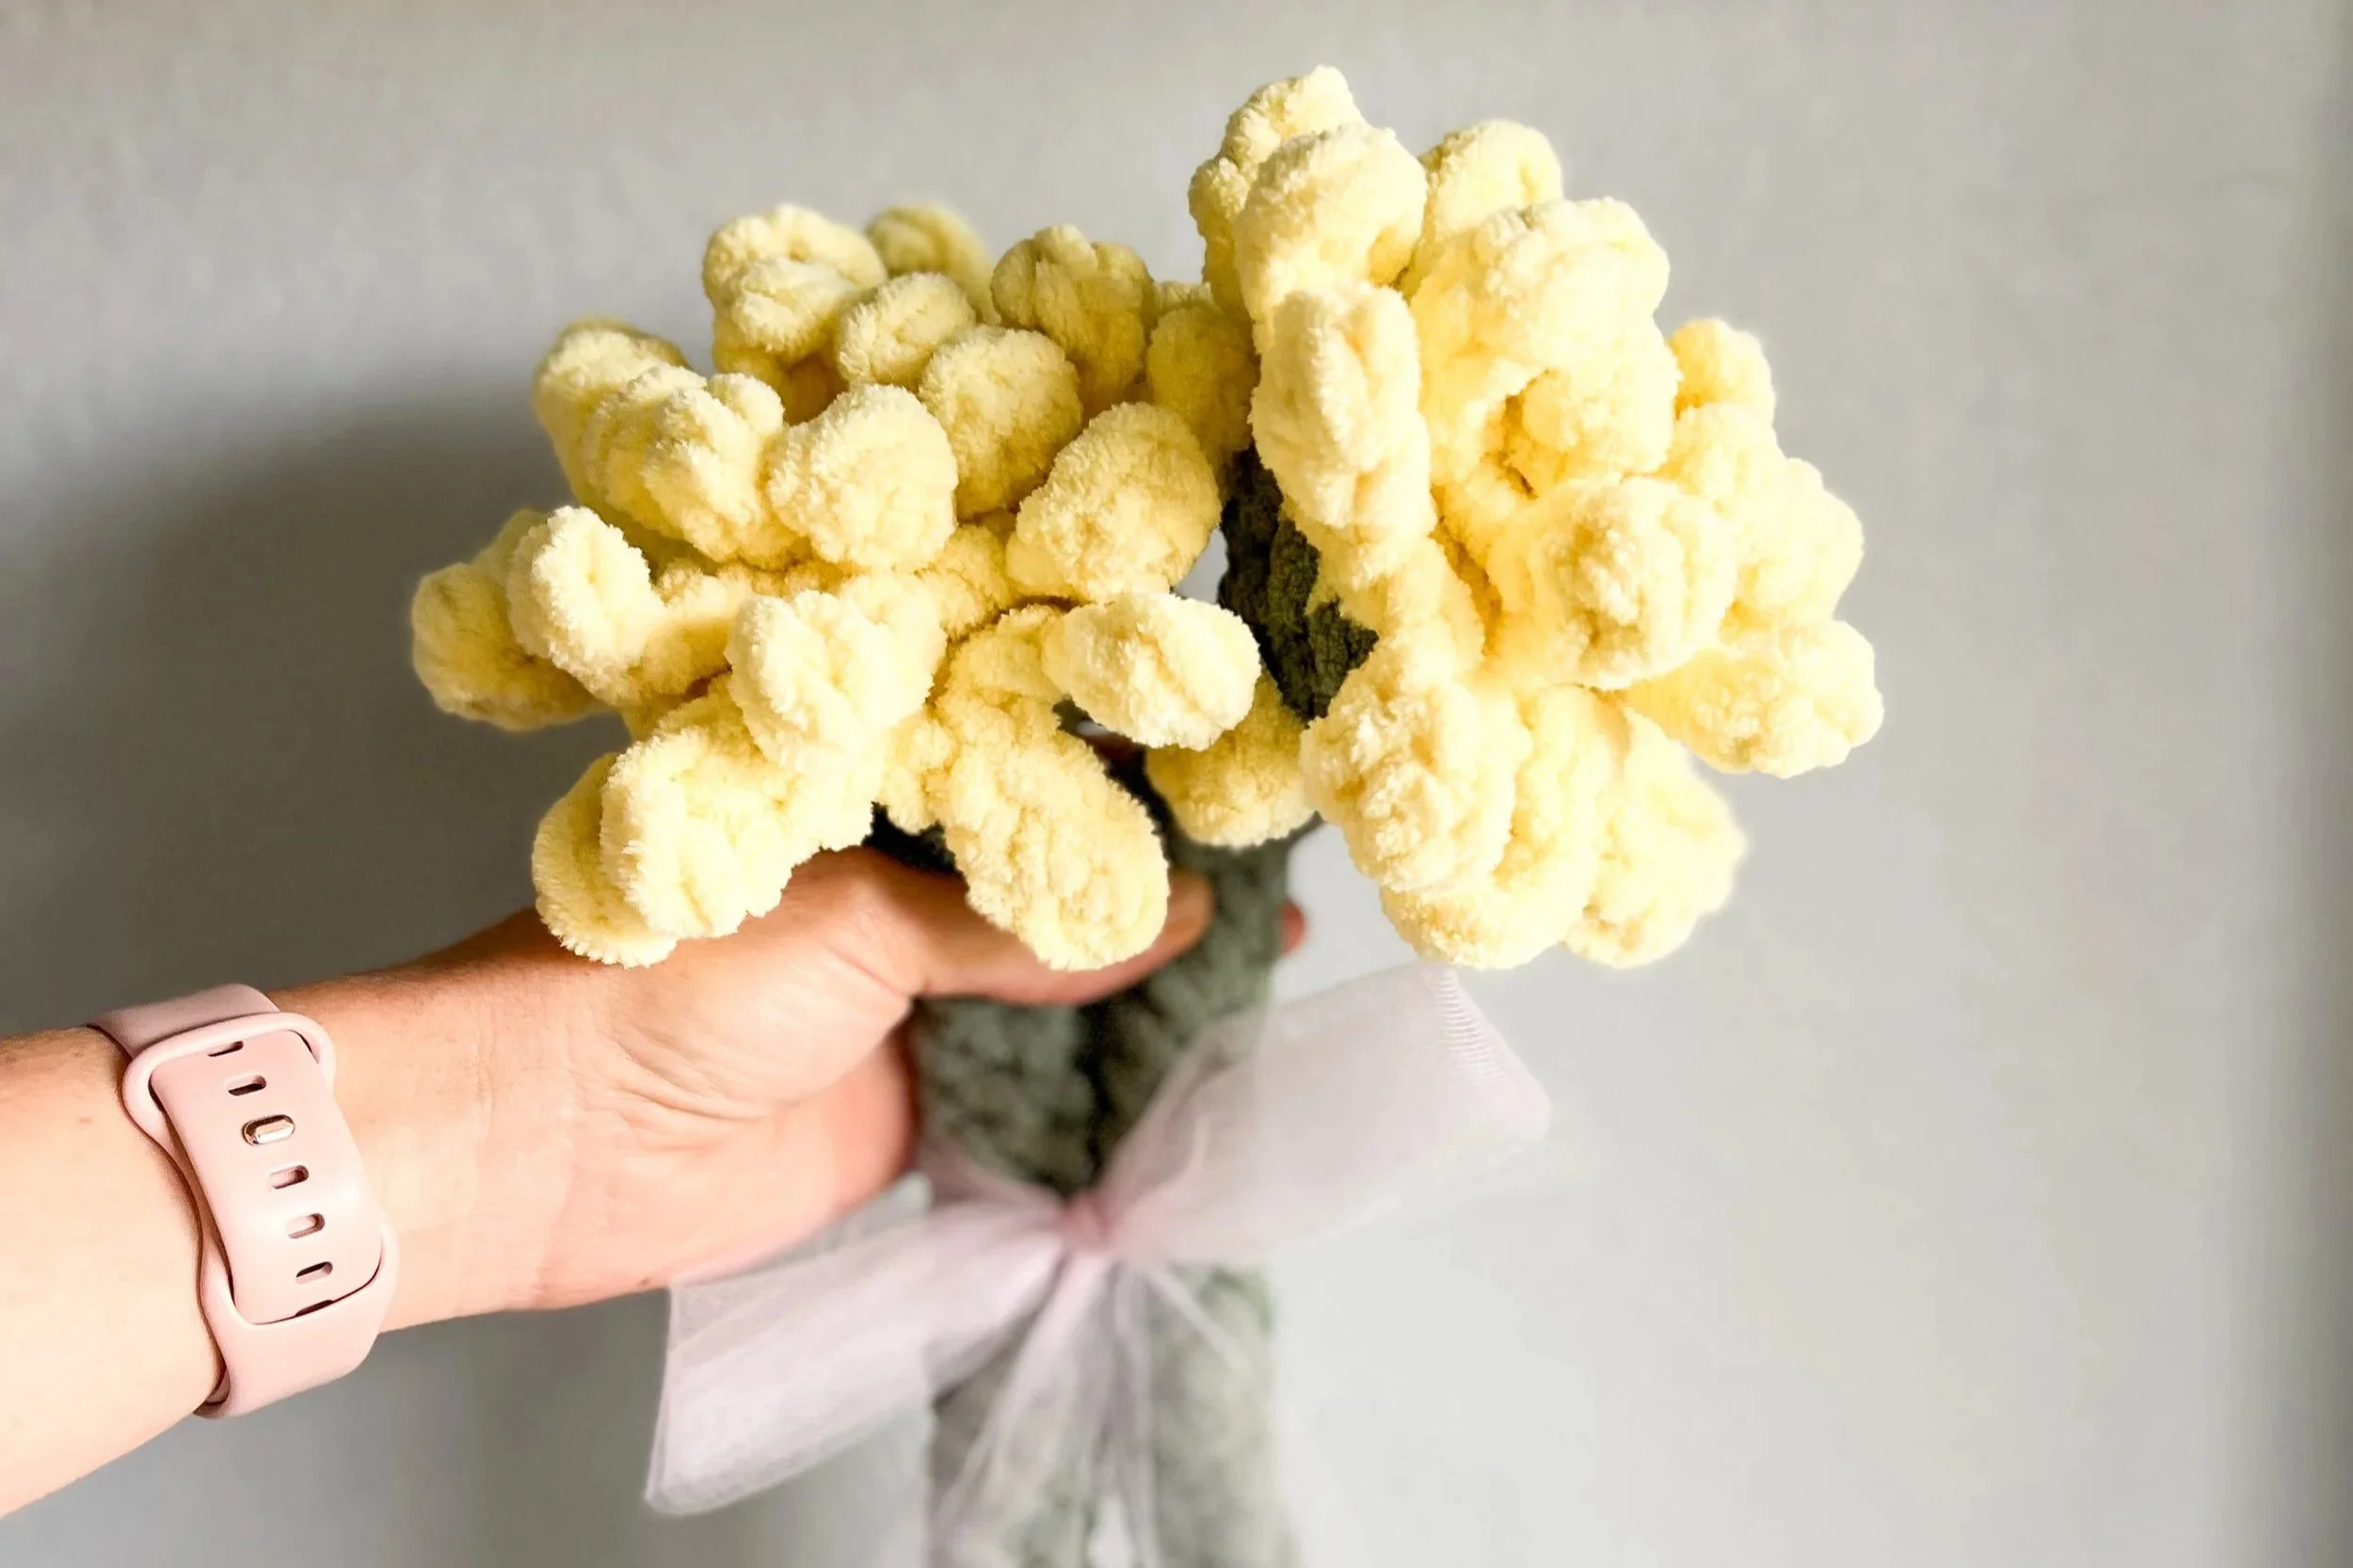
Finished measurements: 12” (30 cm) [super bulky flower]; 6" (15 cm) [worsted weight flower]
This pattern contains affiliate links. I earn a small commission with every purchase through one of these links, and I am so grateful for your support!
Abbreviations
beg = beginning
blo = back loop only
ch(s) = chain stitch(es)
dec = decrease
flo = front loop only
hdc = half double crochet
inc = increase
MR = magic ring (click here for a video tutorial)
rep = repeat
rnd = round
sc = single crochet
sl st = slip stitch
st = stitch
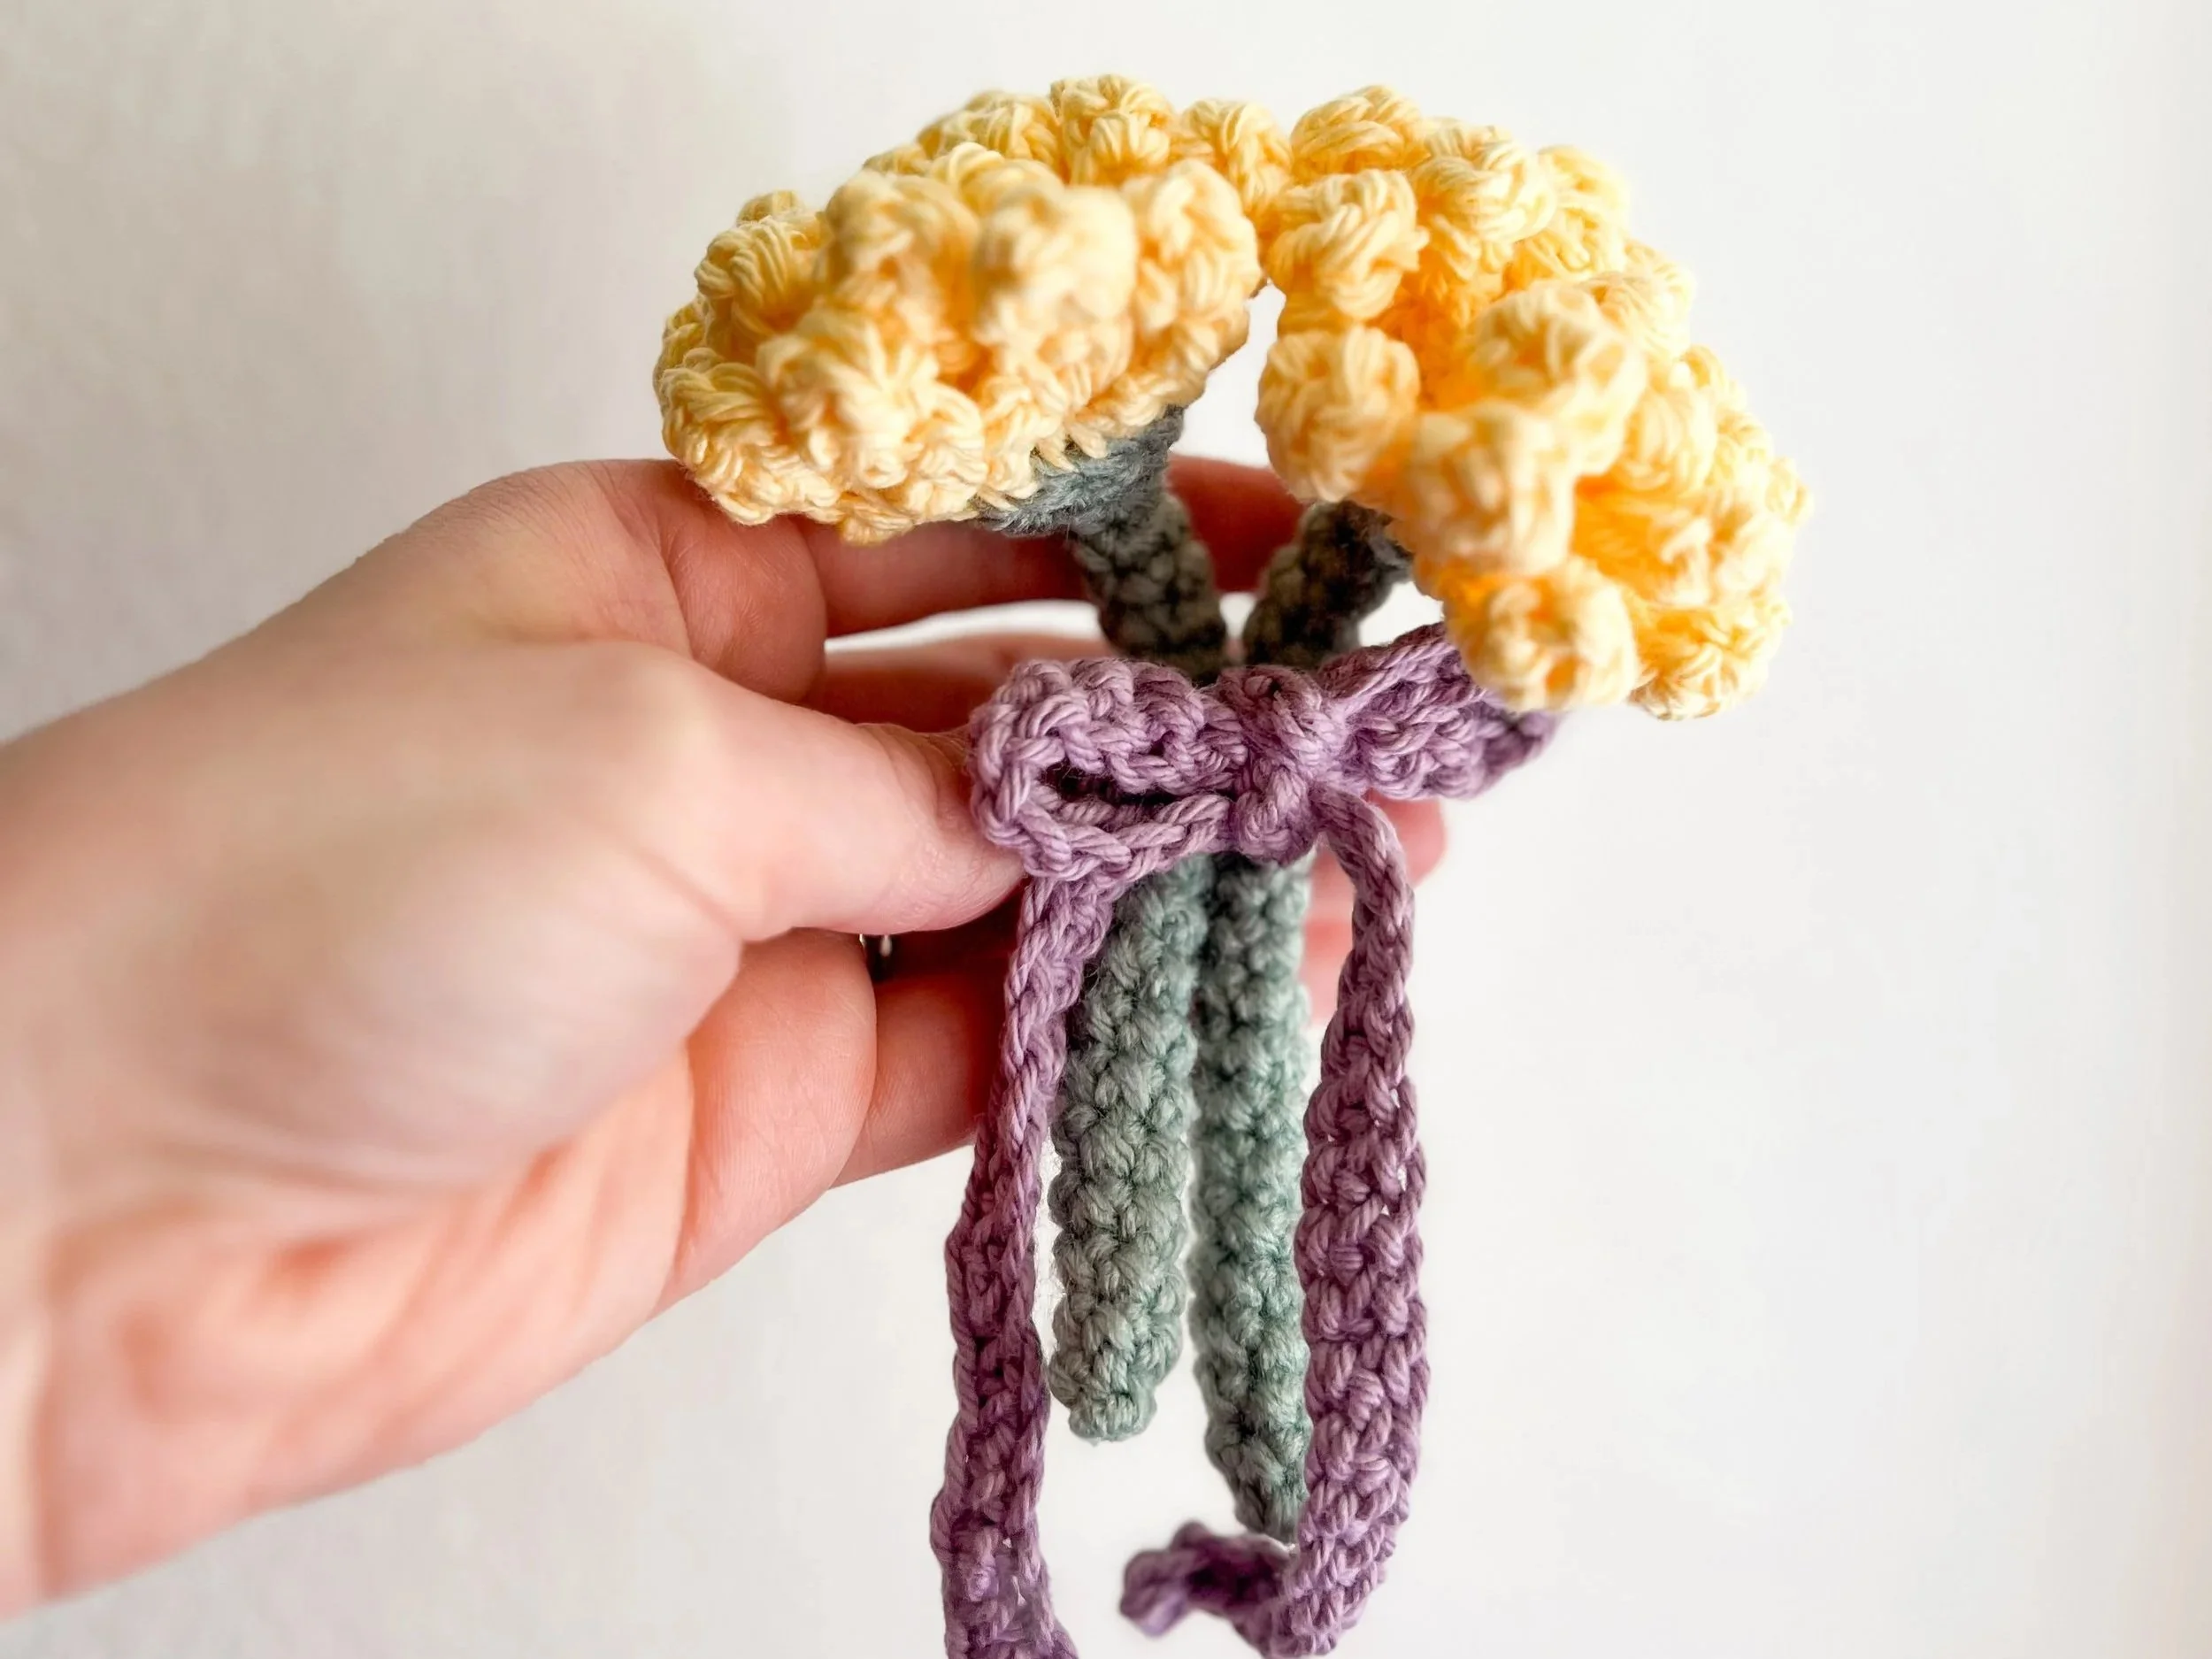
Mini Dauntless Dandelion MOD
Yarn: Dishie Cotton size 4 worsted weight in Creme Brulee (flower), and Hobby Lobby Yarn Bee Soft & Sleek in Sage (stem)
Hook: size G-6 (4.00mm) (flower) and F-5 (3.75mm) (stem)
Pattern
Flower:
With Color A and 8.00mm hook.
Rnd 1: place sc 6 in MR. (6 sc)
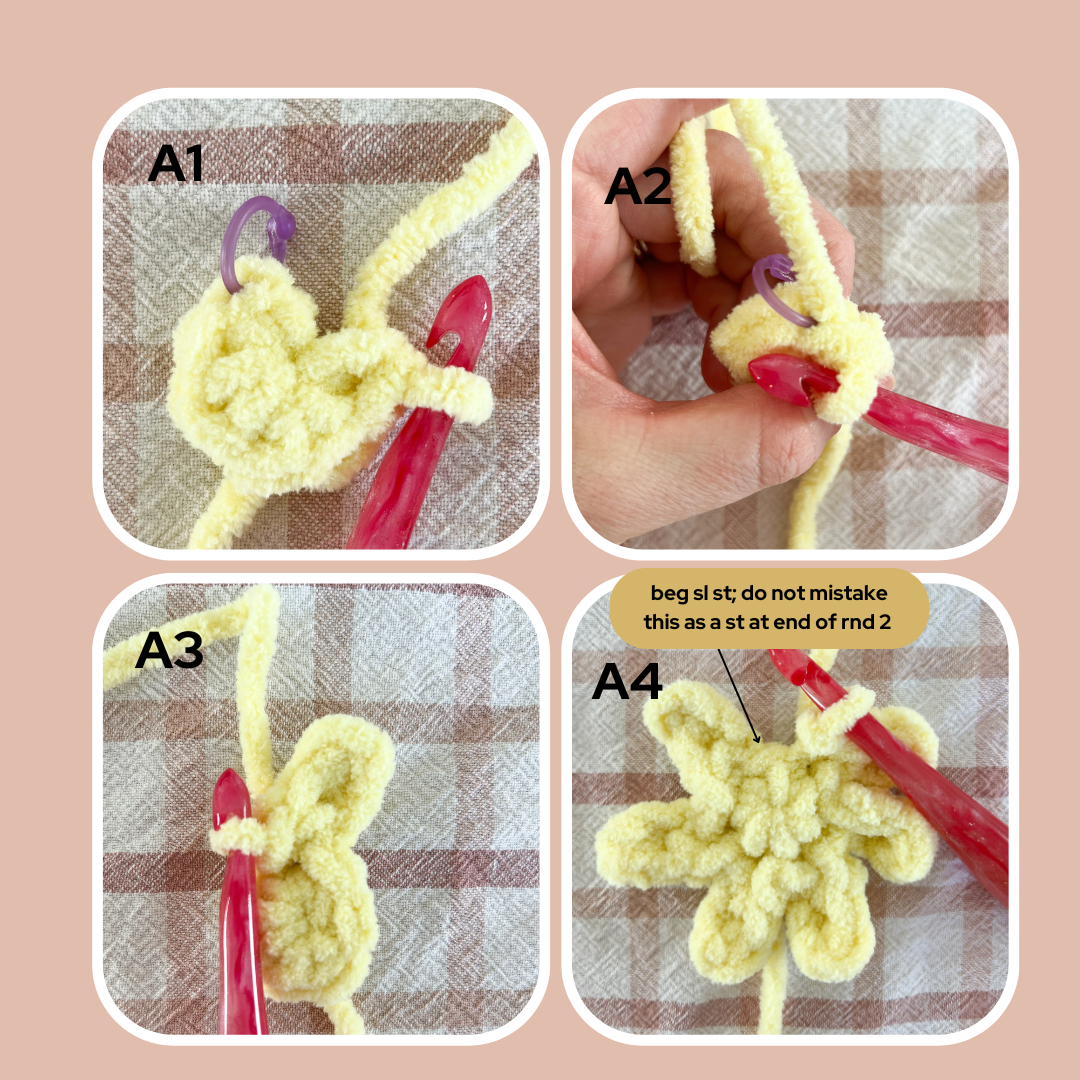
The next rnd will be worked in the front loops of rnd 1. Before beginning, place your st marker in the back loop of the 1st st to mark where you’ll place your 1st st of rnd 3 (photo A1).
Rnd 2: flo sl st in 1st st (photo A2), ch 3, hdc in 2nd ch from hook, sc in next ch, sl st to beg st (photo A3), (flo sl st in next st, ch 3, hdc in 2nd ch from hook, sc in next ch, sl st to beg st) x 5. (6 petals total)
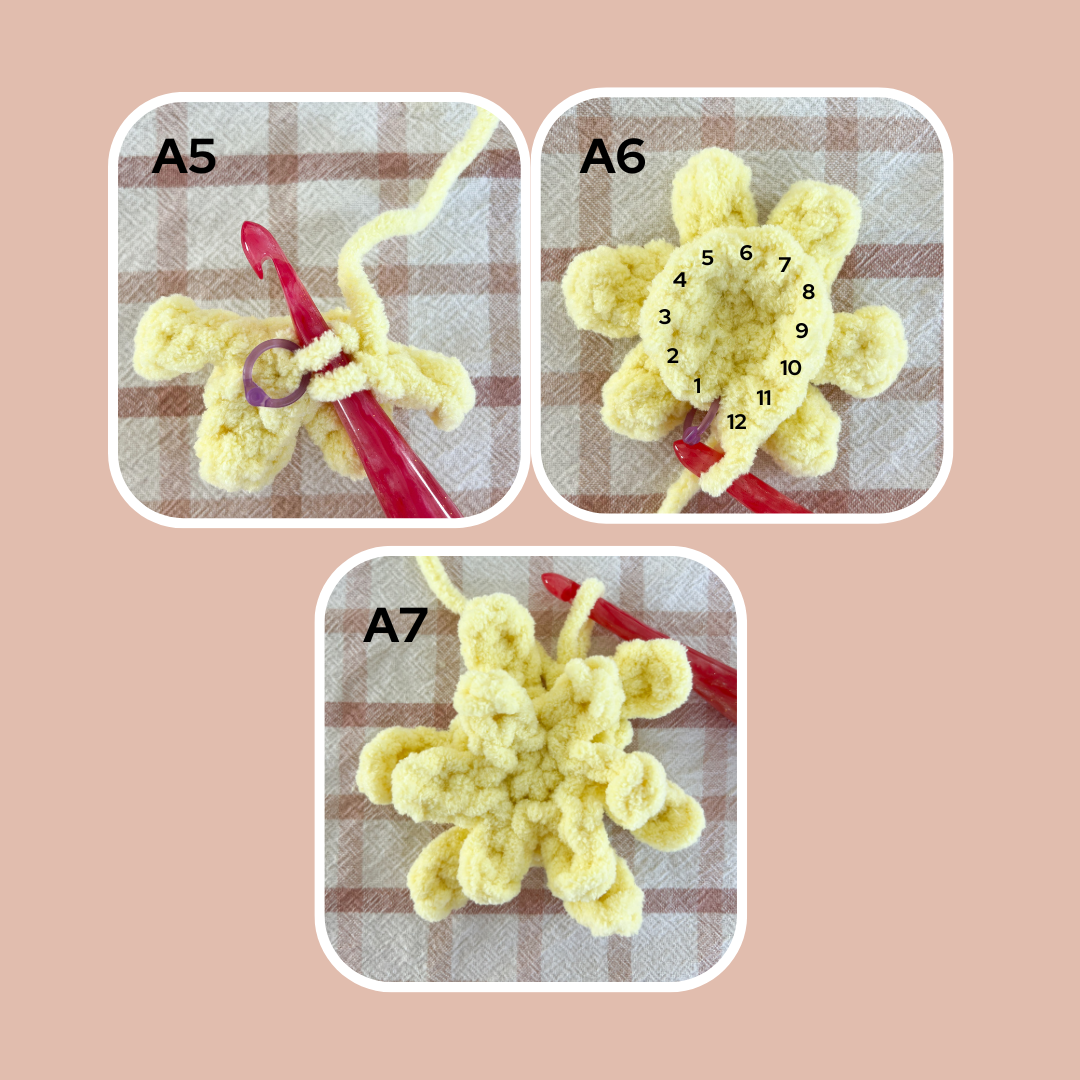
NOTE: do not mistake the beg sl st of rnd 2 with a st at the end of your rnd (photo A4).You’ll finish your last petal, then skip behind the beg petal to work into the marked back loop (photo A5).
Rnd 3:working into each back loop of rnd 1 (photo A5), inc in the first st, remove the st marker and place it in the 1st st of rnd 3, inc in each st around (photo A6). (12 sc)
The next rnd will be worked in the front loops of rnd 3. Before beginning, move your st marker to the blo of the 1st st to mark where you’ll place your 1st st of rnd 5.
Rnd 4: flo sl st in 1st st, ch 4, hdc in 2nd ch from hook, hdc in next ch, sc in next ch, sl st to beg st, flo sc in next st, (flo sl st in next st, ch 4, hdc in 2nd ch from hook, hdc in next ch, sc in next ch, sl st to beg st, flo sc in next st) x 5. (6 petals total, 6 sc)
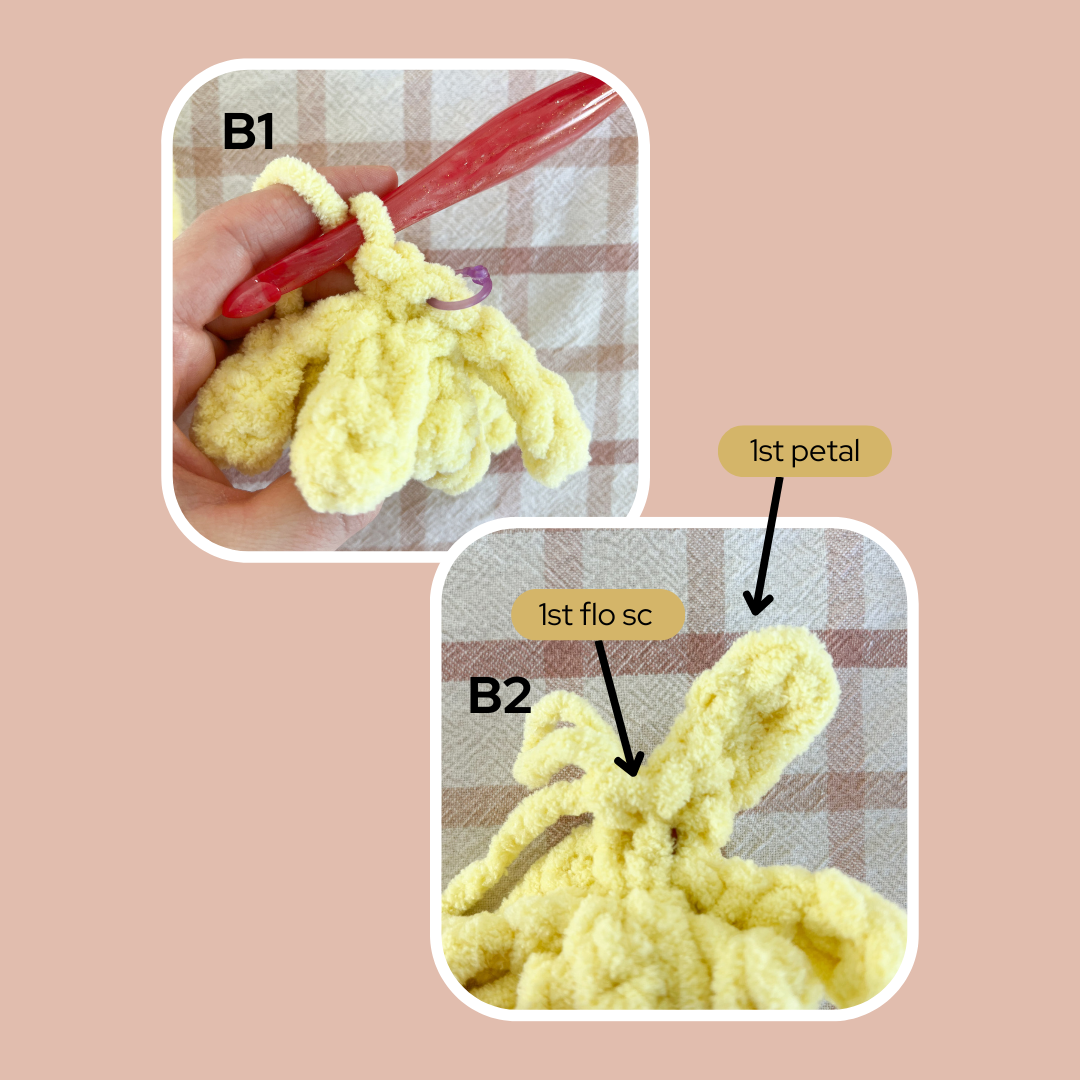
Rnd 5: working into the back loops of rnd 3, inc in the first st, remove the st marker and place it in the first st of rnd 5 (photo B1) inc in each st around. (24 sc)
The next rnd will be worked in the front loops of rnd 5 and is your last rnd of petals. Before beginning, move your st marker to the blo of the 1st st to mark where you’ll place your 1st st of rnd 7.
Rnd 6: flo sl st in 1st st, ch 4, hdc in 2nd ch from hook, hdc in next ch, sc in next ch, sl st to beg st, flo sc in next st (photo B2), (flo sl st in next st, ch 4, hdc in 2nd ch from hook, hdc in next ch, sc in next ch, sl st to beg st, flo sc in next st) x 11, change to Color B in the last st of the rnd (see tip below). (12 petals, 12 sc)
Continue to Stem.
Color Changing Tip
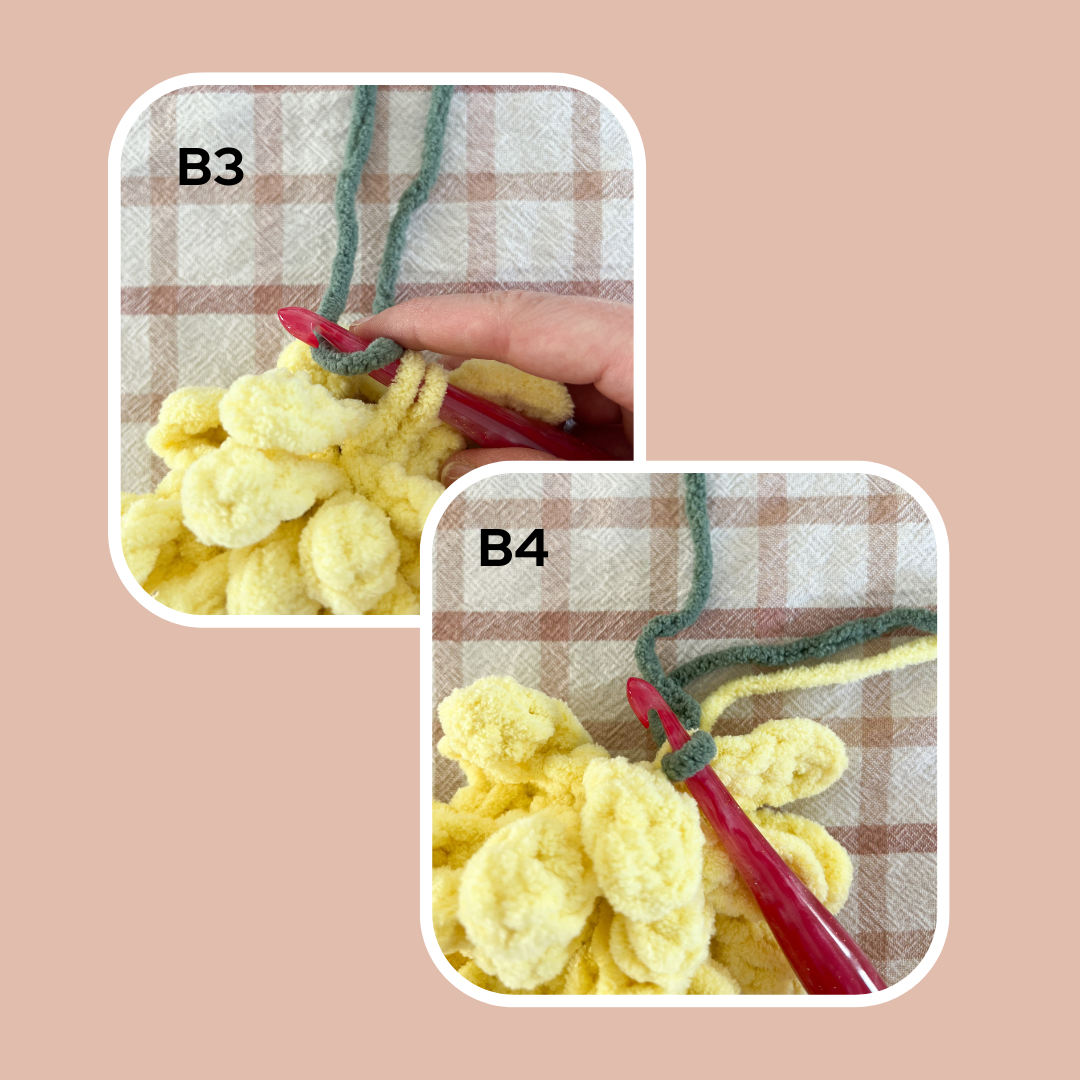
When working your LAST st of the rnd, insert your hook and pull up that first loop of the sc, drop the current color, yarn over with your new color (photo B3) and pull through the two current loops on your hook. Now, you’ll be ready to work with your new color in the next st (photo B4).
Stem:
With Color B and 7.00mm hook.
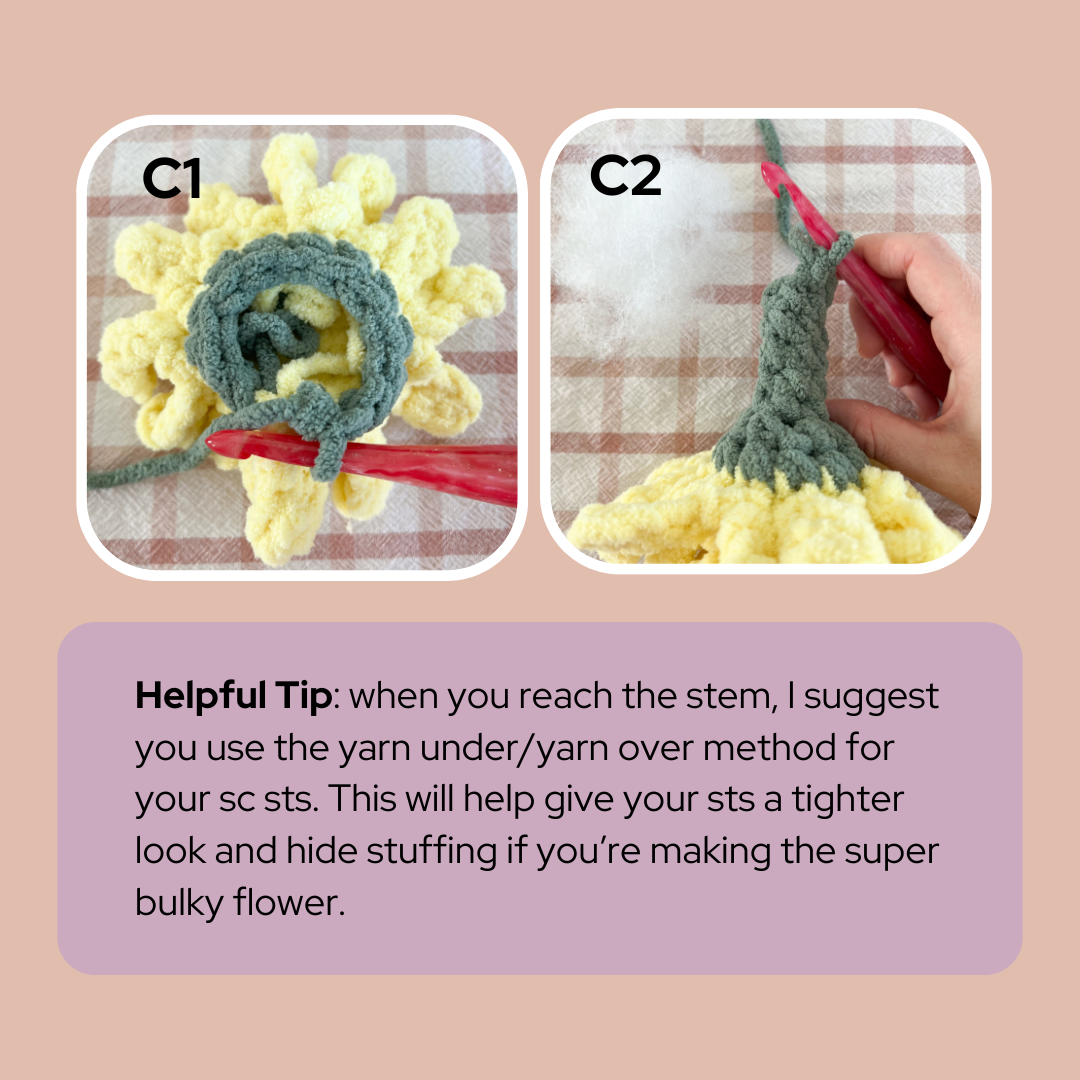
Rnd 7: working into the back loops of rnd 5, dec around (photo C1). (12 sc)
Begin lightly stuffing the flower.
Rnd 8: dec x 6. (6)
Rnd 9: dec, sc in next 4 sc. (5 sc)
Rnds 10-36: sc in each st around. (5 sc) [26 rnds; 130 total sts]
Stop every few rnds to lightly stuff. You want it to be enough to keep its form, but not too much to where the stuffing shows through the stem (photo C2).
If you prefer a sturdier stem to allow the flower to stand up, stop stuffing after rnd 10 and use a wooden dowel. After you finish rnd 36, insert your dowel into the stem. Feel free to add or take out stitches to make the stem fit snuggly before fastening off.
If you’re making a flower with worsted weight yarn, lightly stuff the flower only and do not stuff the stem.
Fasten off and use a tapestry needle to weave your yarn tail through the outside loop of each st around, pull to close and weave in your end.
Ribbon
With Color C and 8.00mm hook.
Ch 76
Row 1: sc in 2nd ch from hook, sc in each st across. (75 sc)
Fasten off and weave in ends.
The ribbon is now long enough to tie into a bow around 3 dandelion stems. Feel free to adjust the beginning chain amount if you’d like your ribbon to be shorter or longer.

Thank you so much for following along. I hope you enjoy making your own Dauntless Dandelions to represent our nation’s brave military children! If you’d like to make a bouquet with a variety of flowers, check them all out in my shop here!
This pattern is copyright © 2026 Junebug and James. Pattern and photos cannot be used for resale purposes. Distribution in part or in whole of this pattern is strictly forbidden. Any Dauntless Dandelion created using this pattern may be sold, but please remember to give credit to Junebug and James.
