
Free Crochet Pattern | Madeline Christmas Blanket
Written by Kristen M
Published on: November 2nd, 2025
Disclaimer: This blog post contains affiliate links. I will receive a small commission when you make a purchase through of these links at no additional cost to you.


It’s that time of year, friends! Time to get our Christmas yarn out (if you haven’t already), and make some Christmas crochet projects. What better way to start the season than with a good old-fashioned Christmas crochet blanket pattern?!
Start off the holiday season with this easy Christmas crochet pattern - The Madeline Christmas Blanket. To make this project even more of a breeze, if you keep reading you’ll find a free printable below I created just for you to stay on track with your Christmas blanket this year!
Fun fact: this blanket is actually a modification of my original Madeline Baby Blanket. Designed in April 2024, the Madeline Baby Blanket has been one of my favorite free crochet patterns here on the blog! It’s easy, simple, and classic, but gives you a stunning texture. And the best part, it’s a beginner friendly crochet pattern!
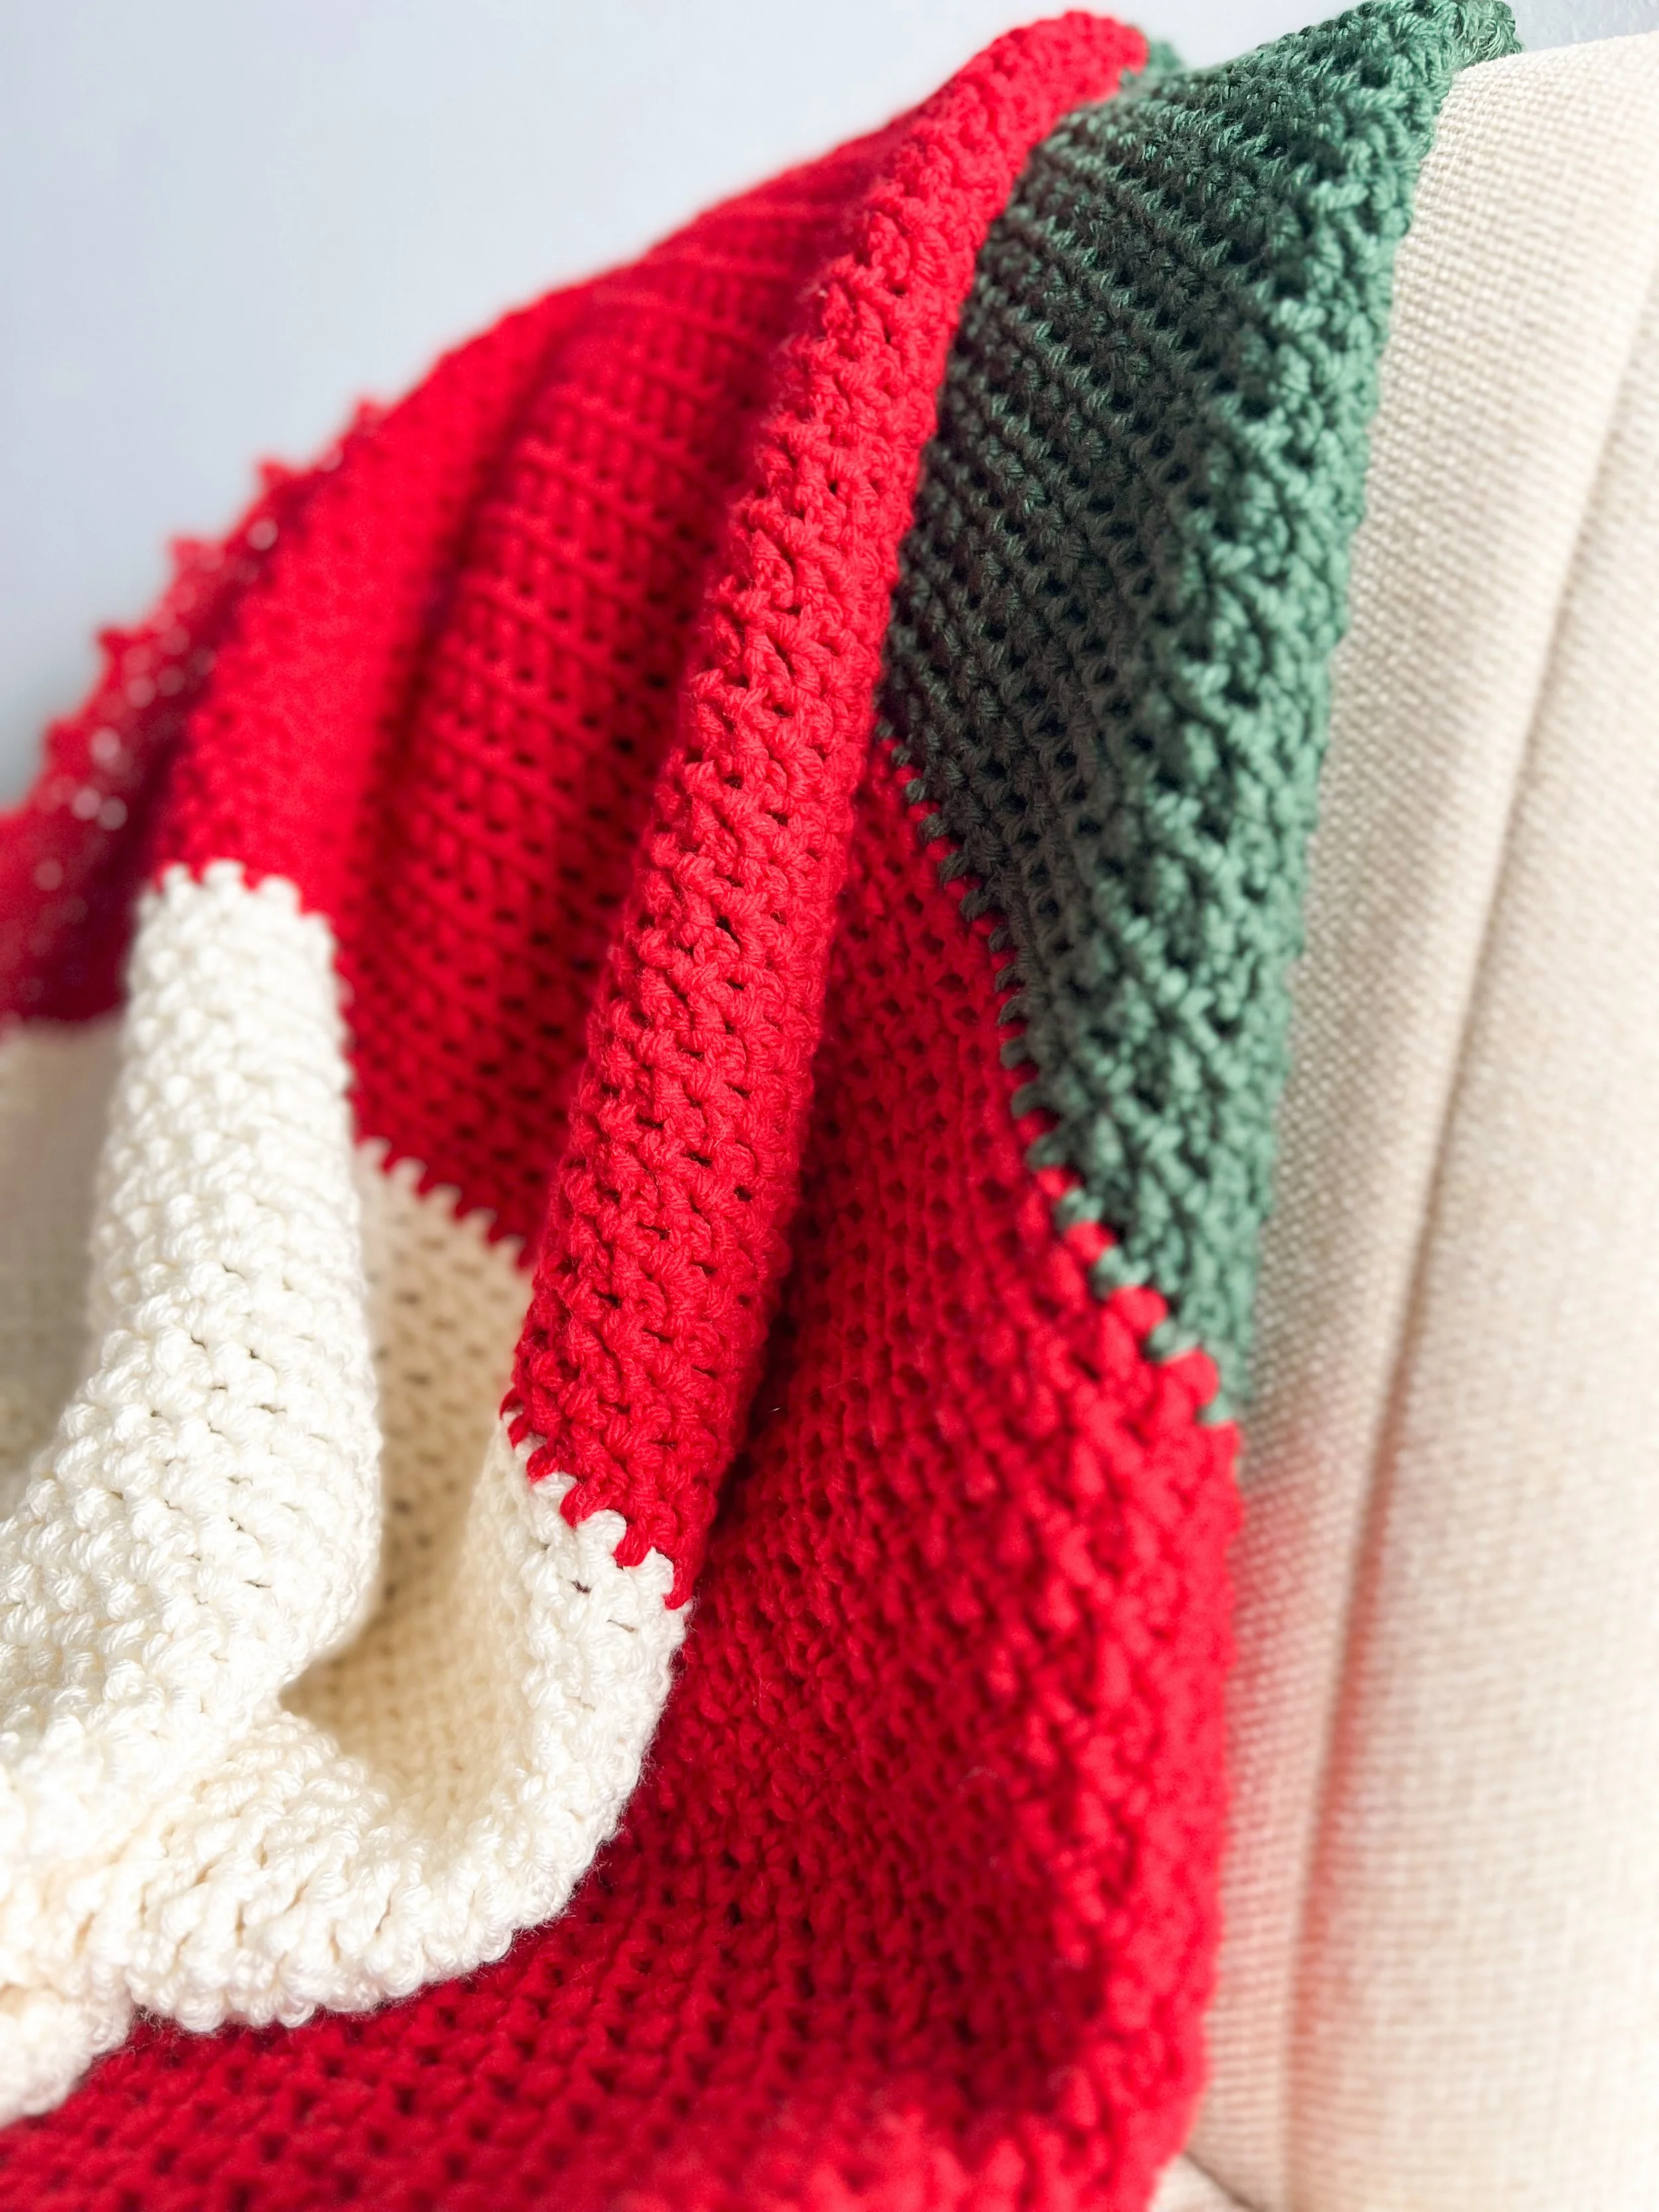
When I was dreaming up my next crochet project to share with all of you here, I landed on the idea of turning my Madeline Baby Blanket into a festive Christmas crocheted afghan. The main stitch pattern is exactly the same, with modifications in the sizing, colors, and border.
Basically, the Christmas version is bigger (throw blanket sized, to be exact), made in festive Christmas colors, and has a slight modification to the border.
So let’s jump in and talk about the process!
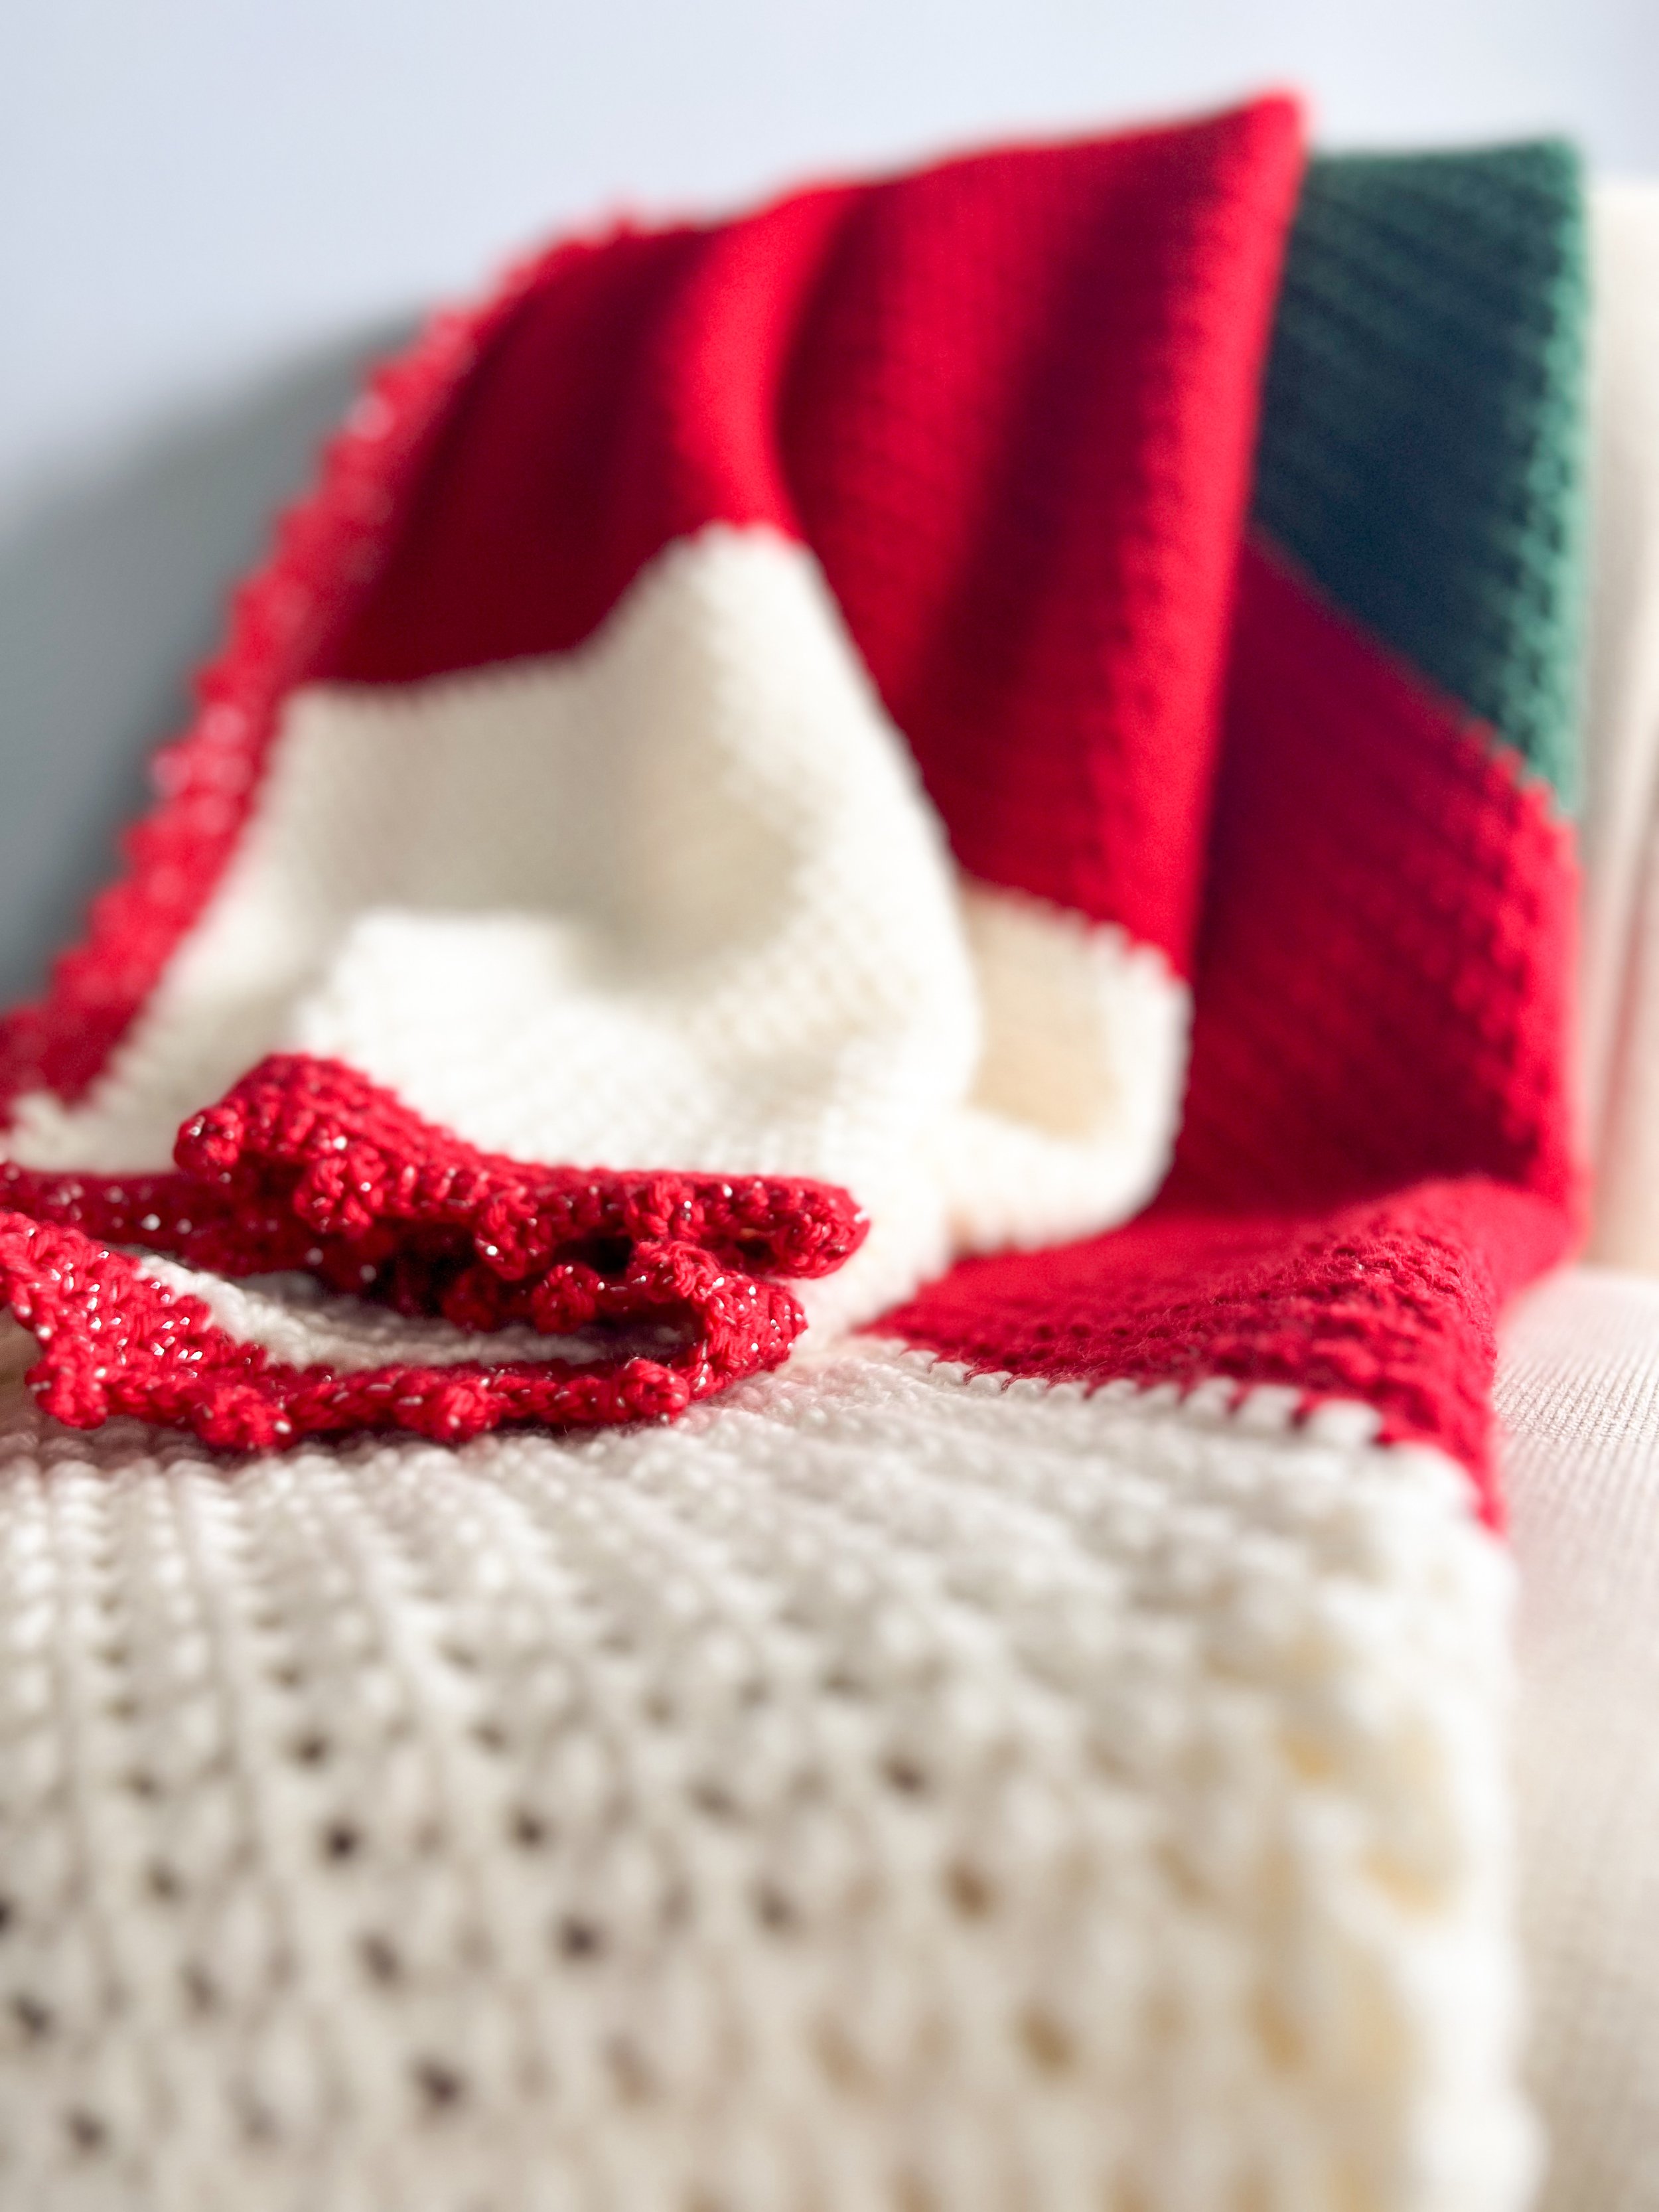
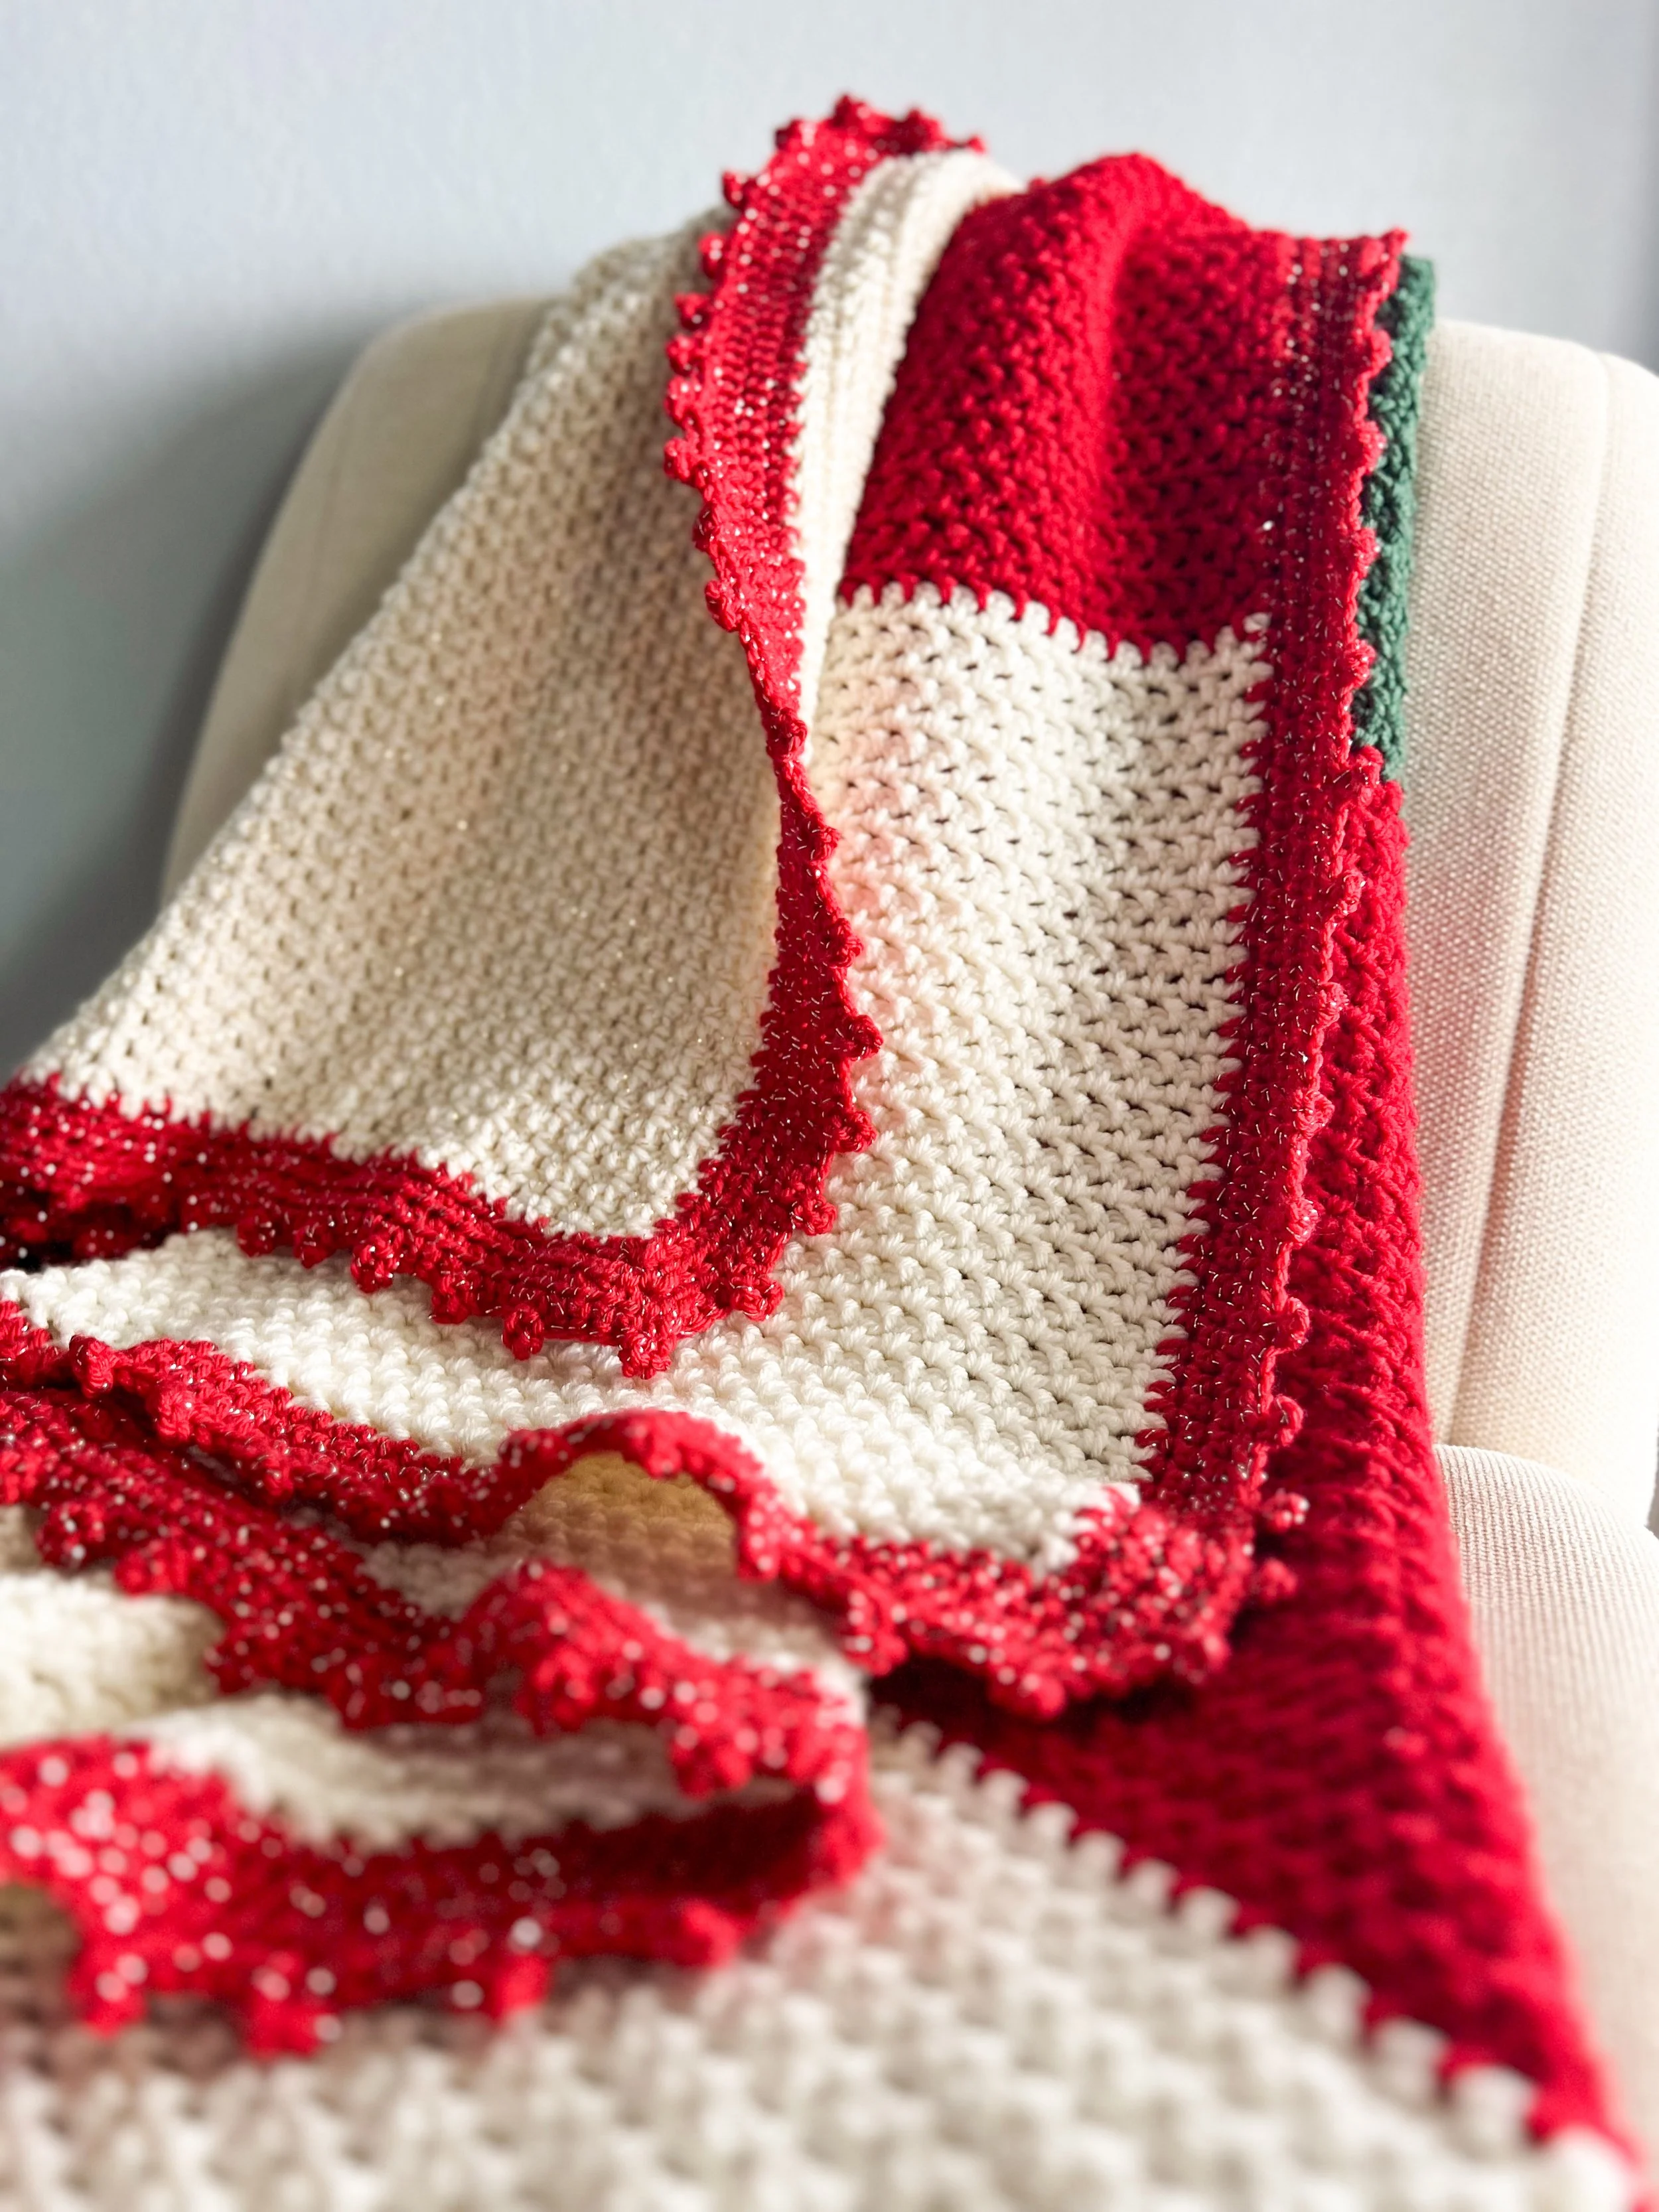
The yarn I chose for the Madeline Christmas Blanket is Hobby Lobby’s I Love This Yarn in the colorways White, Forest Green, Metallic Red, and Metallic Ivory. The red color block of the blanket was made with Lion Brand Yarn’s Pound of Love in the colorway Cherry, because I had a huge skein (one pound to be exact) on hand and it was the perfect opportunity for it to get some use. But if you check the color options for I Love This Yarn, they have two beautiful choices for your red color block - Red or Fire Red!
I also really wanted my blanket to sparkle a bit, so I chose I Love This Yarn Metallic in Ivory and Red to add that extra festive bling! Keep in mind, the skeins of Metallic are slightly smaller than the original I Love This Yarn skeins. While I only needed 2 skeins of original for my typical color blocks, I needed 3 skeins of Metallic to finish one color block. As long as you check the yardage included in the pattern though, you will be set!
The main stitch used in this pattern is my absolute favorite - the herringbone half double crochet stitch. While tricky at first, you’ll soon find your rhythm with this stitch and fall in love with its texture. For extra help and a video tutorial, check out my post on the herringbone half double crochet stitch here!
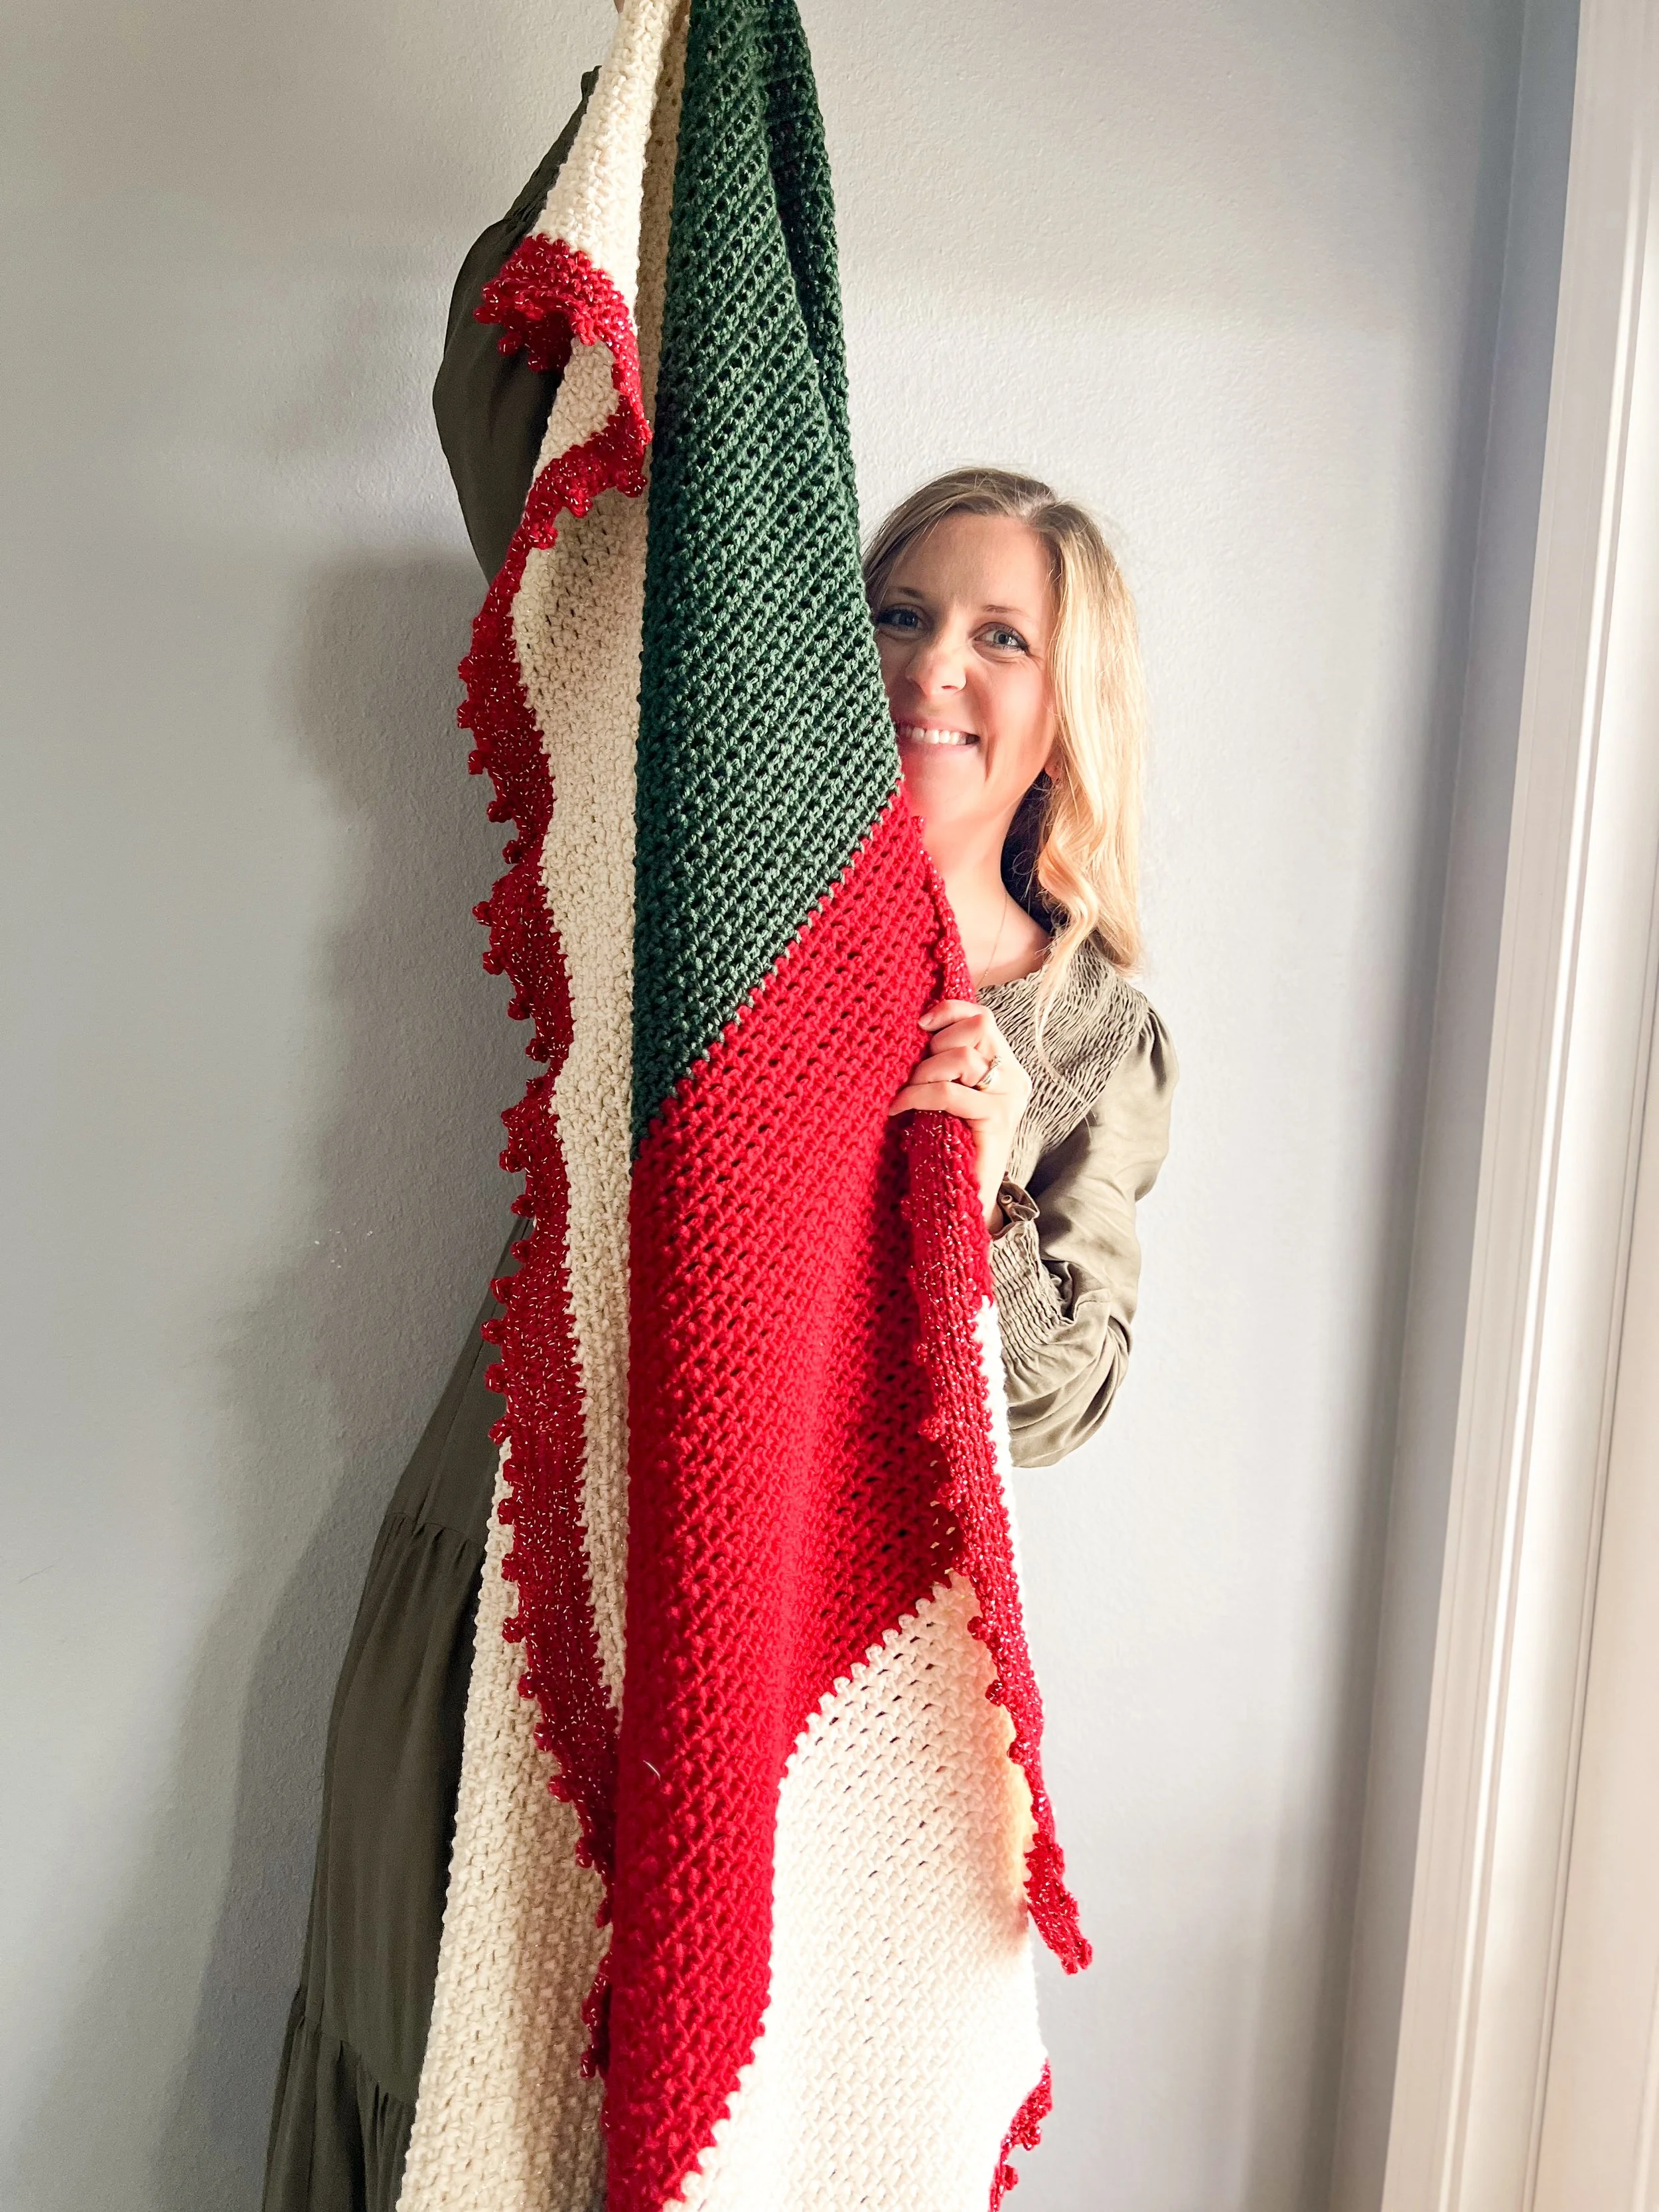
Working with Christmas colors for this blanket was a such a dream. In my vision, I saw a gorgeously classic throw blanket big enough to cover myself on the couch (feet and all!), while I cozy up and watch a cheesy Hallmark movie with a hot latte.
Naturally, when you come across a bigger crocheted blanket pattern it might be a bit intimidating to think about how long it takes to make. One of the things I love about this specific crocheted blanket pattern is that it actually works up surprisingly quick for a throw blanket size. Because of the stitch pattern used, it’s so easy to get into a great rhythm with your stitches, making it easy to lose count of how many rows you did in one sitting.
While I was working on this blanket, I could usually work about 5-6 rounds per hour. There are 160 rows total, so you could estimate the time it would take to finish at about 32-35 hours, including the border.
If you’re anything like me, thinking about that many hours may seem pretty daunting. However, if you think about it this way - starting your blanket on November 5th, and working just 5 rows a day, you could finish your entire blanket (including the beautiful border) by December 9th. That’s a perfect amount of time to not only enjoy crocheting your Christmas blanket during the holiday season, but also enjoy a couple of weeks with it finished before Christmas Day.
To help stay on track, I created a free printable row tracker on Canva for you to use! Download your festive tracker right here and have fun keeping up with your progress.
If you don’t have time to start your blanket soon, but want to save the pattern for later, make sure you pin the image below so you can find it anytime!

The Madeline Christmas Blanket Pattern
Materials
Colors A, B, C, & D - Hobby Lobby, I Love This Yarn [100% acrylic, 710 yds (14 oz) needed per color block; colors White (A), Red or Fire Red (B), Forest Green (C), & Metallic Ivory (D). Two skeins of each worked great for original I Love This Yarn, but for the Metallic color block I needed 3 skeins total.
Color E (border) - Hobby Lobby Metallic, I Love This Yarn [100% acrylic, 504 yds (10 oz) needed for border rounds; color Metallic Red] Two skeins total of Metallic yarn to complete the border.
Total yardage needed: 2,840 (blanket) + 504 (border) = 3,344 total yds
Pattern Gauge
13 rows x 17 sts = 4" (10 cm) unblocked square in main pattern, excluding border.
Helpful Pattern Details
This pattern is a slightly modified version of my Madeline Baby Blanket free crochet pattern. Check out the pattern at this link! The stitch pattern is the same, but the blanket is larger and there is an extra round worked for the border.
This pattern is written in English, using U.S. crochet terms.
Finished measurements (unblocked): 56” (142 cm) long x 56” (142 cm) wide
This pattern uses a one row repeat throughout. You will change colors every 40 rows to begin the next color block.
The border is worked in rounds and measures at approx. 2" (5 cm) wide.
Keep in mind, depending on your tension, the finished size of your blanket may be larger or smaller than the included measurements.
If you’re having trouble with your border rippling, you may need to work less sts around than instructed. However, if this is needed, be sure to still end round 2 of the border with a st count that is a multiple of 4. This will ensure the mp sts in rnd 4 line up evenly around. Please feel free to reach out to me if you have any questions!
Abbreviations
beg = beginning
ch(s) = chain stitches
hhdc = herringbone half double crochet
hdc = half double crochet
mp = modified picot
rep = repeat
rnd = round
sc = single crochet
sk = skip
sl st = slip stitch
sp = space
st(s) = stitch(es)
Special Stitches
Herringbone Half Double Crochet (hhdc) (click here for a video tutorial) = yarn over, insert hook into next stitch, yarn over and pull up a loop, pull the loop through second (middle) loop on hook, yarn over, pull through last 2 loops.
Modified Picot Stitch (mp) = ch 6, sl st to first ch made creating a loop with your ch(s).
Pattern
With Color A and hook size 5.00mm.
Ch 230
Row 1: hhdc in 2nd ch from hook, *ch 1, sk next ch, hhdc*, rep from *to* across, ch 1, turn. (229 sts)
Rows 2-40: sk 1st hhdc, hhdc in 1st ch 1 sp, *ch 1, sk next st, hhdc in next ch 1 sp*, rep from *to* across until there is 1 hhdc st left, ch 1, hhdc in last st, ch 1, turn. (229 sts)
Change to Color B in last st of row 40.
Rows 41 - 80: sk 1st hhdc, hhdc in 1st ch 1 sp, *ch 1, sk next st, hhdc in next ch 1 sp*, rep from *to* across until there is 1 hhdc st left, ch 1, hhdc in last st, ch 1, turn. (229 sts)
Change to Color C in last st of row 80.
Rows 81 - 120: sk 1st hhdc, hhdc in 1st ch 1 sp, *ch 1, sk next st, hhdc in next ch 1 sp*, rep from *to* across until there is 1 hhdc st left, ch 1, hhdc in last st, ch 1, turn. (229 sts)
Change to Color D in last st of row 120.
Rows 121 - 160: sk 1st hhdc, hhdc in 1st ch 1 sp, *ch 1, sk next st, hhdc in next ch 1 sp*, rep from *to* across until there is 1 hhdc st left, ch 1, hhdc in last st, ch 1, turn. (229 sts)
Change to Color E for the border in last st of row 160.
Do NOT turn after row 160.
Continue to Border.
Border
With Color E and hook size H-8 (5.00mm)
Rnd 1: ch 1, *hdc 3 in last ch 1 sp of the row (place a st marker in middle st to mark corner), hdc down the side placing one st at the end of each row, hdc 3 in corner (place a st marker in middle st to mark corner), hdc across bottom edge placing one st in each ch 1 sp and each hhdc*, rep from *to* one more time, sl st to beg hdc, sl st in next marked hdc, ch 1, do not turn. (782 hdc).
Rnds 2-3: *hdc 3 in st marked with st marker, (replace the st marker in middle st to mark corner), hdc across to next st marker*, rep from *to* around, sl st to beg st, sl st in next st, ch 1, do not turn. (790 hdc, 798 hdc)
Rnd 4: (sc, mp) in st marked with st marker, sc in next 3 sts, *mp, sc in next 4 sts* repeat from * to * all the way around, sl st to beg mp. There will be no extra sts worked into the corners for this rnd. (approx 99 mp loops total)
Fasten off and weave in all ends!
If you love your Madeline Christmas Blanket I would LOVE to hear about it! Please feel free to share on social media and tag me @junebugandjames so I can see and share your work!
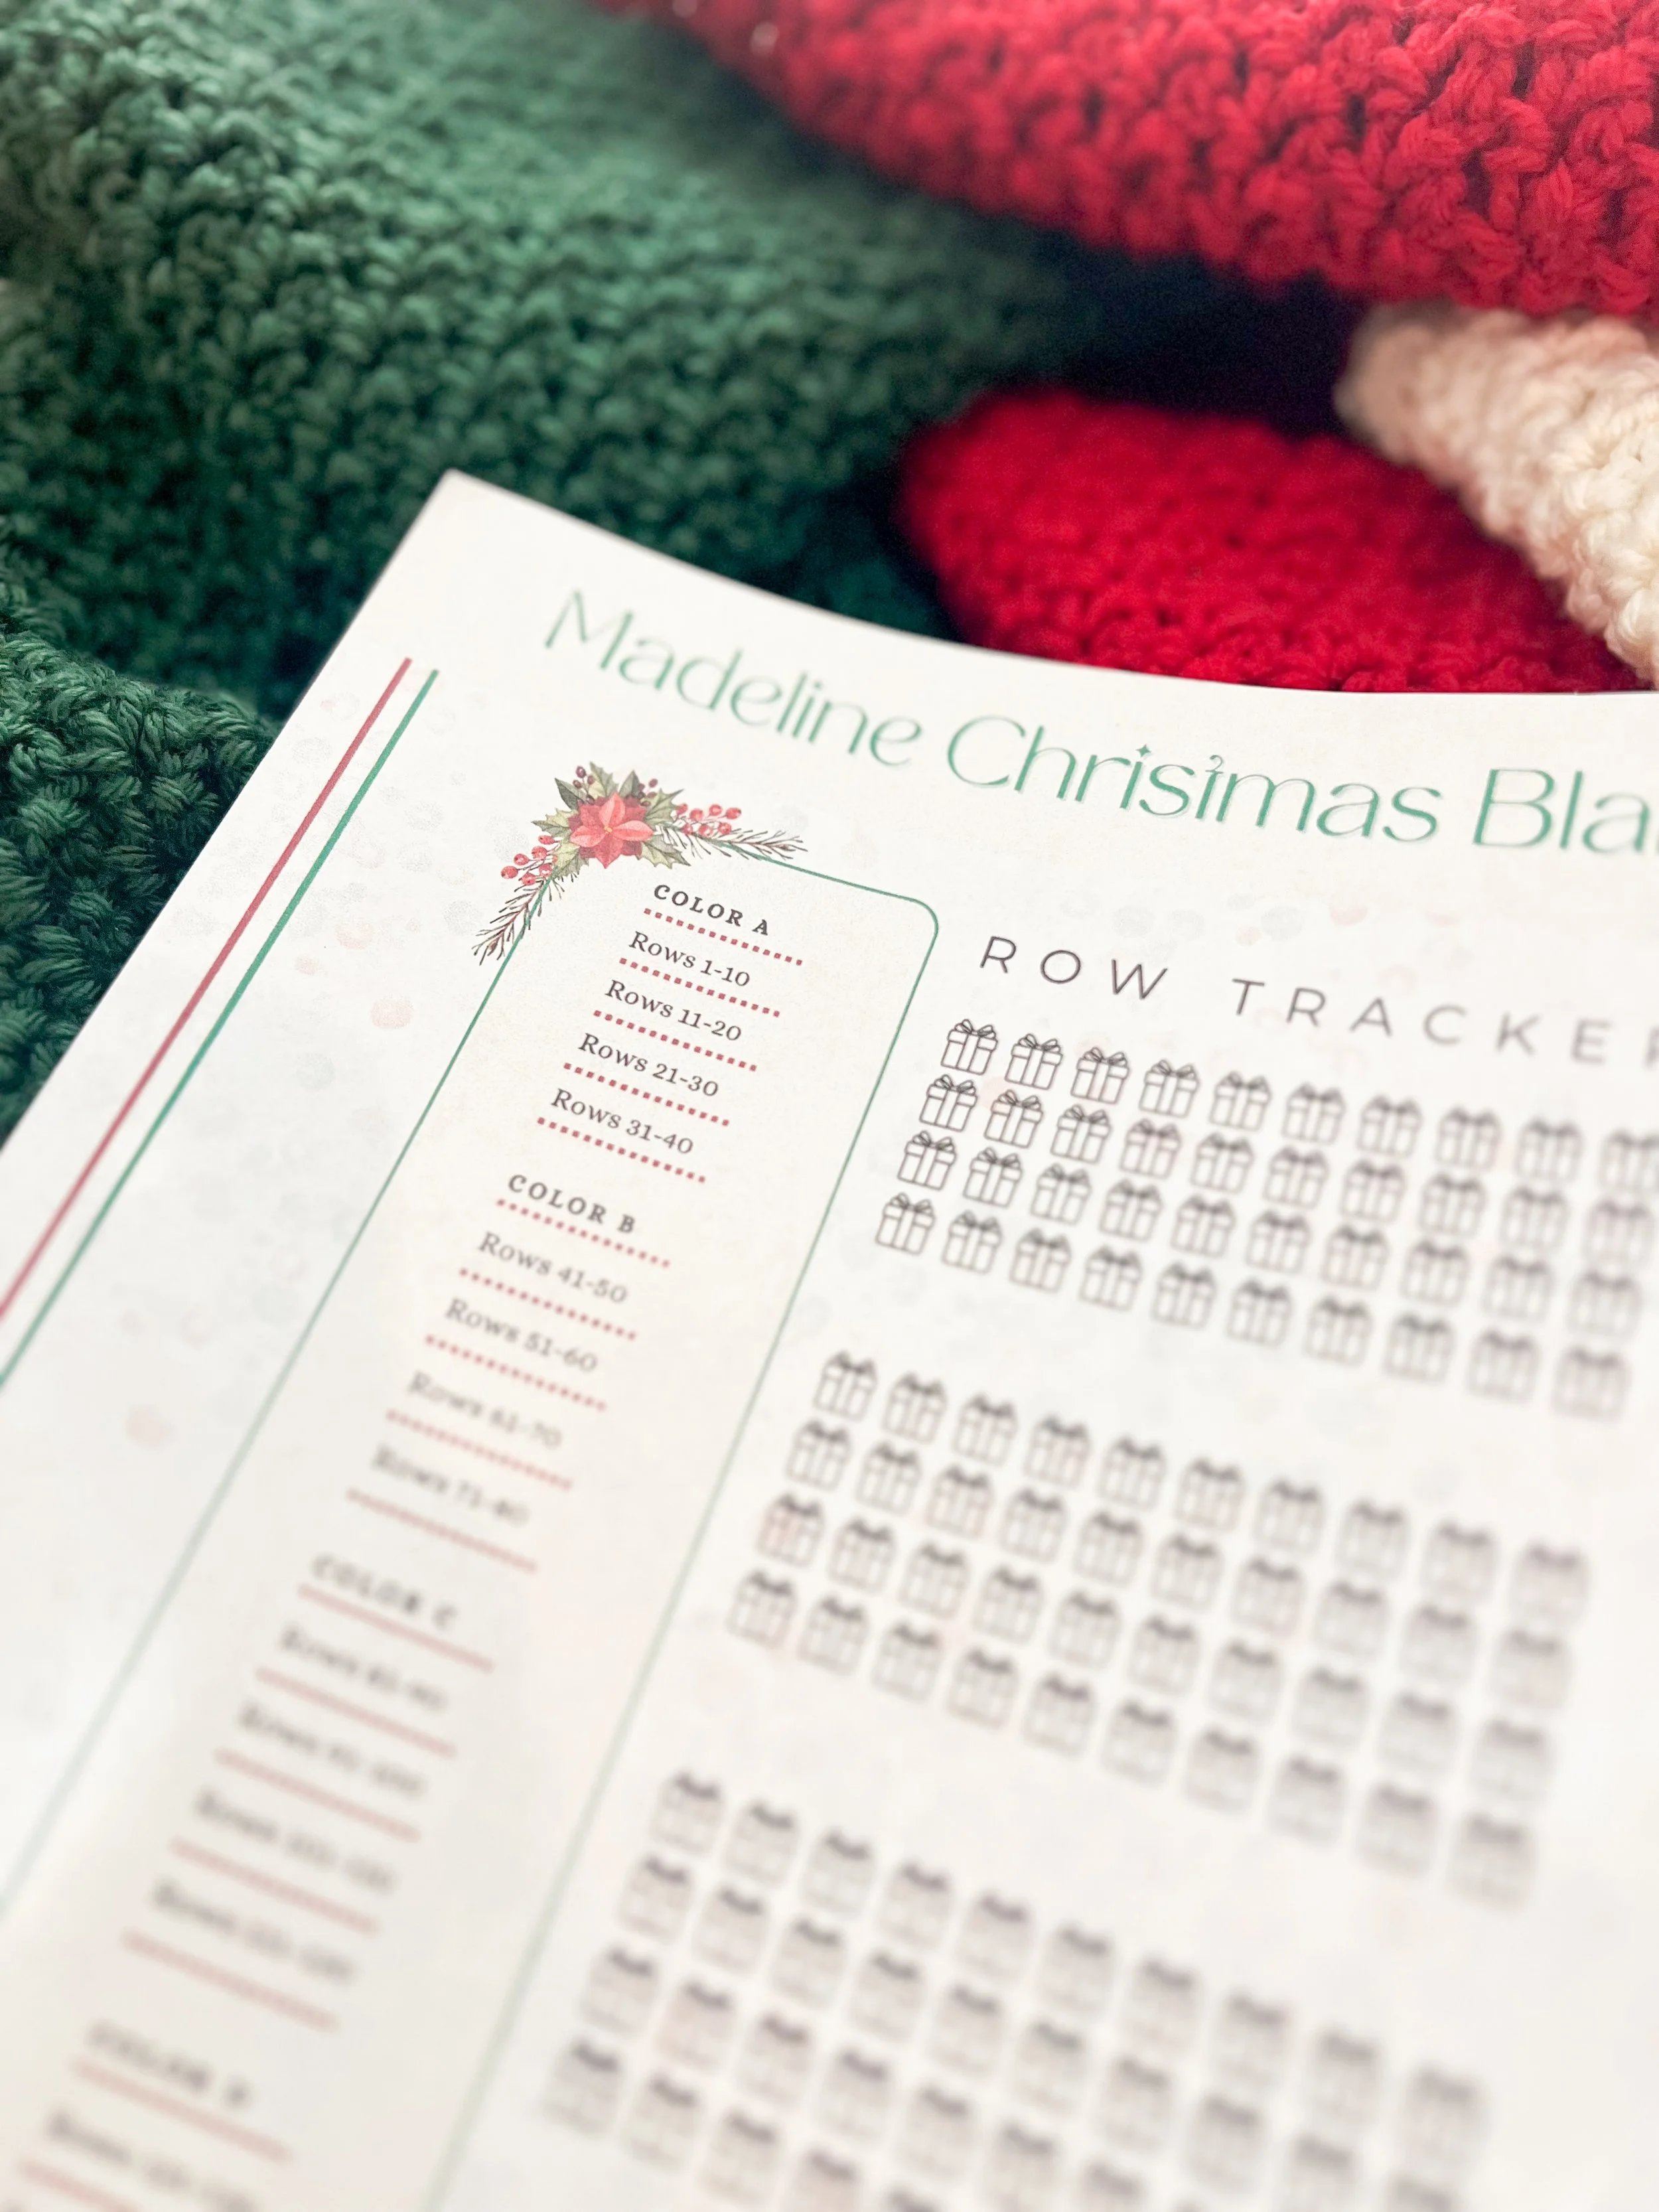
Don’t forget to download your FREE printable row tracker, and have fun coloring in the gift boxes for each row you complete!
This pattern is copyright © 2025 Junebug and James. Pattern and photos can NOT be used for resale purposes. Distribution in part or in whole of this pattern is strictly forbidden. Any Madeline Christmas Blanket created using this pattern may be sold, but please remember to give credit to Junebug and James. | www.junebugandjames.com
Want to see more of my free patterns? Check all of them out at the button below! From dishcloths to cute strawberry amigurumi hearts, and pumpkins and pillows, my collection of free patterns has been growing slowly but surely and I would love to see what you make from them!
Subscribe to my channel on YouTube
Check out my other printable, downloadable patterns in my shop on Etsy!
Please feel free to reach out to me if you have any questions or pattern assistance needs! If you share your finished MIrabel Pillow on social media, please feel free to tag me so I can see and share your work!
