
FREE Crochet Pattern | The Mirabel Pillow Crochet Pattern
Written by Kristen M
Published on 8/16/2025
Disclaimer: This blog post contains affiliate links. I will receive a small commission when you make a purchase through the links in this post at no additional cost to you.
Hello there friends! I’m so excited to introduce you to the Mirabel Pillow crochet pattern in this blog post. If you’re looking for a cute pillow pattern to increase the coziness in your home, then you should keep reading all about this adorable pattern.
In my opinion, crocheted pillows are some of the most underrated crochet projects out there. They’re quick, fun, and can add so much “pop” to a room.
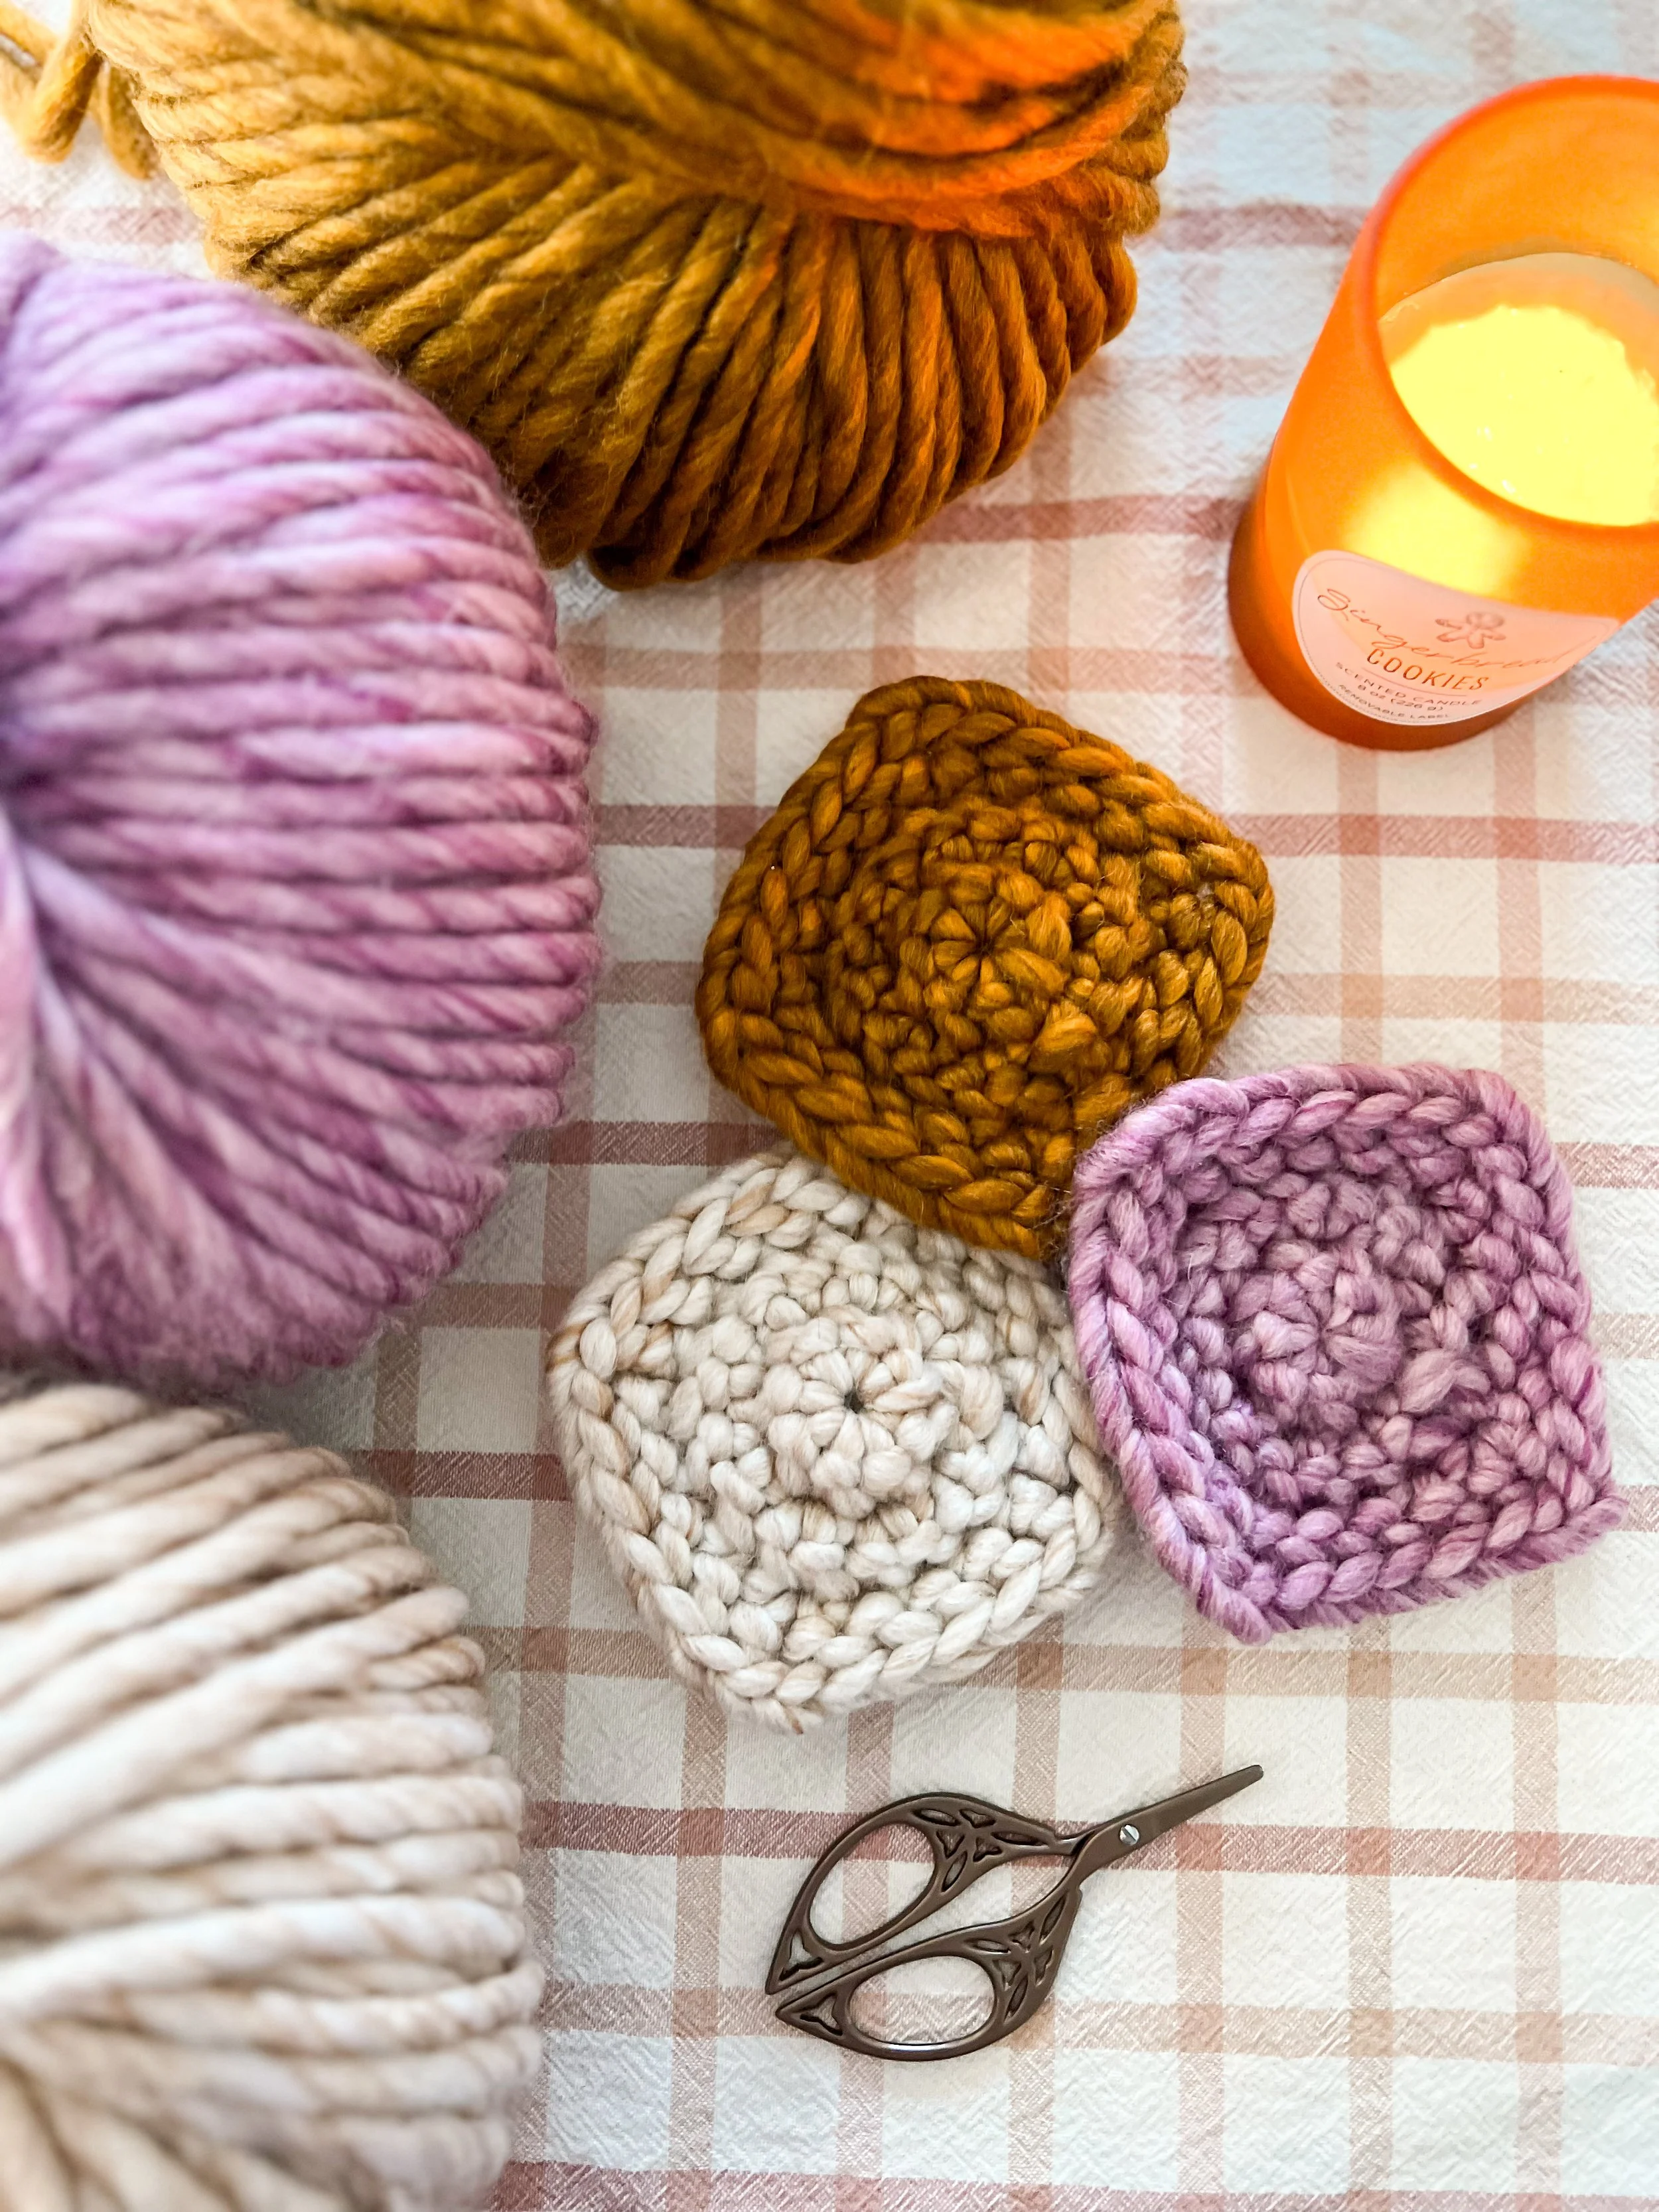
Okay, let’s talk about yarn! For this pattern, any size 6 super bulky weight yarn will do the trick. For the Mirabel Pillows I made, I used Hobbii Yarn’s Udon yarn, and Lion Brand Yarn’s Wool Ease Thick and Quick.
You’re more than welcome to stuff your pillow with fiberfill, but it you don’t want to risk that stuffing showing through you can also purchase a pillow insert like the one right here.
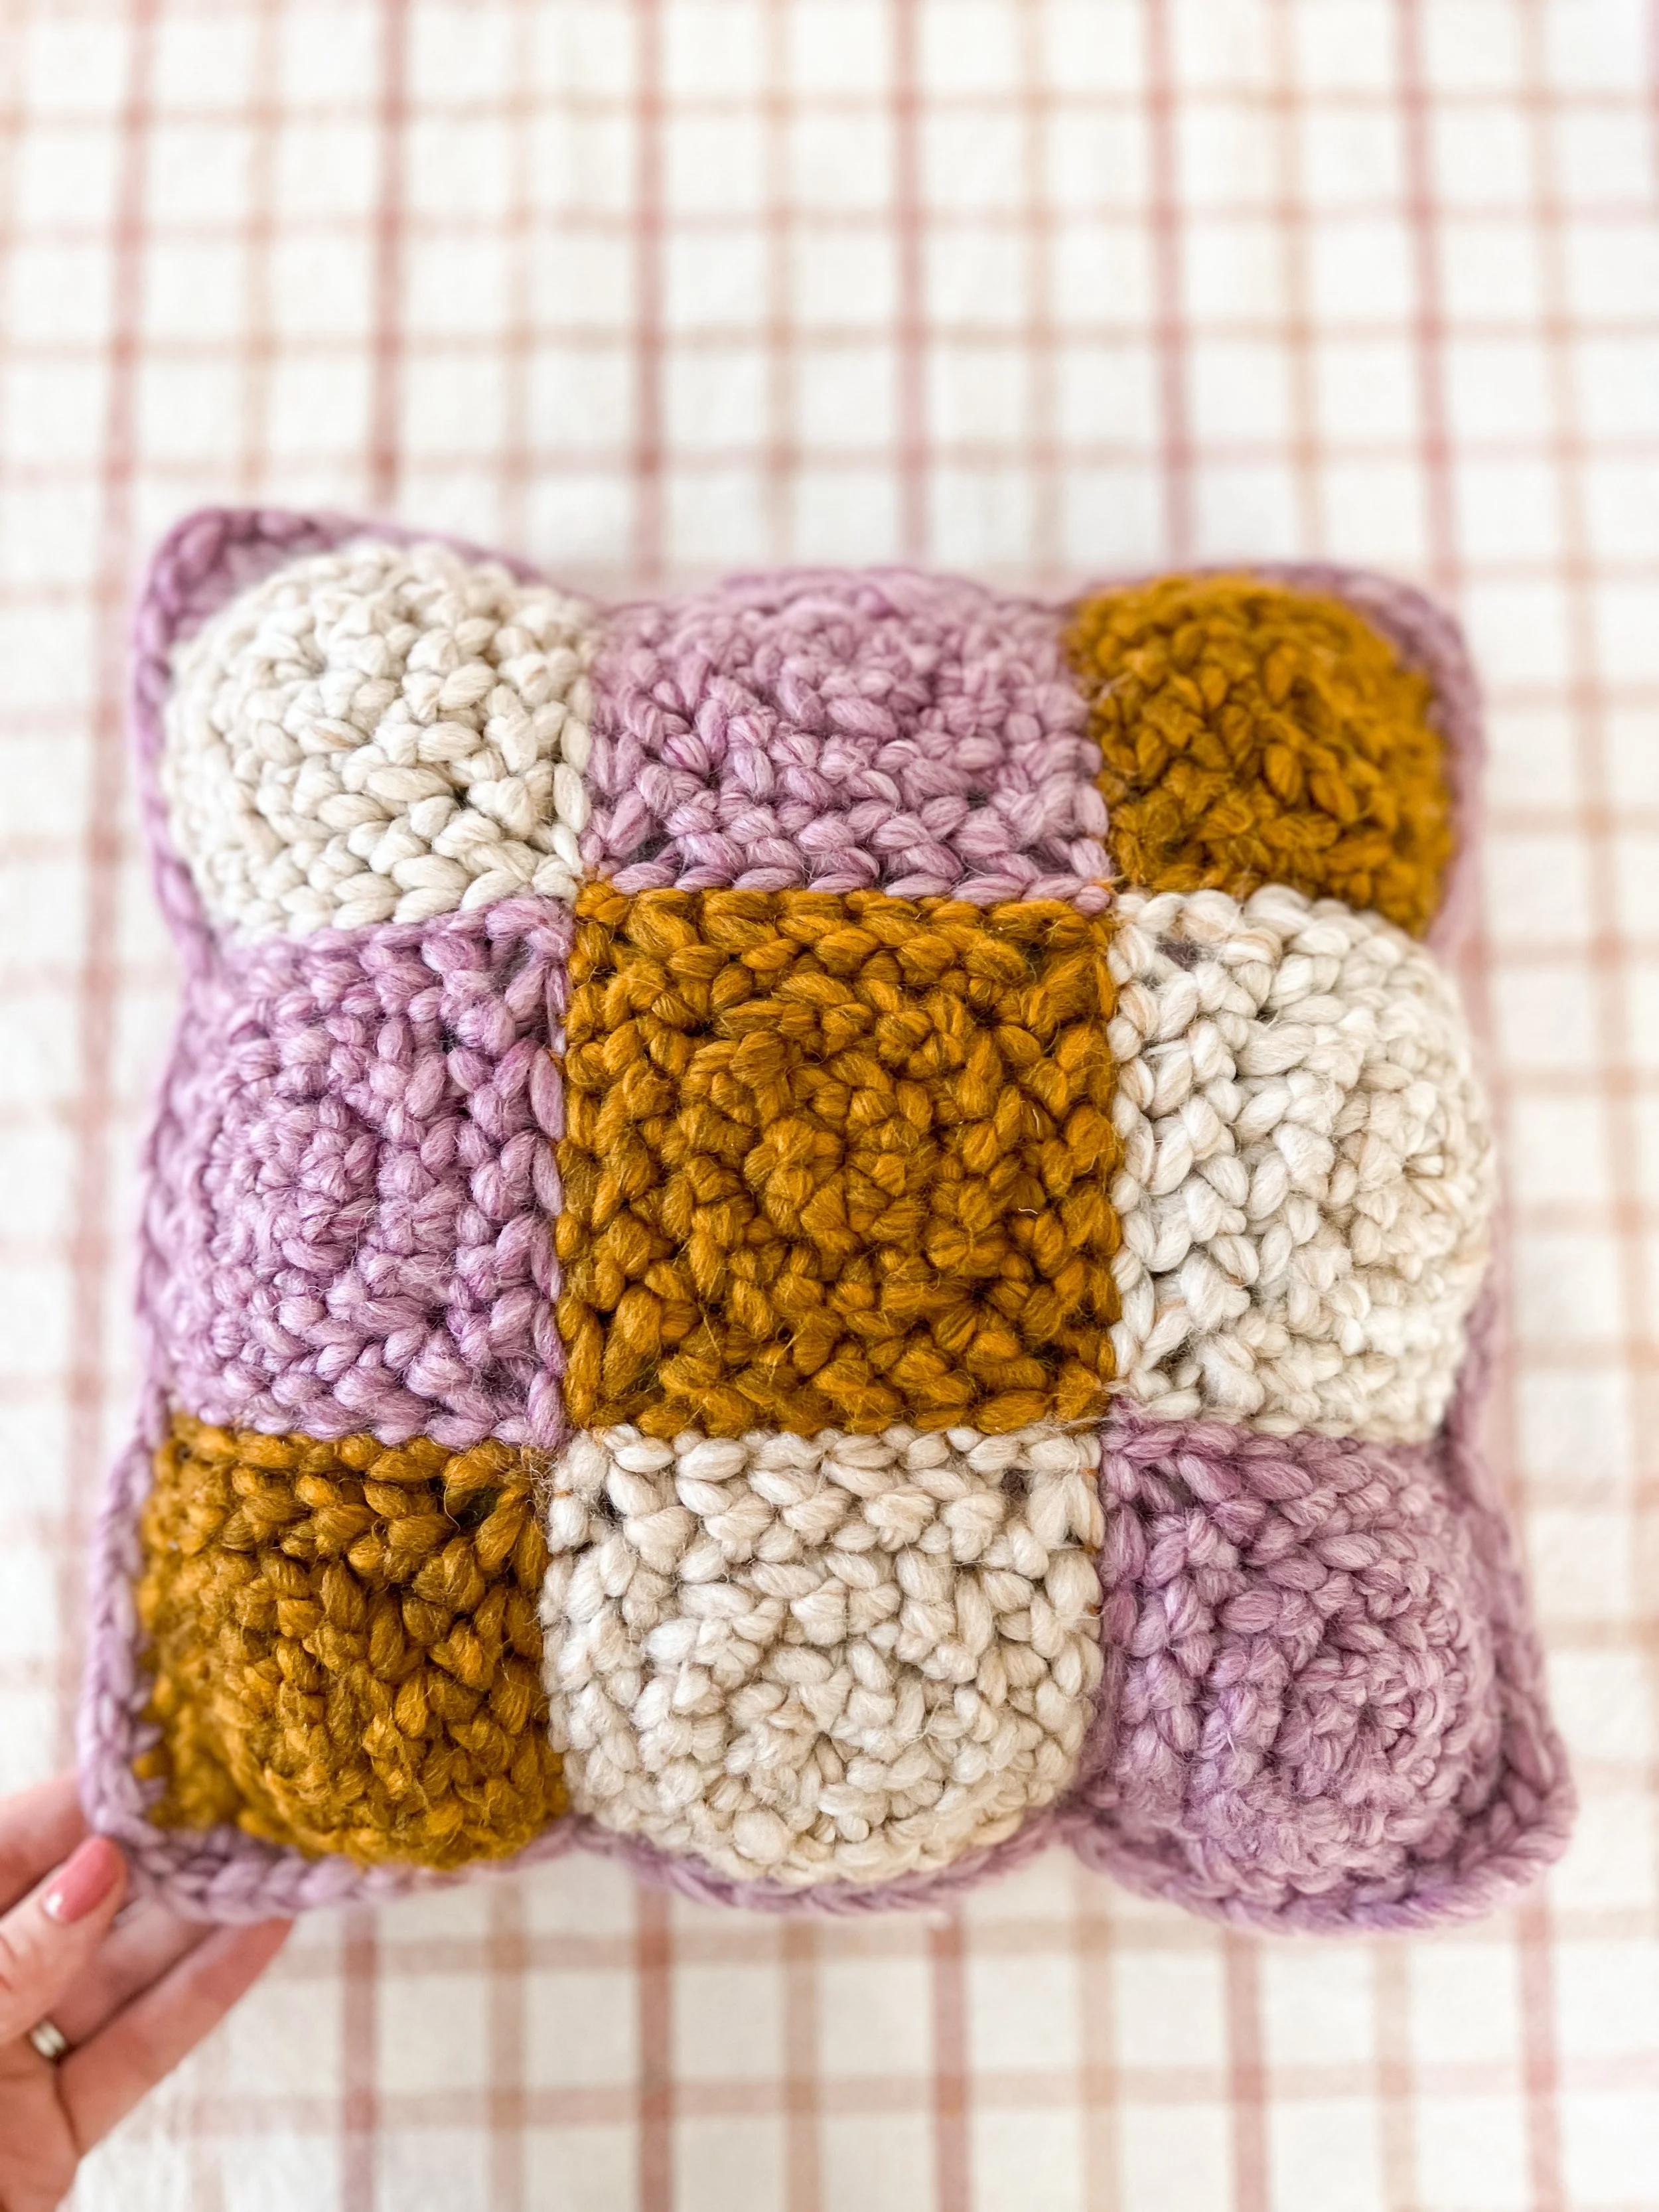
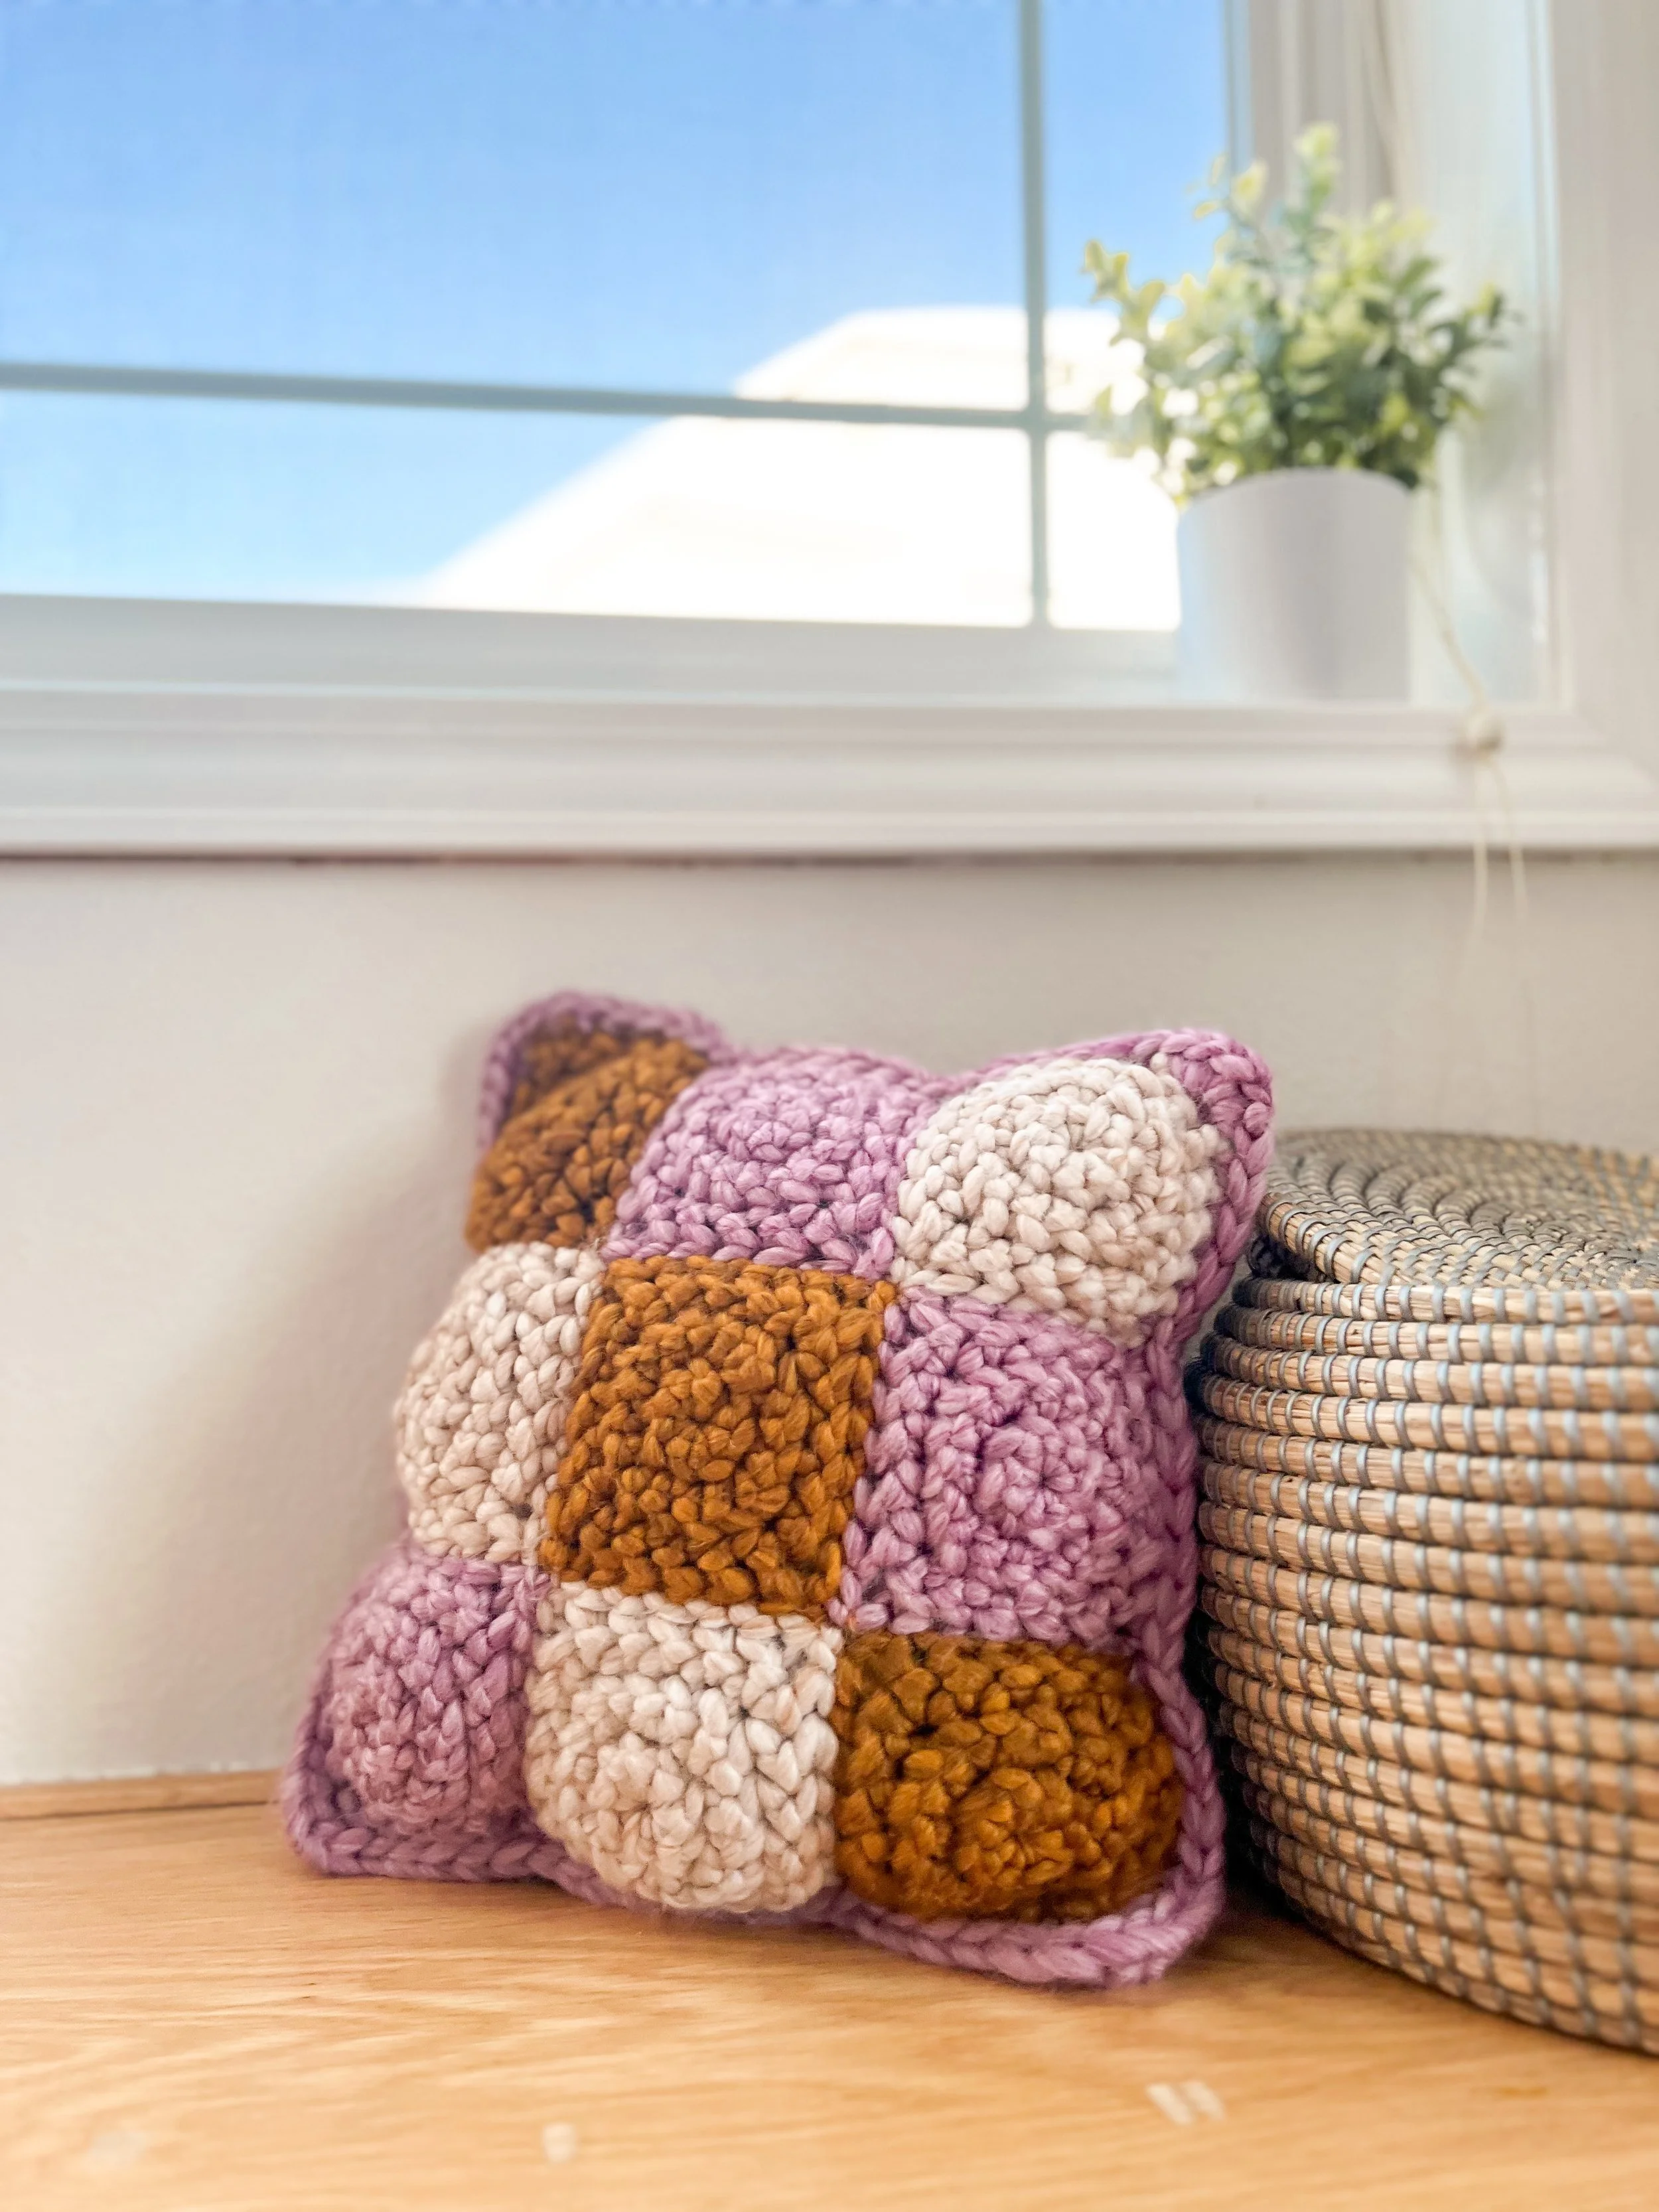
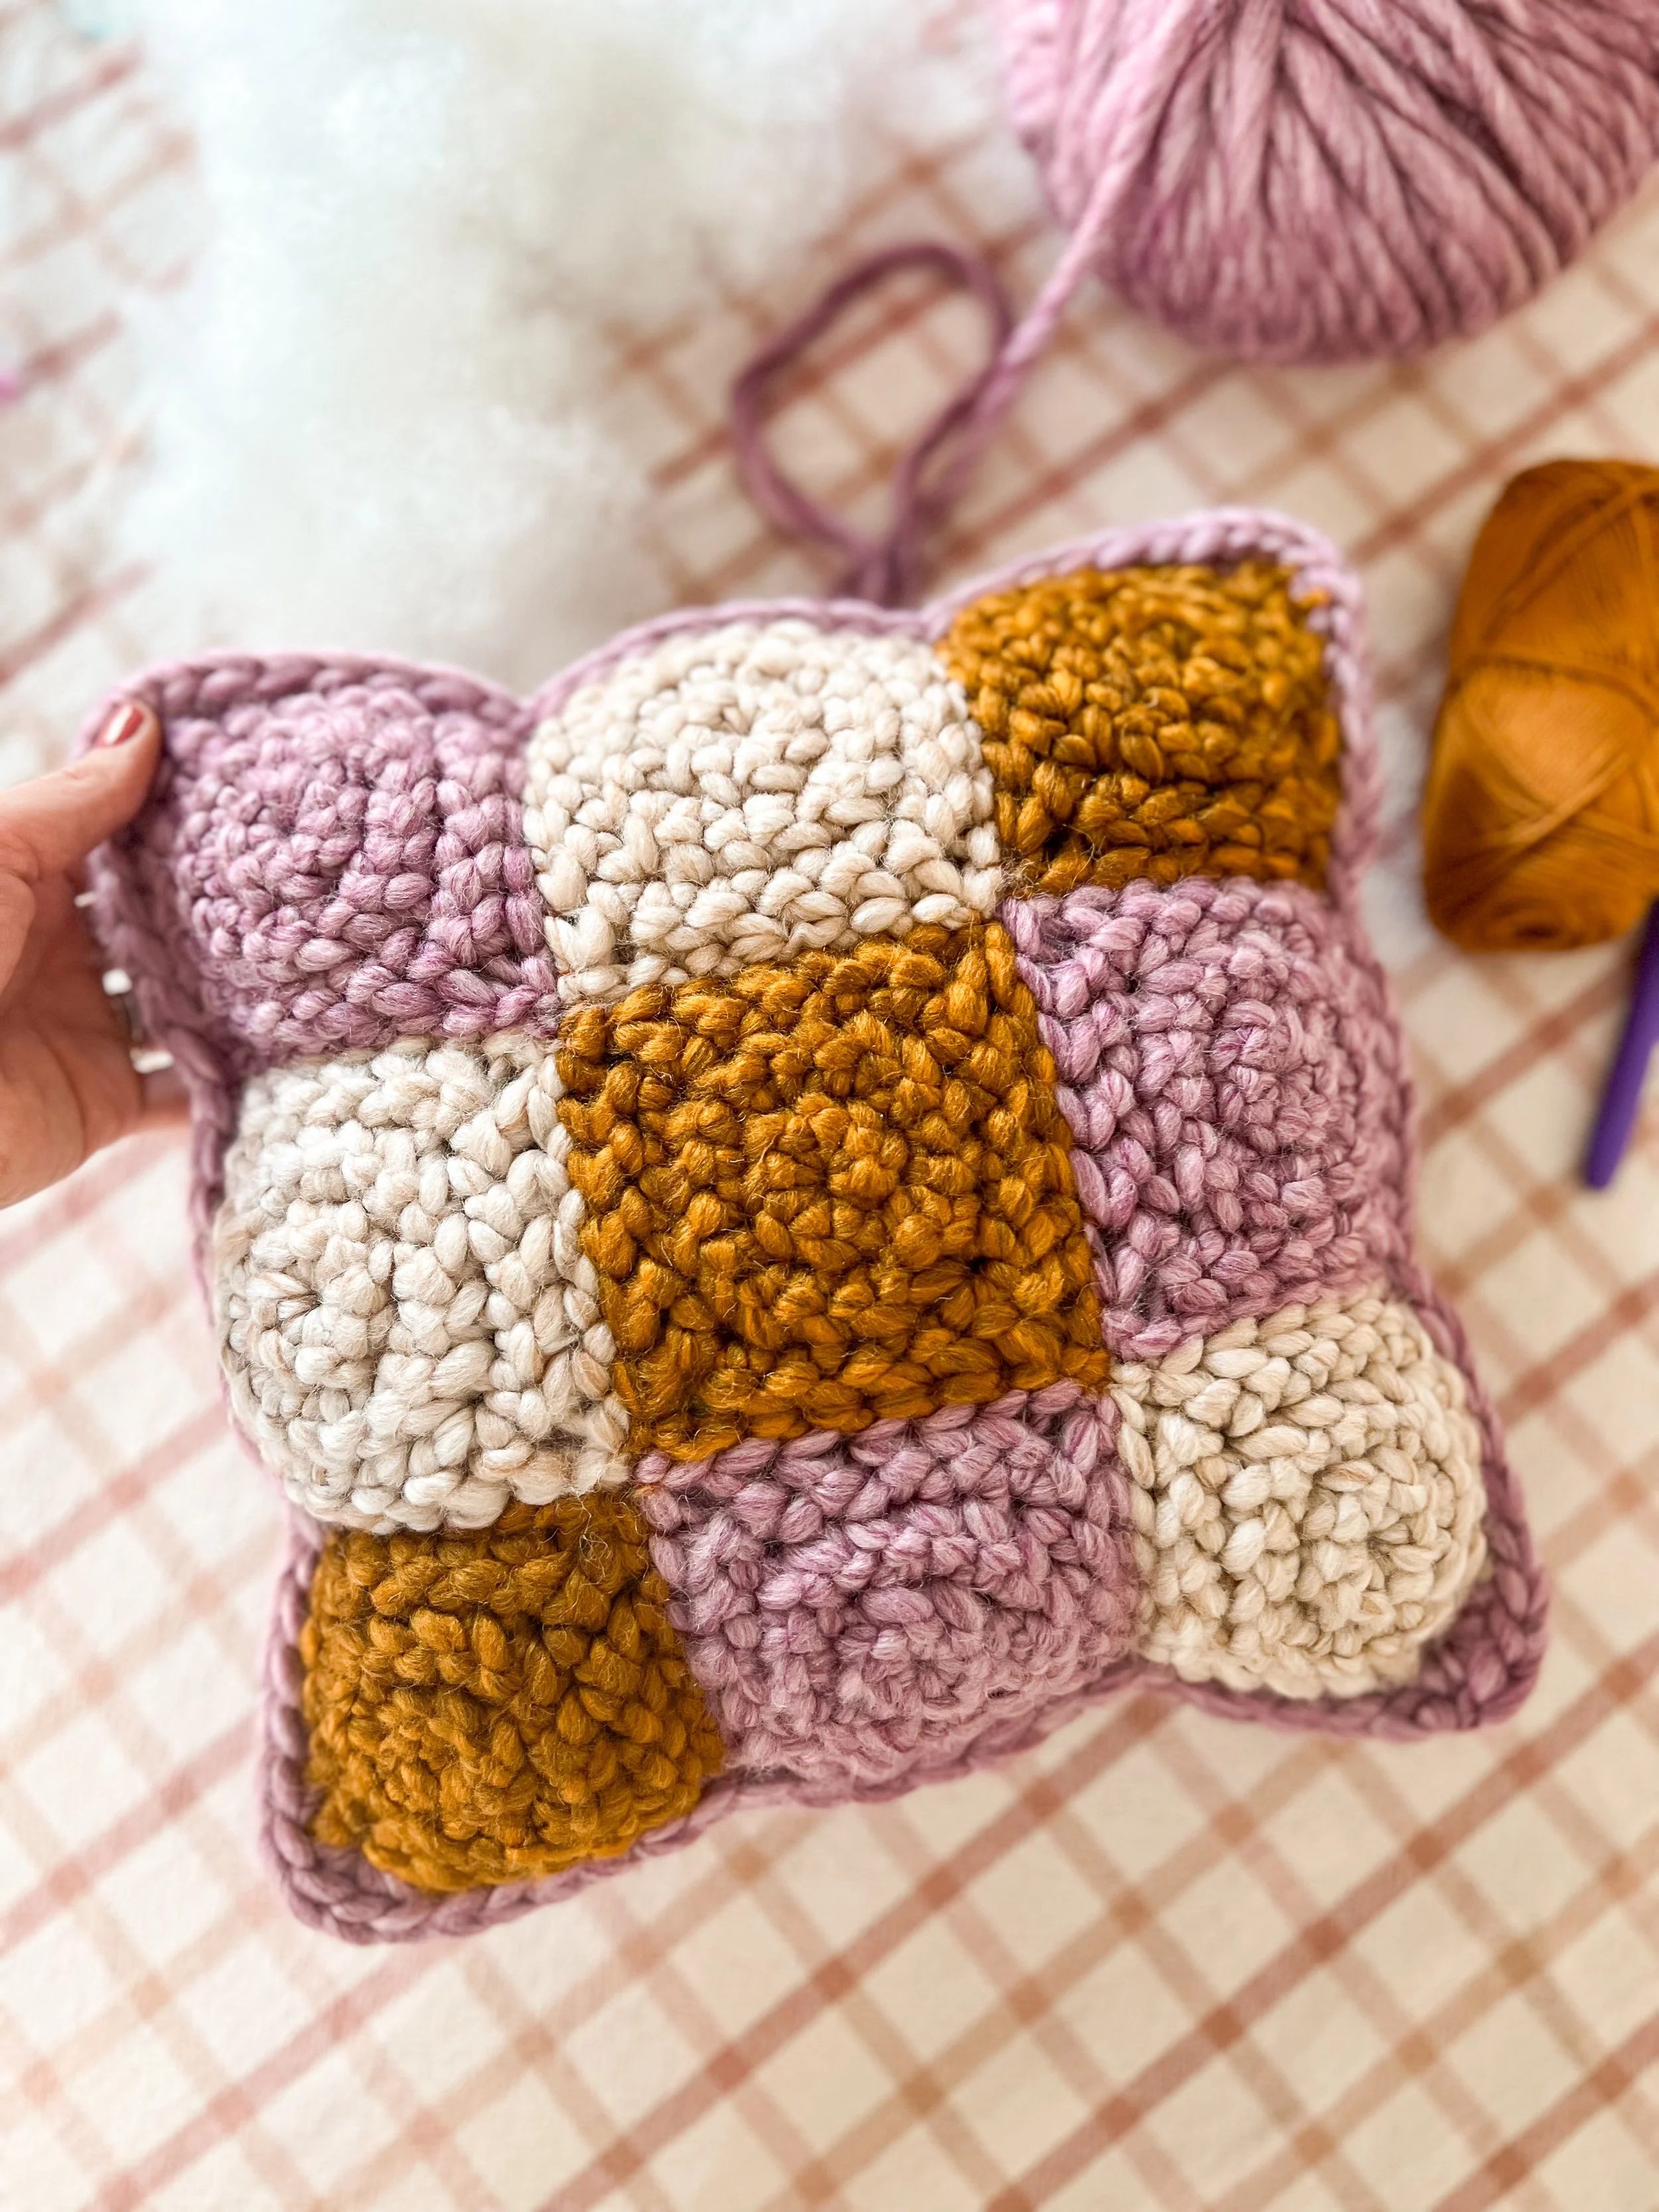
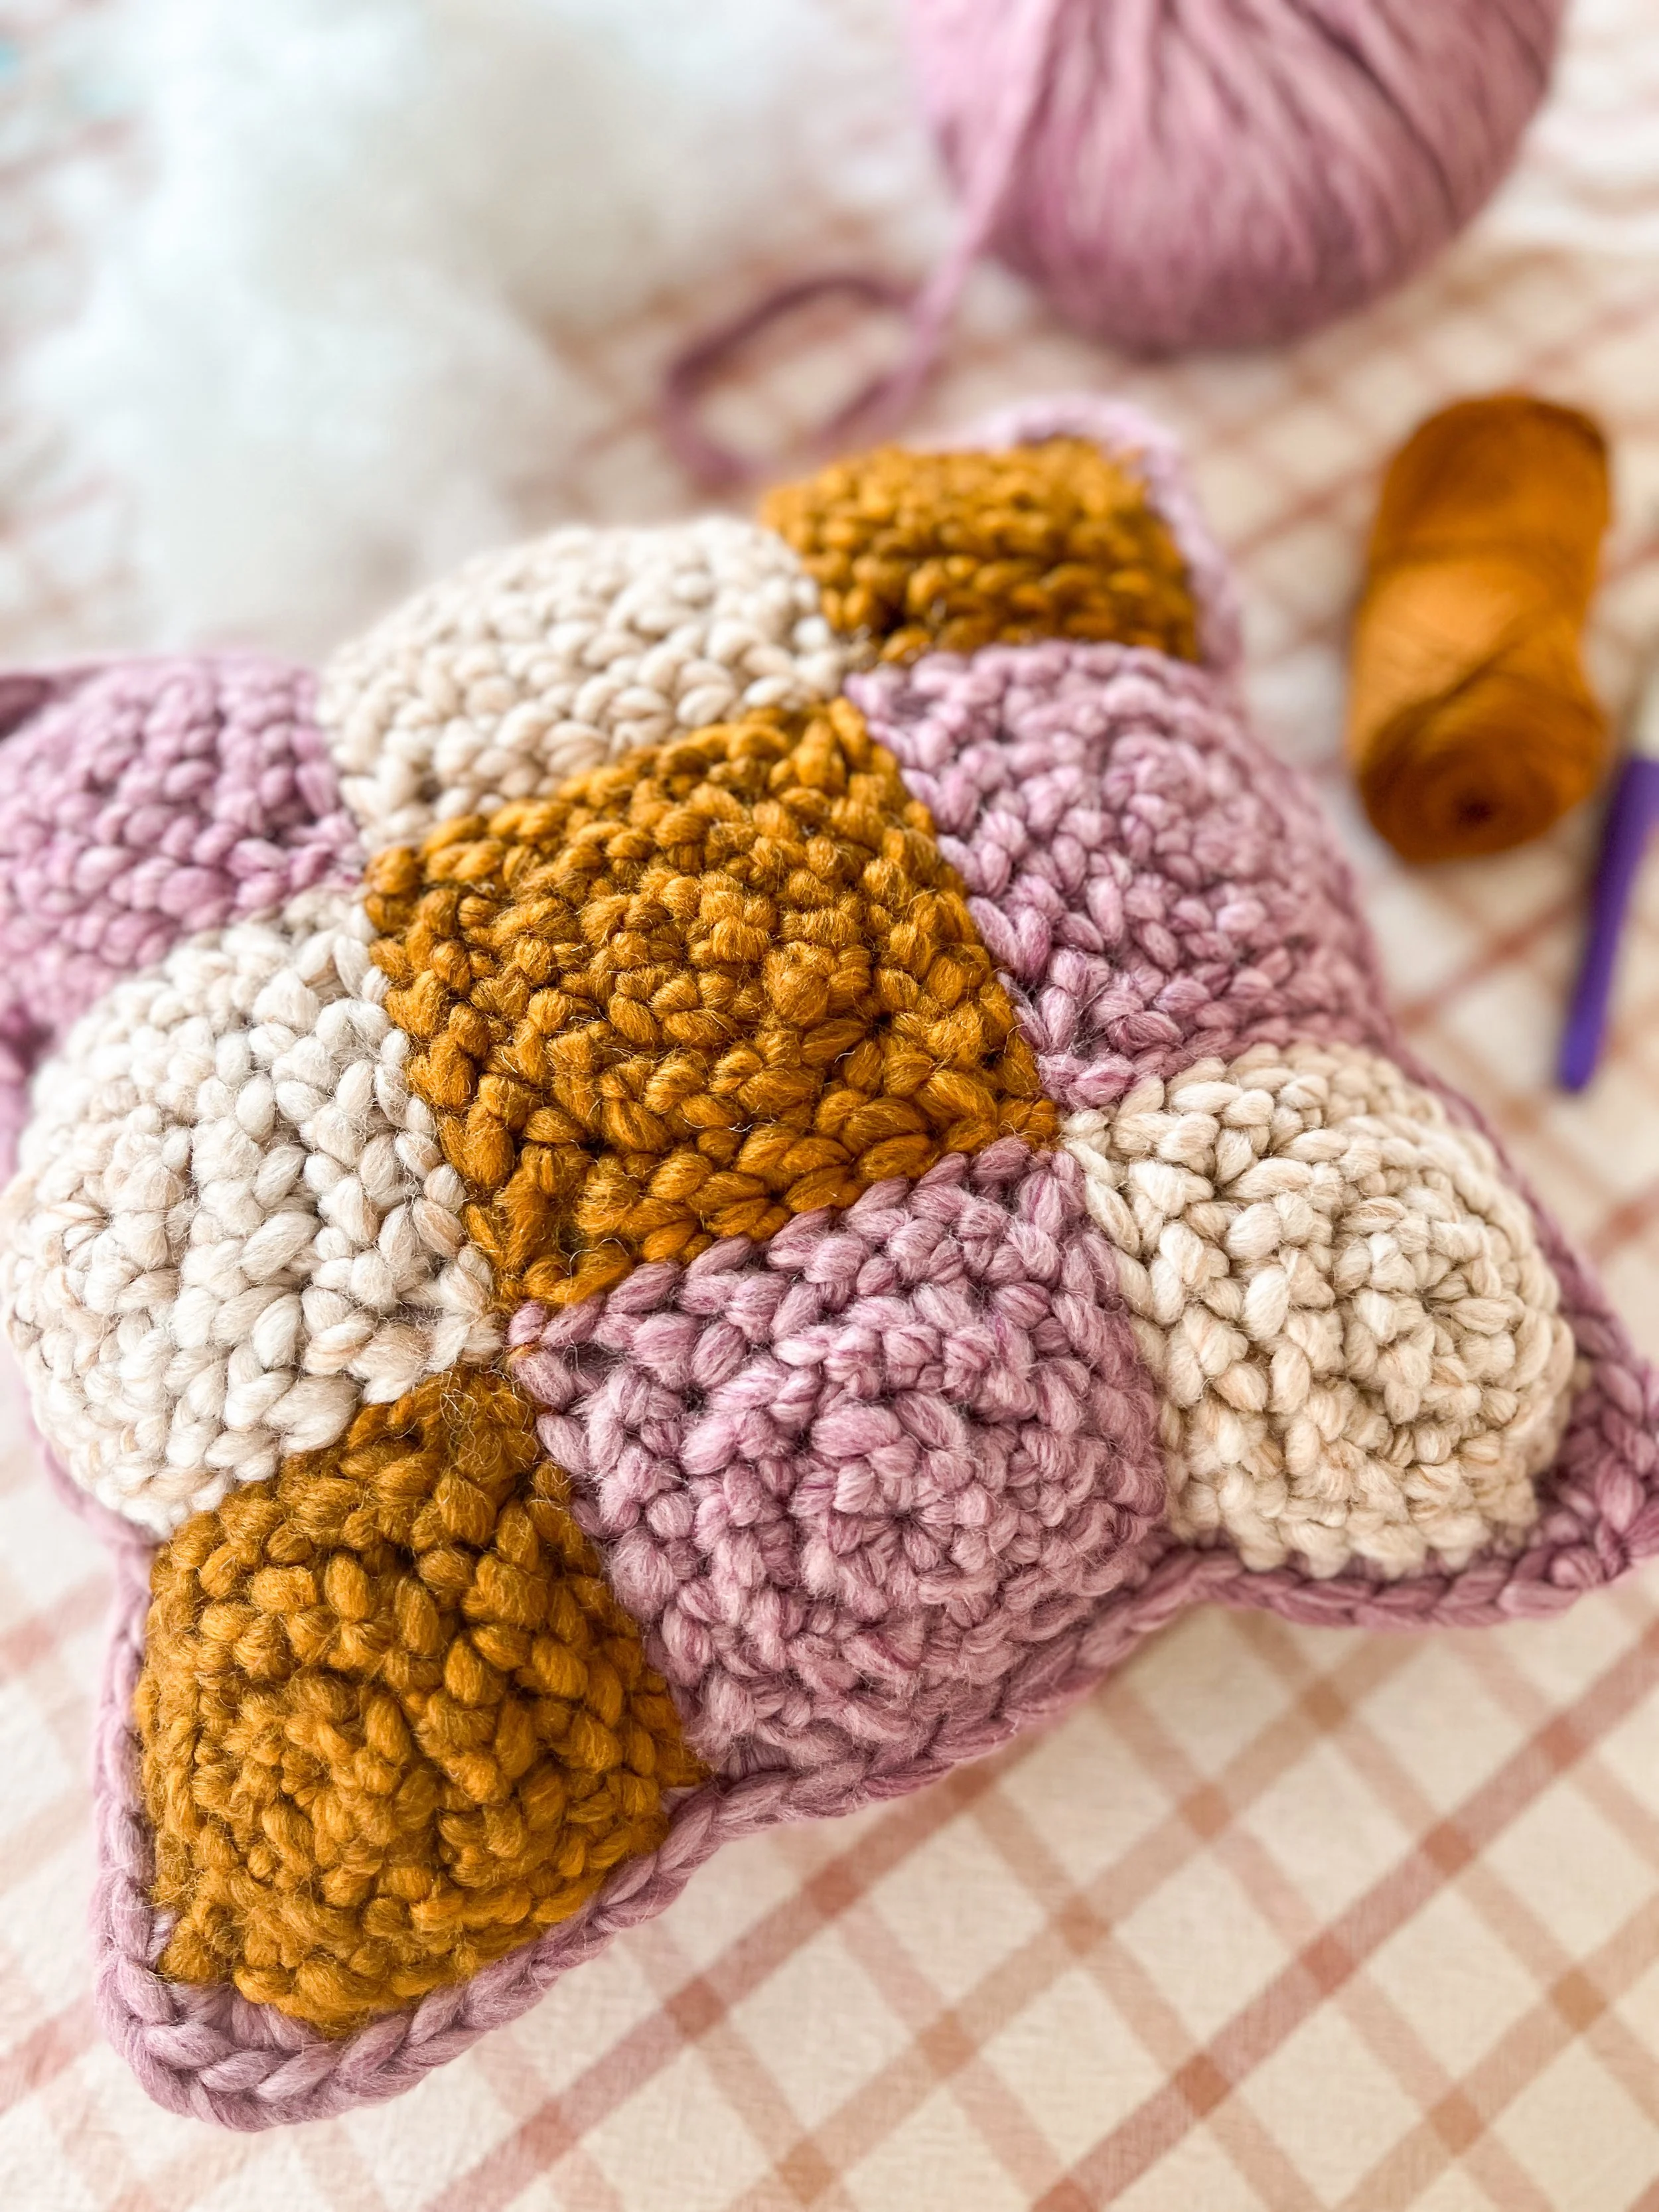
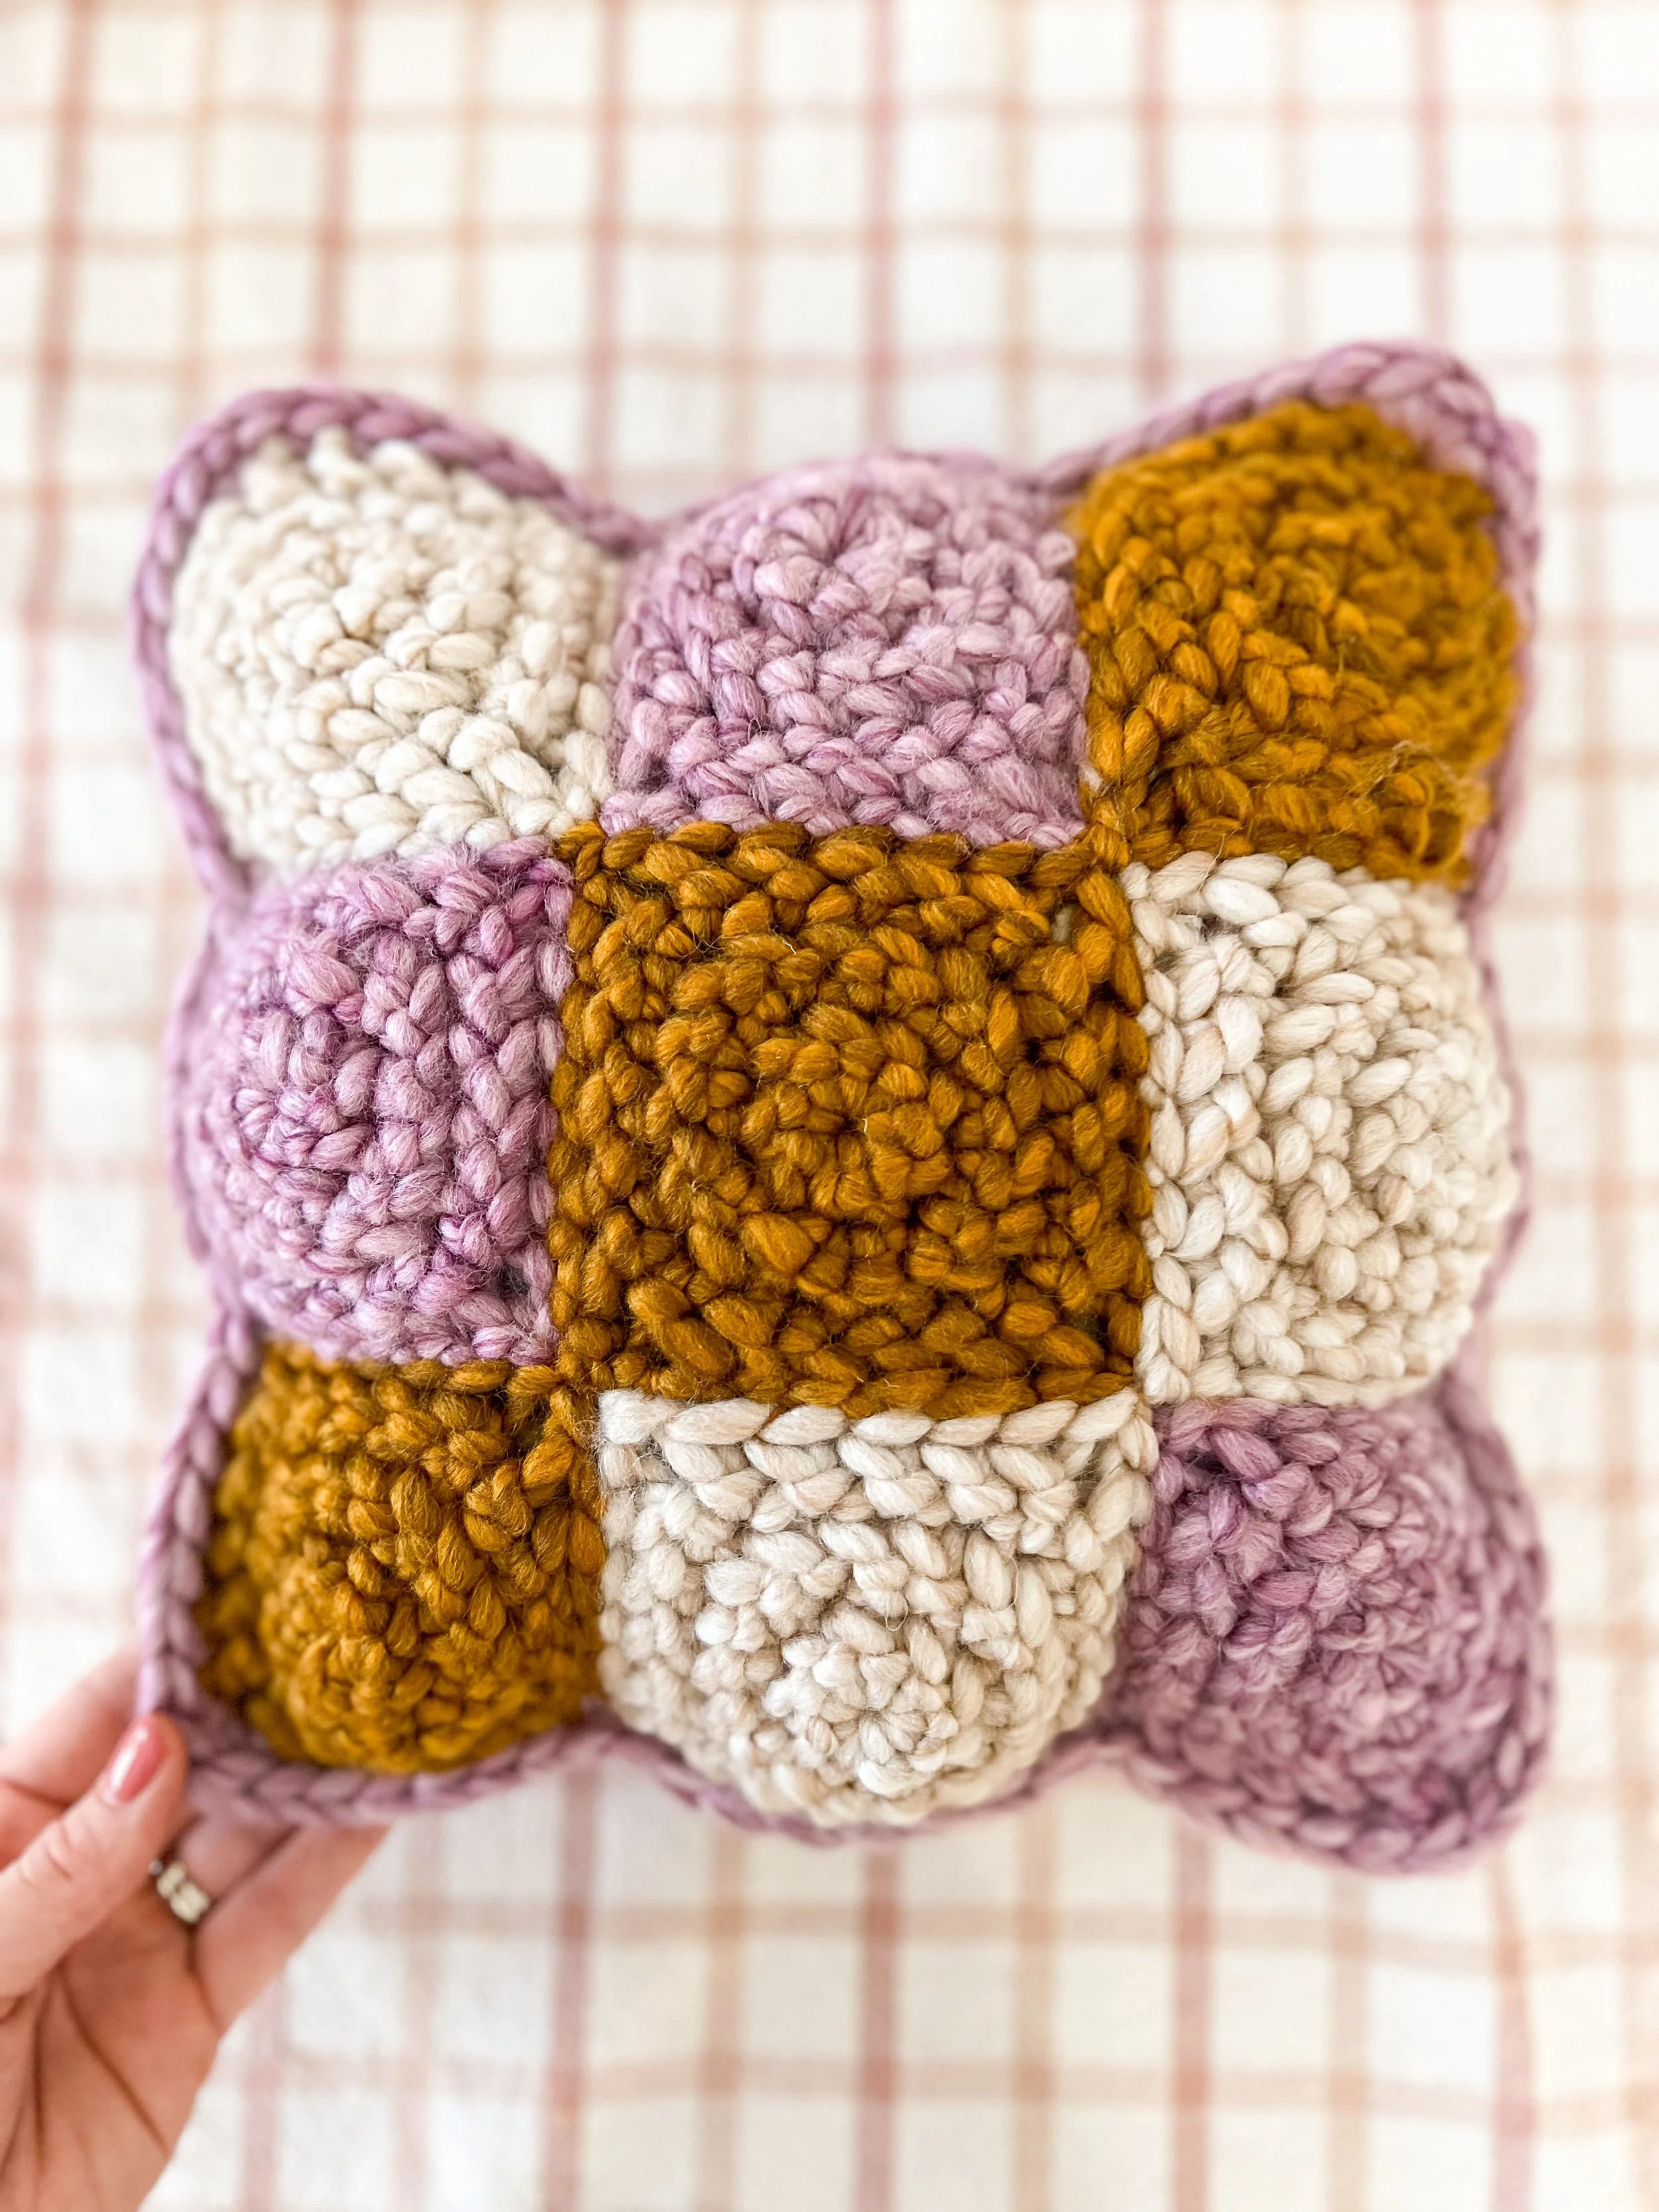
The finished size of your pillow should come out to being 14” x 14” if you meet the gauge in the pattern. It really is such a great size for a small office chair, or love seat couch.
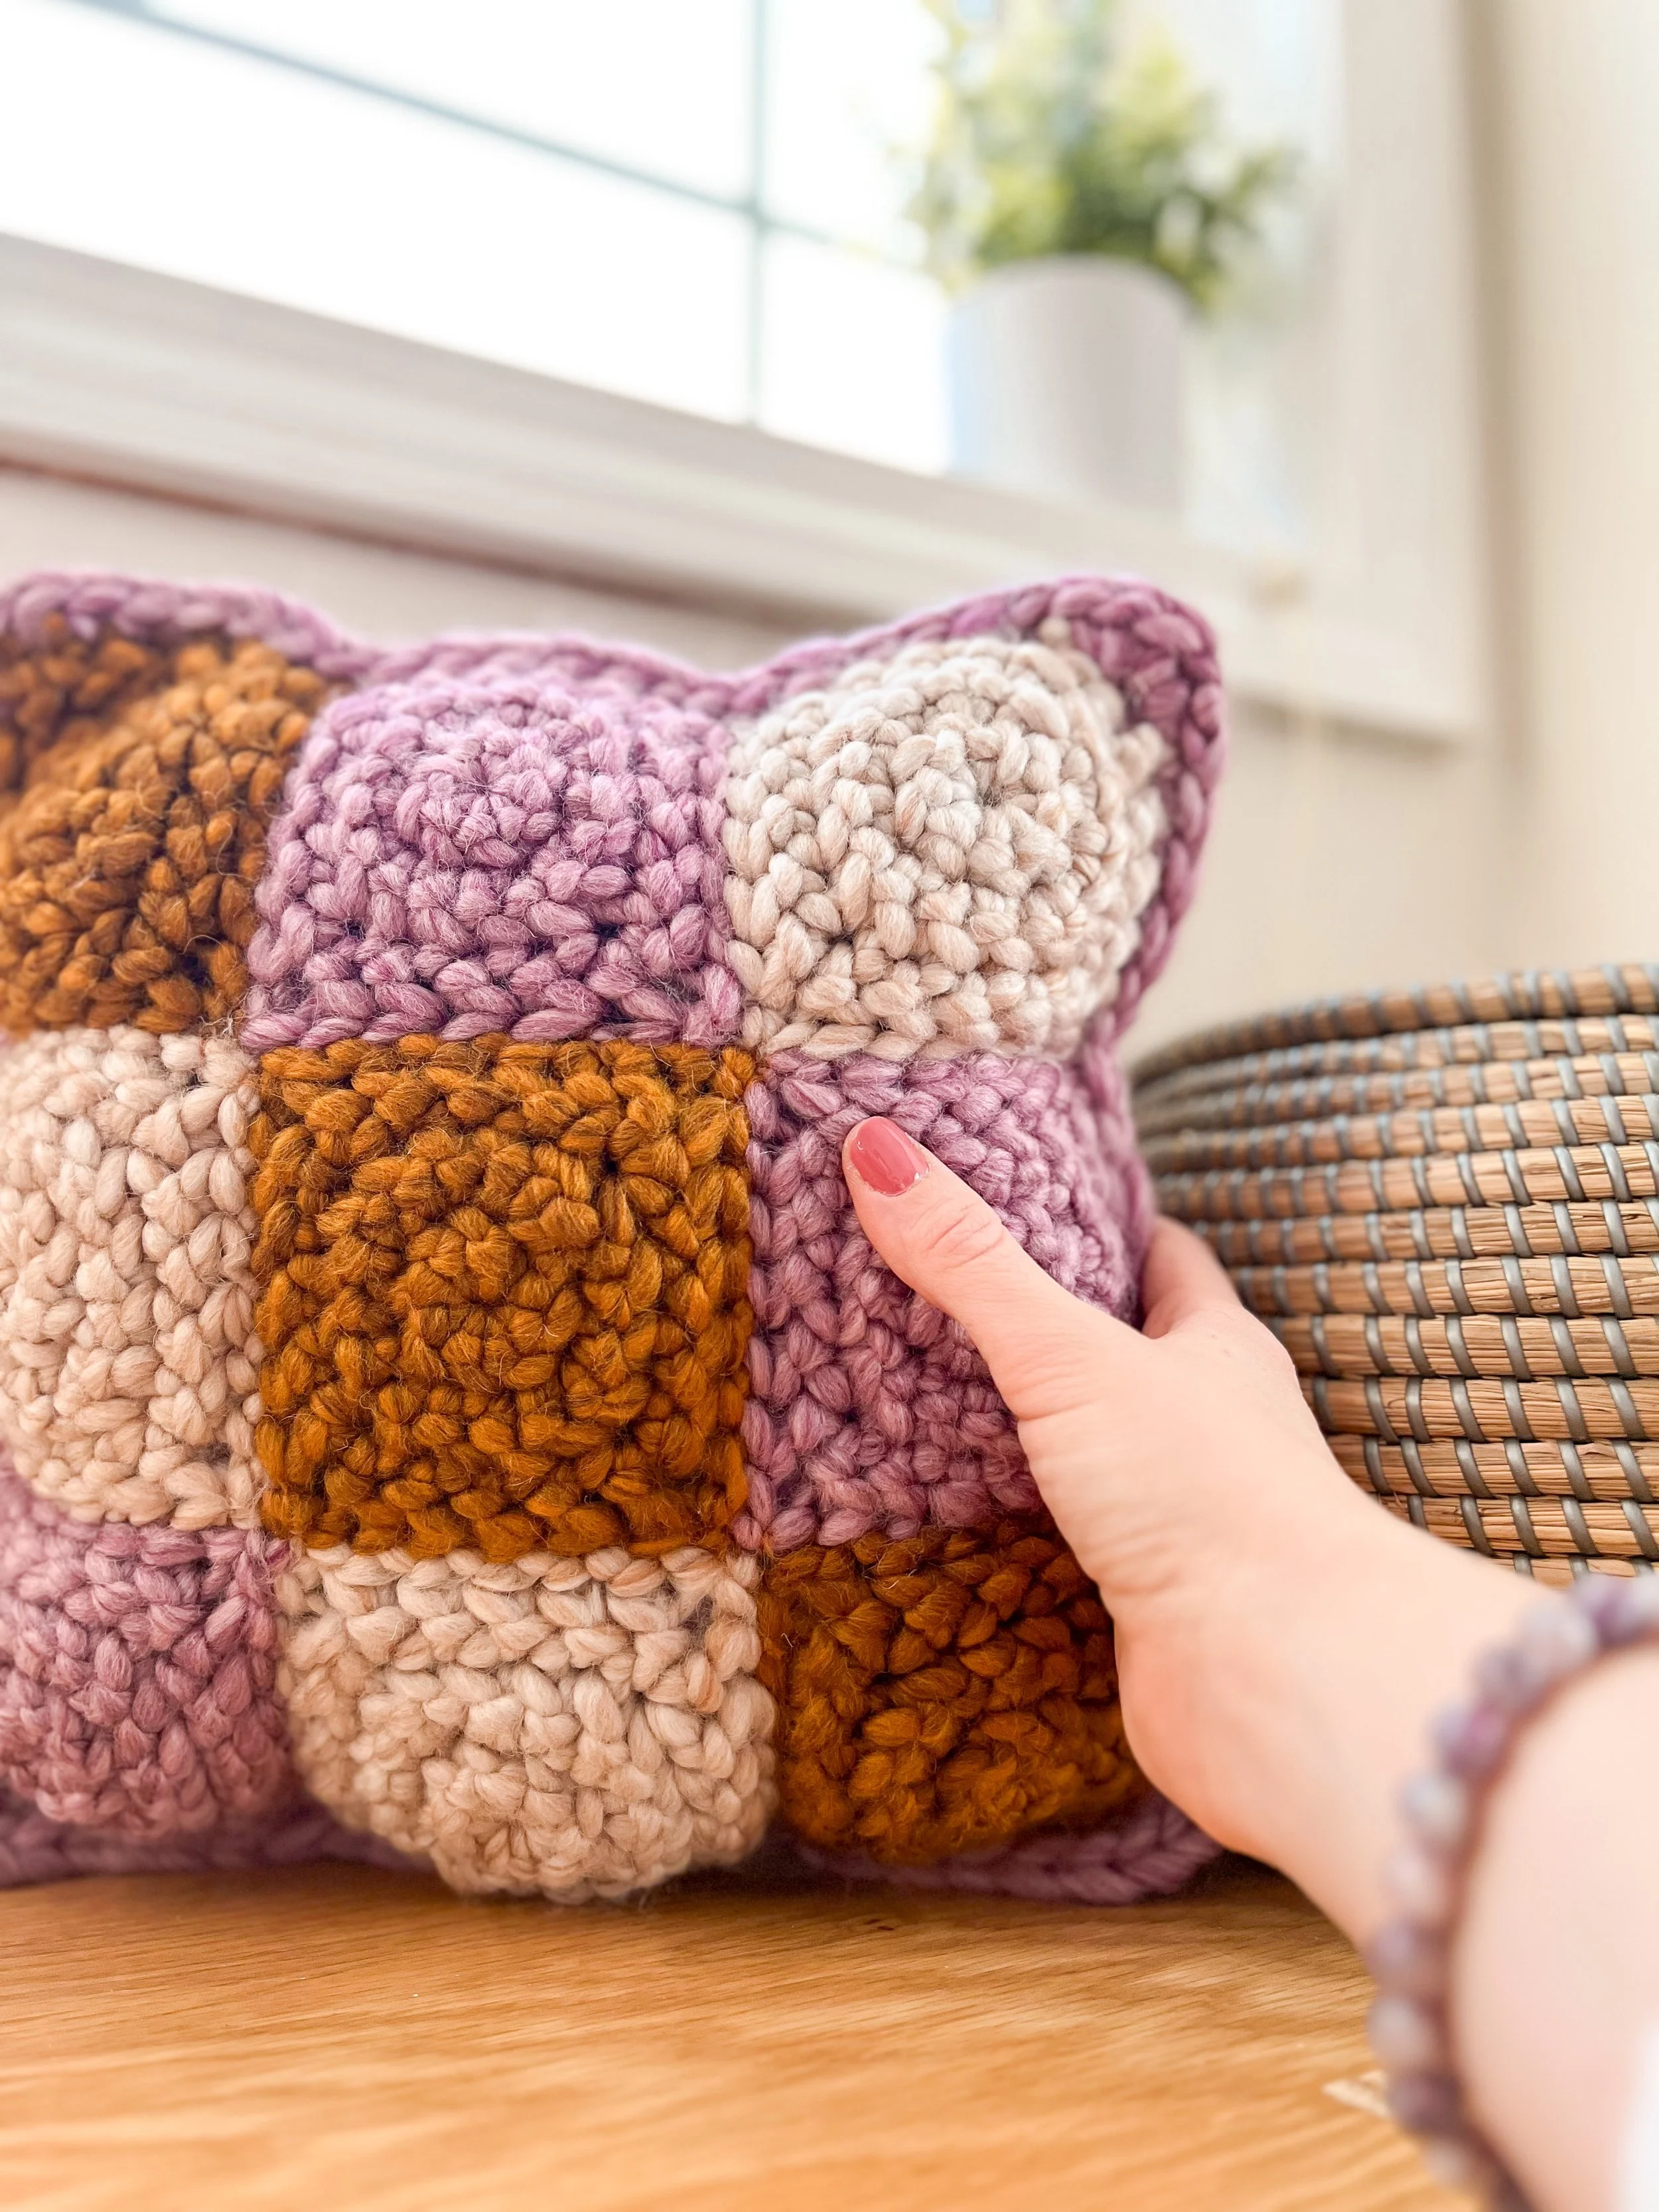
While not a requirement, I do strongly recommend blocking your squares before continuing to assemble the pillow and sew together. Check the instructions carefully during the sewing process to ensure it comes together as smoothly as possible.
Finally, if you want to save this pattern for later make sure you go ahead and pin the image below!
Now let’s make a cute crocheted pillow together!
Want to save this pattern for later? Feel free to pin the image below so you can always come back to it!
The Mirabel Pillow Crochet Pattern
Difficulty Level: Beginner
Finished Measurements
Finished (Blocked) Mirabel Square Measurements: 4” (10 cm) x 4” (10 cm) square
Finished (Blocked) Mirabel Pillow Measurements: 14” (35.5 cm) x 14” (35.5 cm)
Materials
Yarn:
Color A - size 6 super bulky weight [70 yds per 5 oz = 6 squares + border].
Color B - size 6 super bulky weight [45 yds per 3 oz = 6 squares].
Color C - size 6 super bulky weight [45 yds per 3 oz = 6 squares]
Light size 3 fingering weight yarn for sewing blocks together.
Stuffing options: polyester fiberfill, 12” x 12“ pillow insert, or extra yarn scraps.
Pattern Details
This pattern is written in English using US Crochet Terms.
This pillow is made after completing 18 separate granny squares. You will arrange your squares into two panels of 9 squares each, sew them together while using poly-fill stuffing or a pillow insert to stuff, and then crochet the border to complete your project. Each granny square is only 3 rounds so they work up VERY quickly.
If using poly-fill stuffing and having a hard time with your stuffing showing through, try backing your panels with a piece of matching felt. Or, use some of the yarn tails from your blocks to sew a few stitches through any extra gaps that might be showing your stuffing through.
I highly recommend using size 6 super bulky or size 7 jumbo yarn for best results. I used Hobbii Yarn’s Udon yarn which is absolutely stunning. But some other great options would be Lion Brand Wool Ease Thick and Quick, or Michael’s Loops & Threads Ringspun.
While not completely necessary, it does help if you wet block your granny squares first and allow them to dry flat in the shape you want. Or, you can steam them and block on a blocking board like this one. This helps soften the fibers for your pillow, and also helps your blocks lay more flat when sewing them together.
Keep in mind, your finished pillow sizes may be slightly different due to the type of yarn you choose to use.
Please do not hesitate to reach out to me with any questions, comments, or pattern assistance needs! You can email me at junebugandjames@gmail.com or send me a message on Instagram or Facebook.
Abbreviations
beg = beginning
ch(s) = chain stitch(es)
fig = figure
hhdc = herringbone half double crochet
inc = increase
MR = magic ring (click here for a video tutorial)
rep = repeat
RS = right side
sc = single crochet
sl st = slip stitch
sp = space
st(s) = stitch(es)
WS = wrong side
Special Stitches
Herringbone Half Double Crochet Stitch (hhdc) (click here for a full stitch tutorial)- yarn over, insert hook into next stitch, yarn over and pull up a loop, pull through second loop on hook, yarn over, pull through last 2 loops.
Gauge
Finished square (blocked) = 4” (10 cm) x 4” (10 cm) square
Pattern
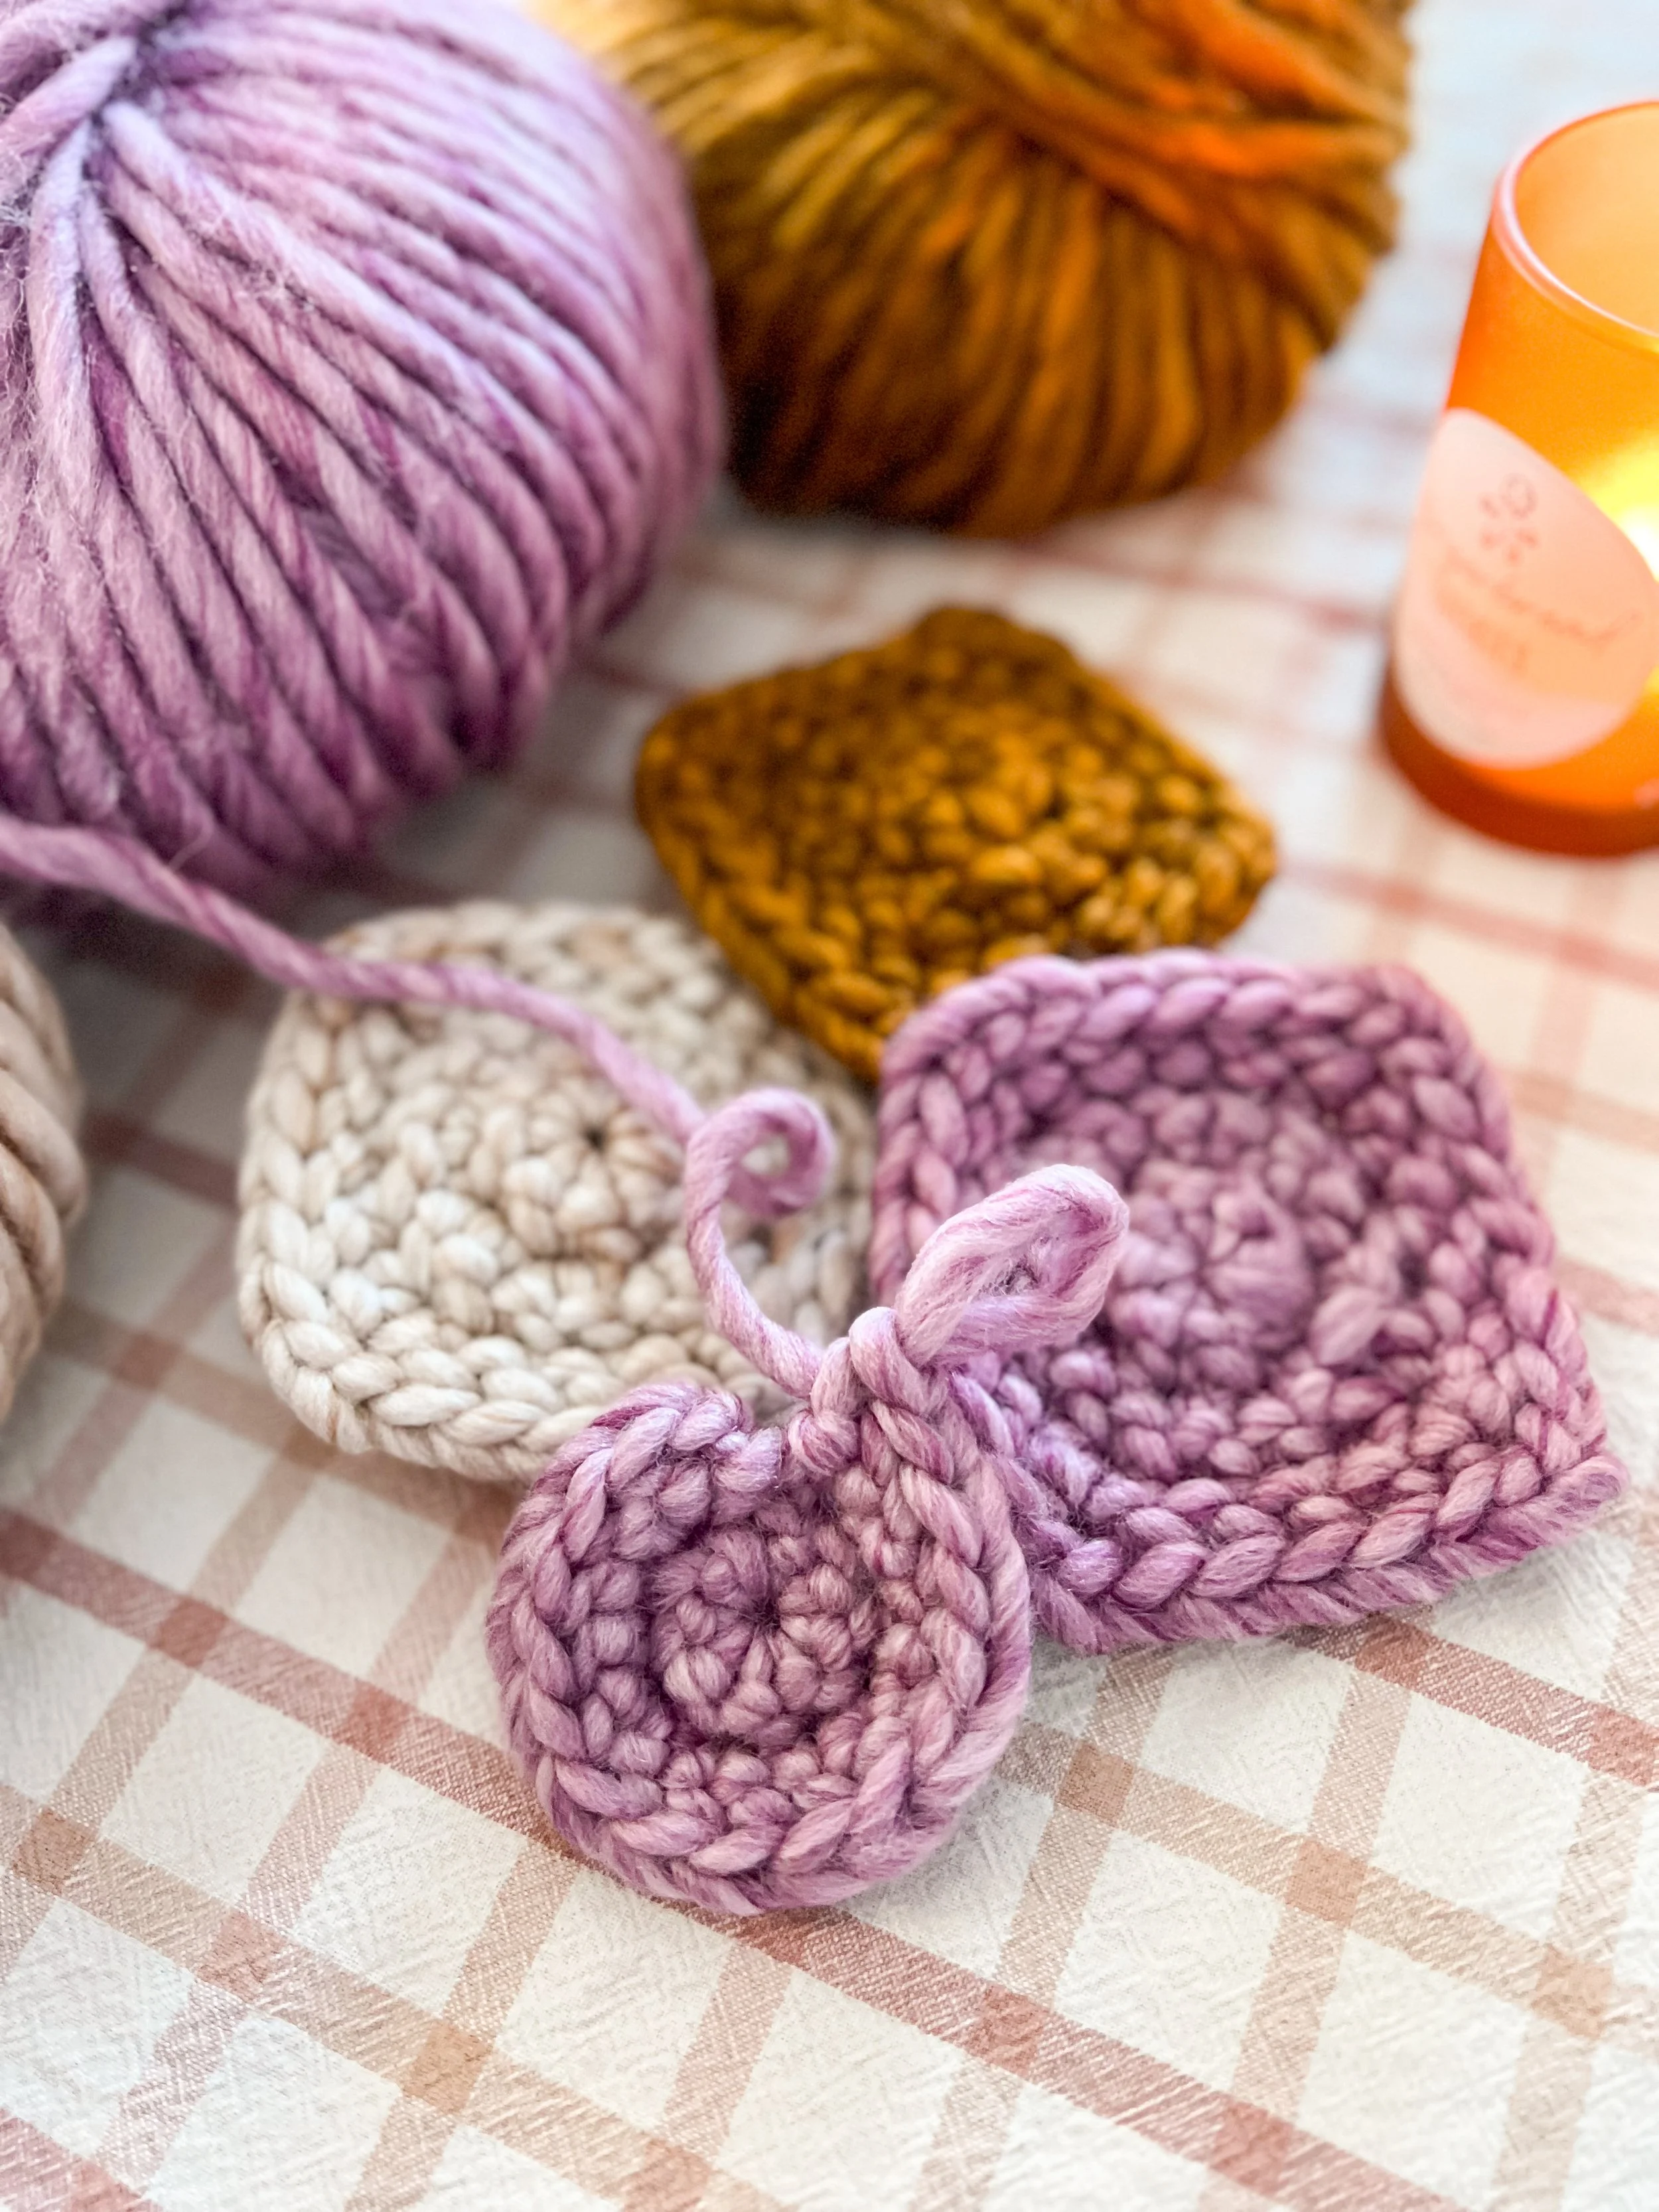
Mirabel Square (make 18)
Make 6 squares of each color (Color A, Color B, & Color C).
Rnd 1: place 8 hhdc in MR, sl st to beg st. (8 hhdc)
Rnd 2: ch 1 (does not count as a st here and throughout), hhdc inc in each st around, sl st to beg st. (16 hhdc)
Rnd 3: ch 1, [hhdc in next 3 sts, (hhdc, ch 2, hhdc) in next st] rep from [to] 3 more times, sl st to beg st. (20 hhdc)
Fasten off. Feel free to weave in your ends or leave them loose since they will be unseen on the inside of your pillow.
For best results, wet block your granny squares before piecing them together.
Continue to Assembly below.
Assembly
Once you have finished creating and blocking all of your squares, you can then begin piecing them together!
You will begin by piecing together the front and the back panels of your pillow separately.
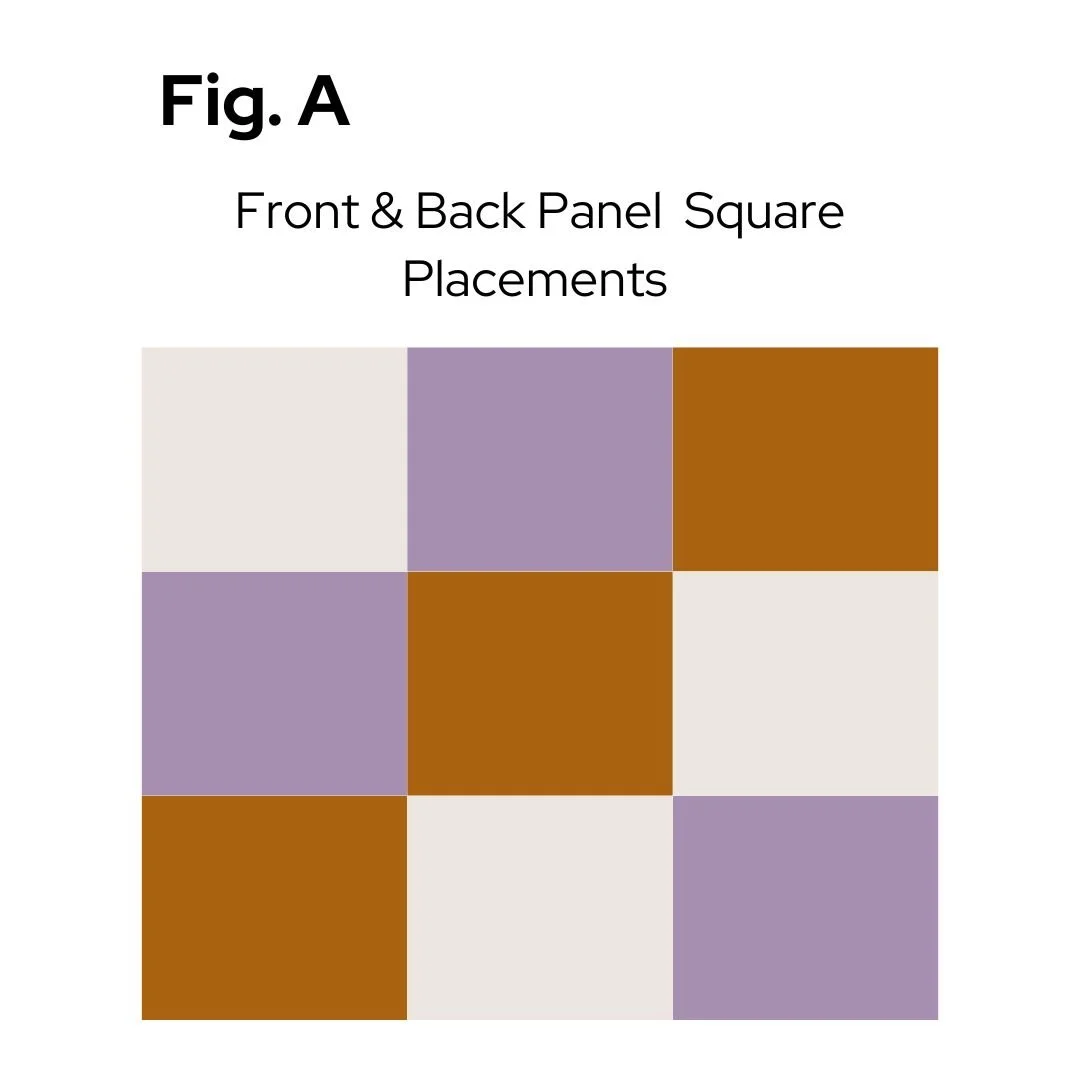
Each panel will have 9 squares sewn together in a grid (figure A).
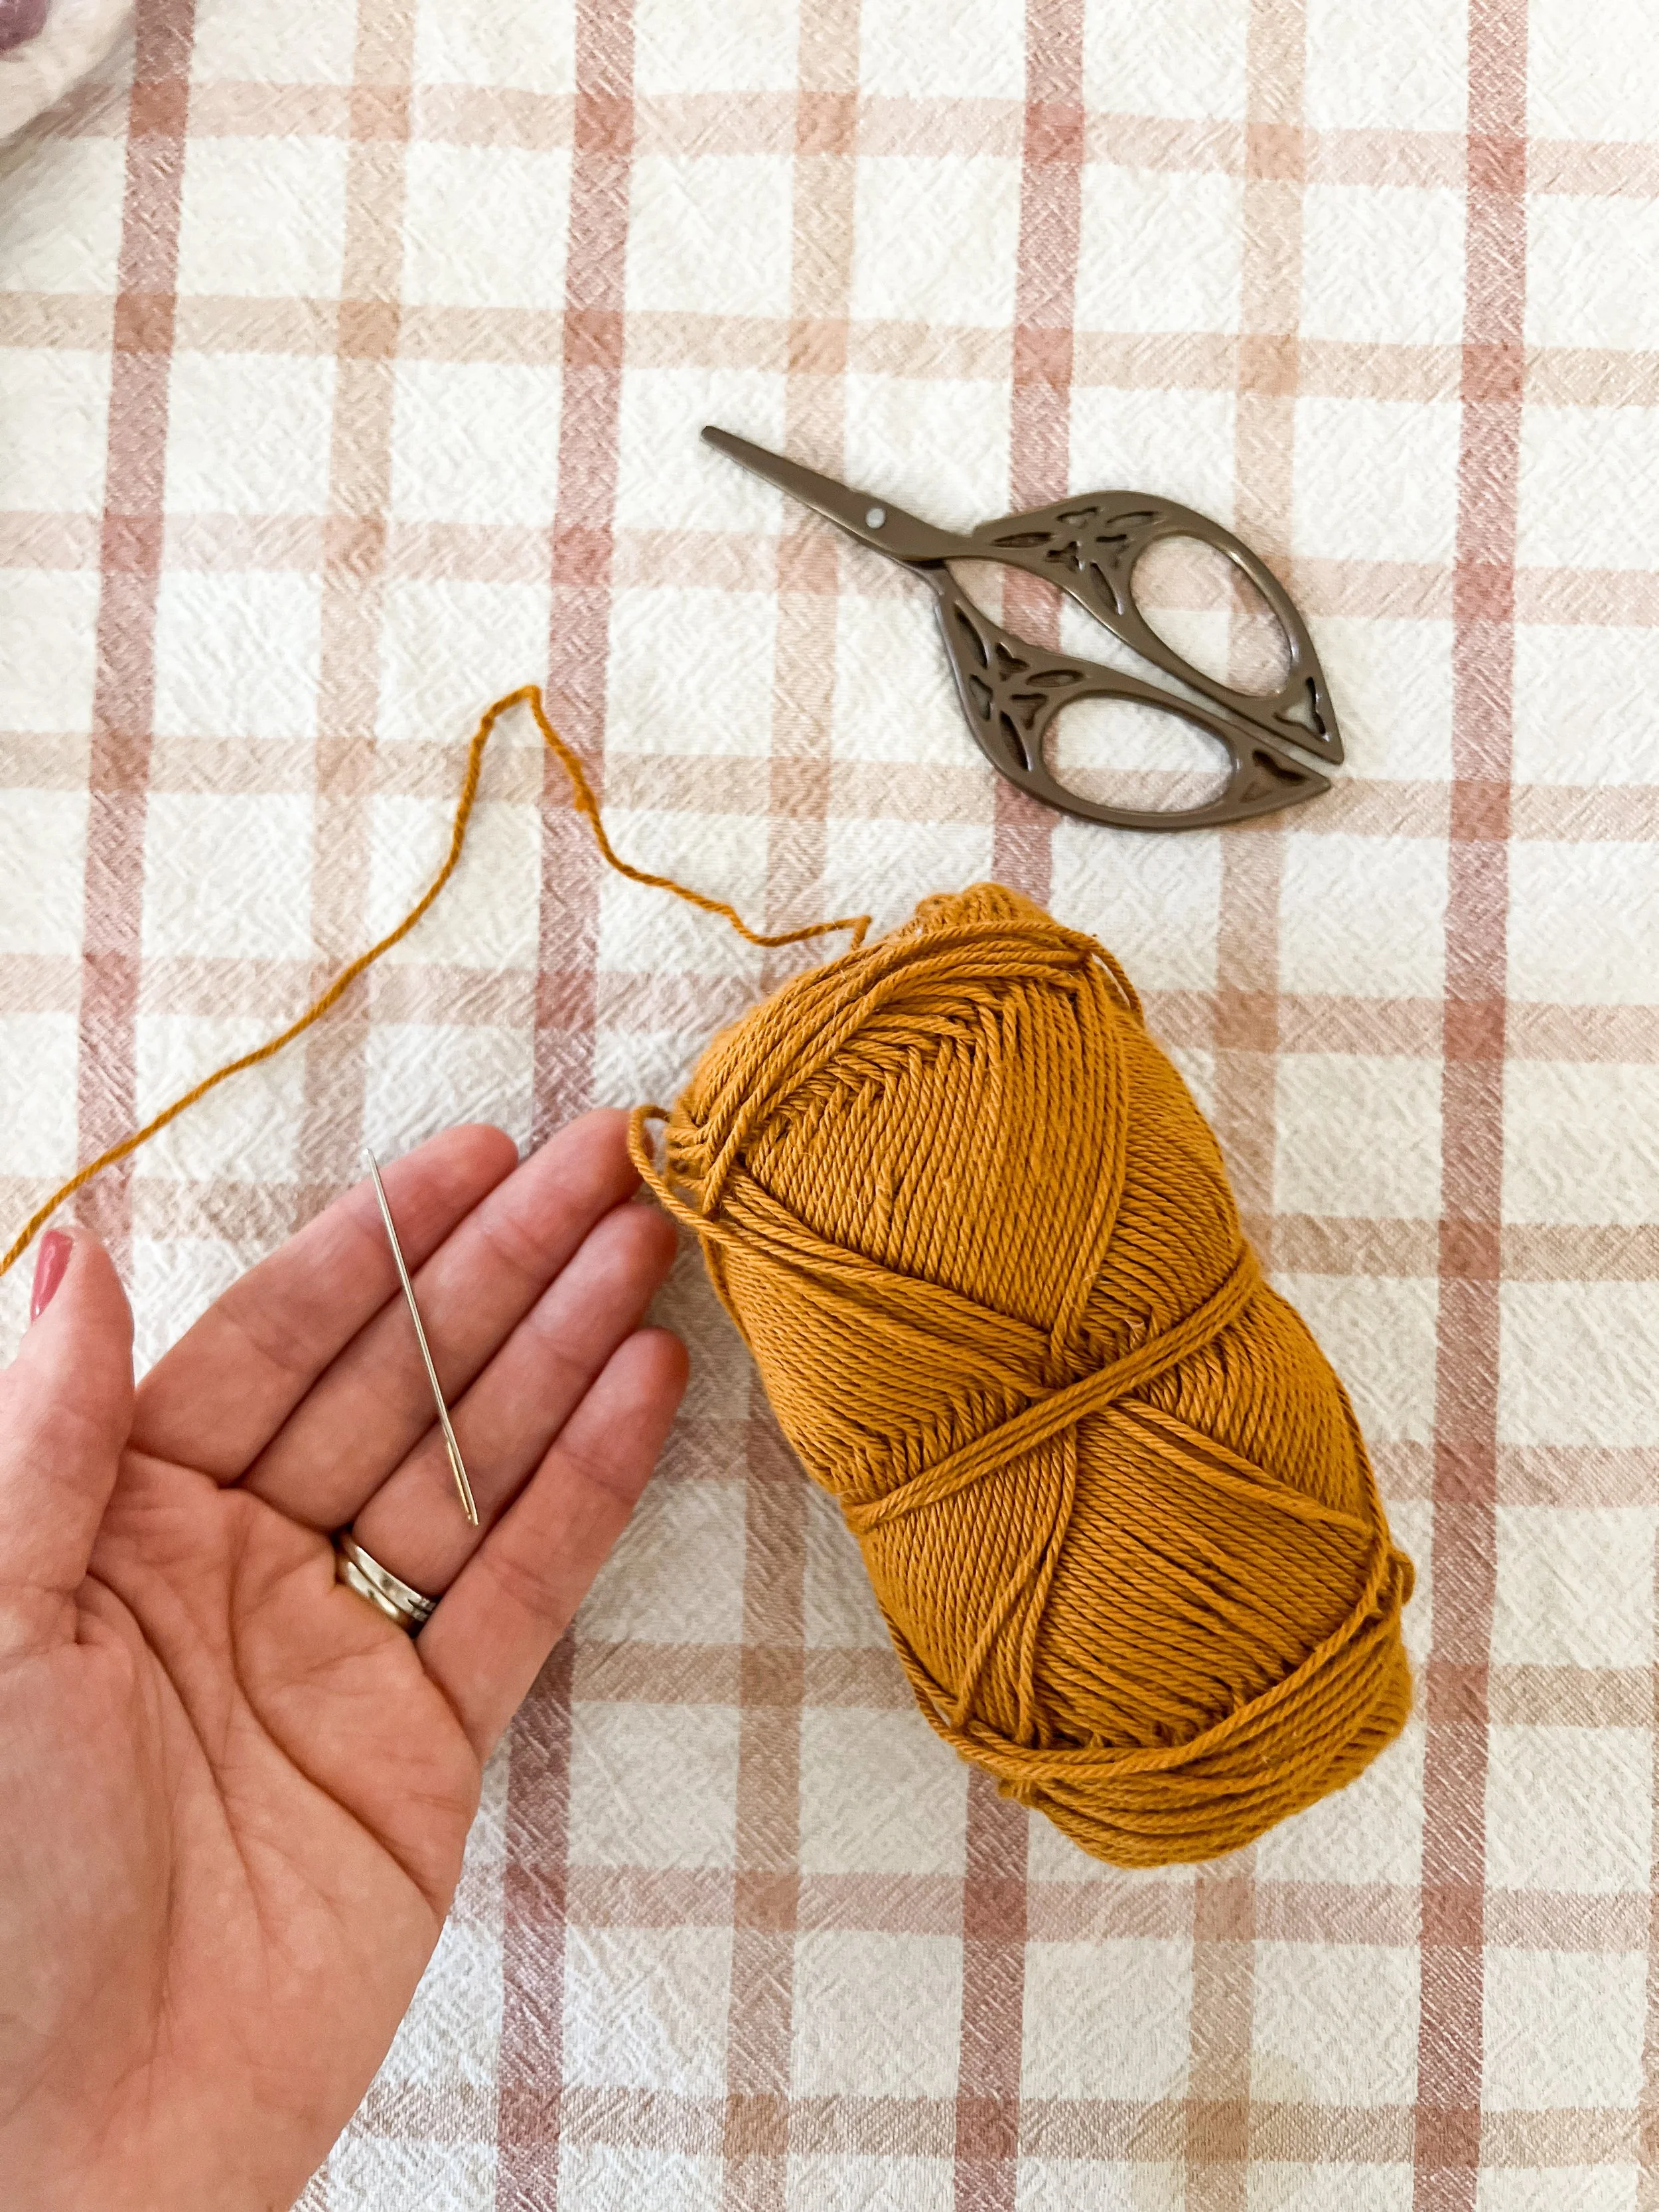
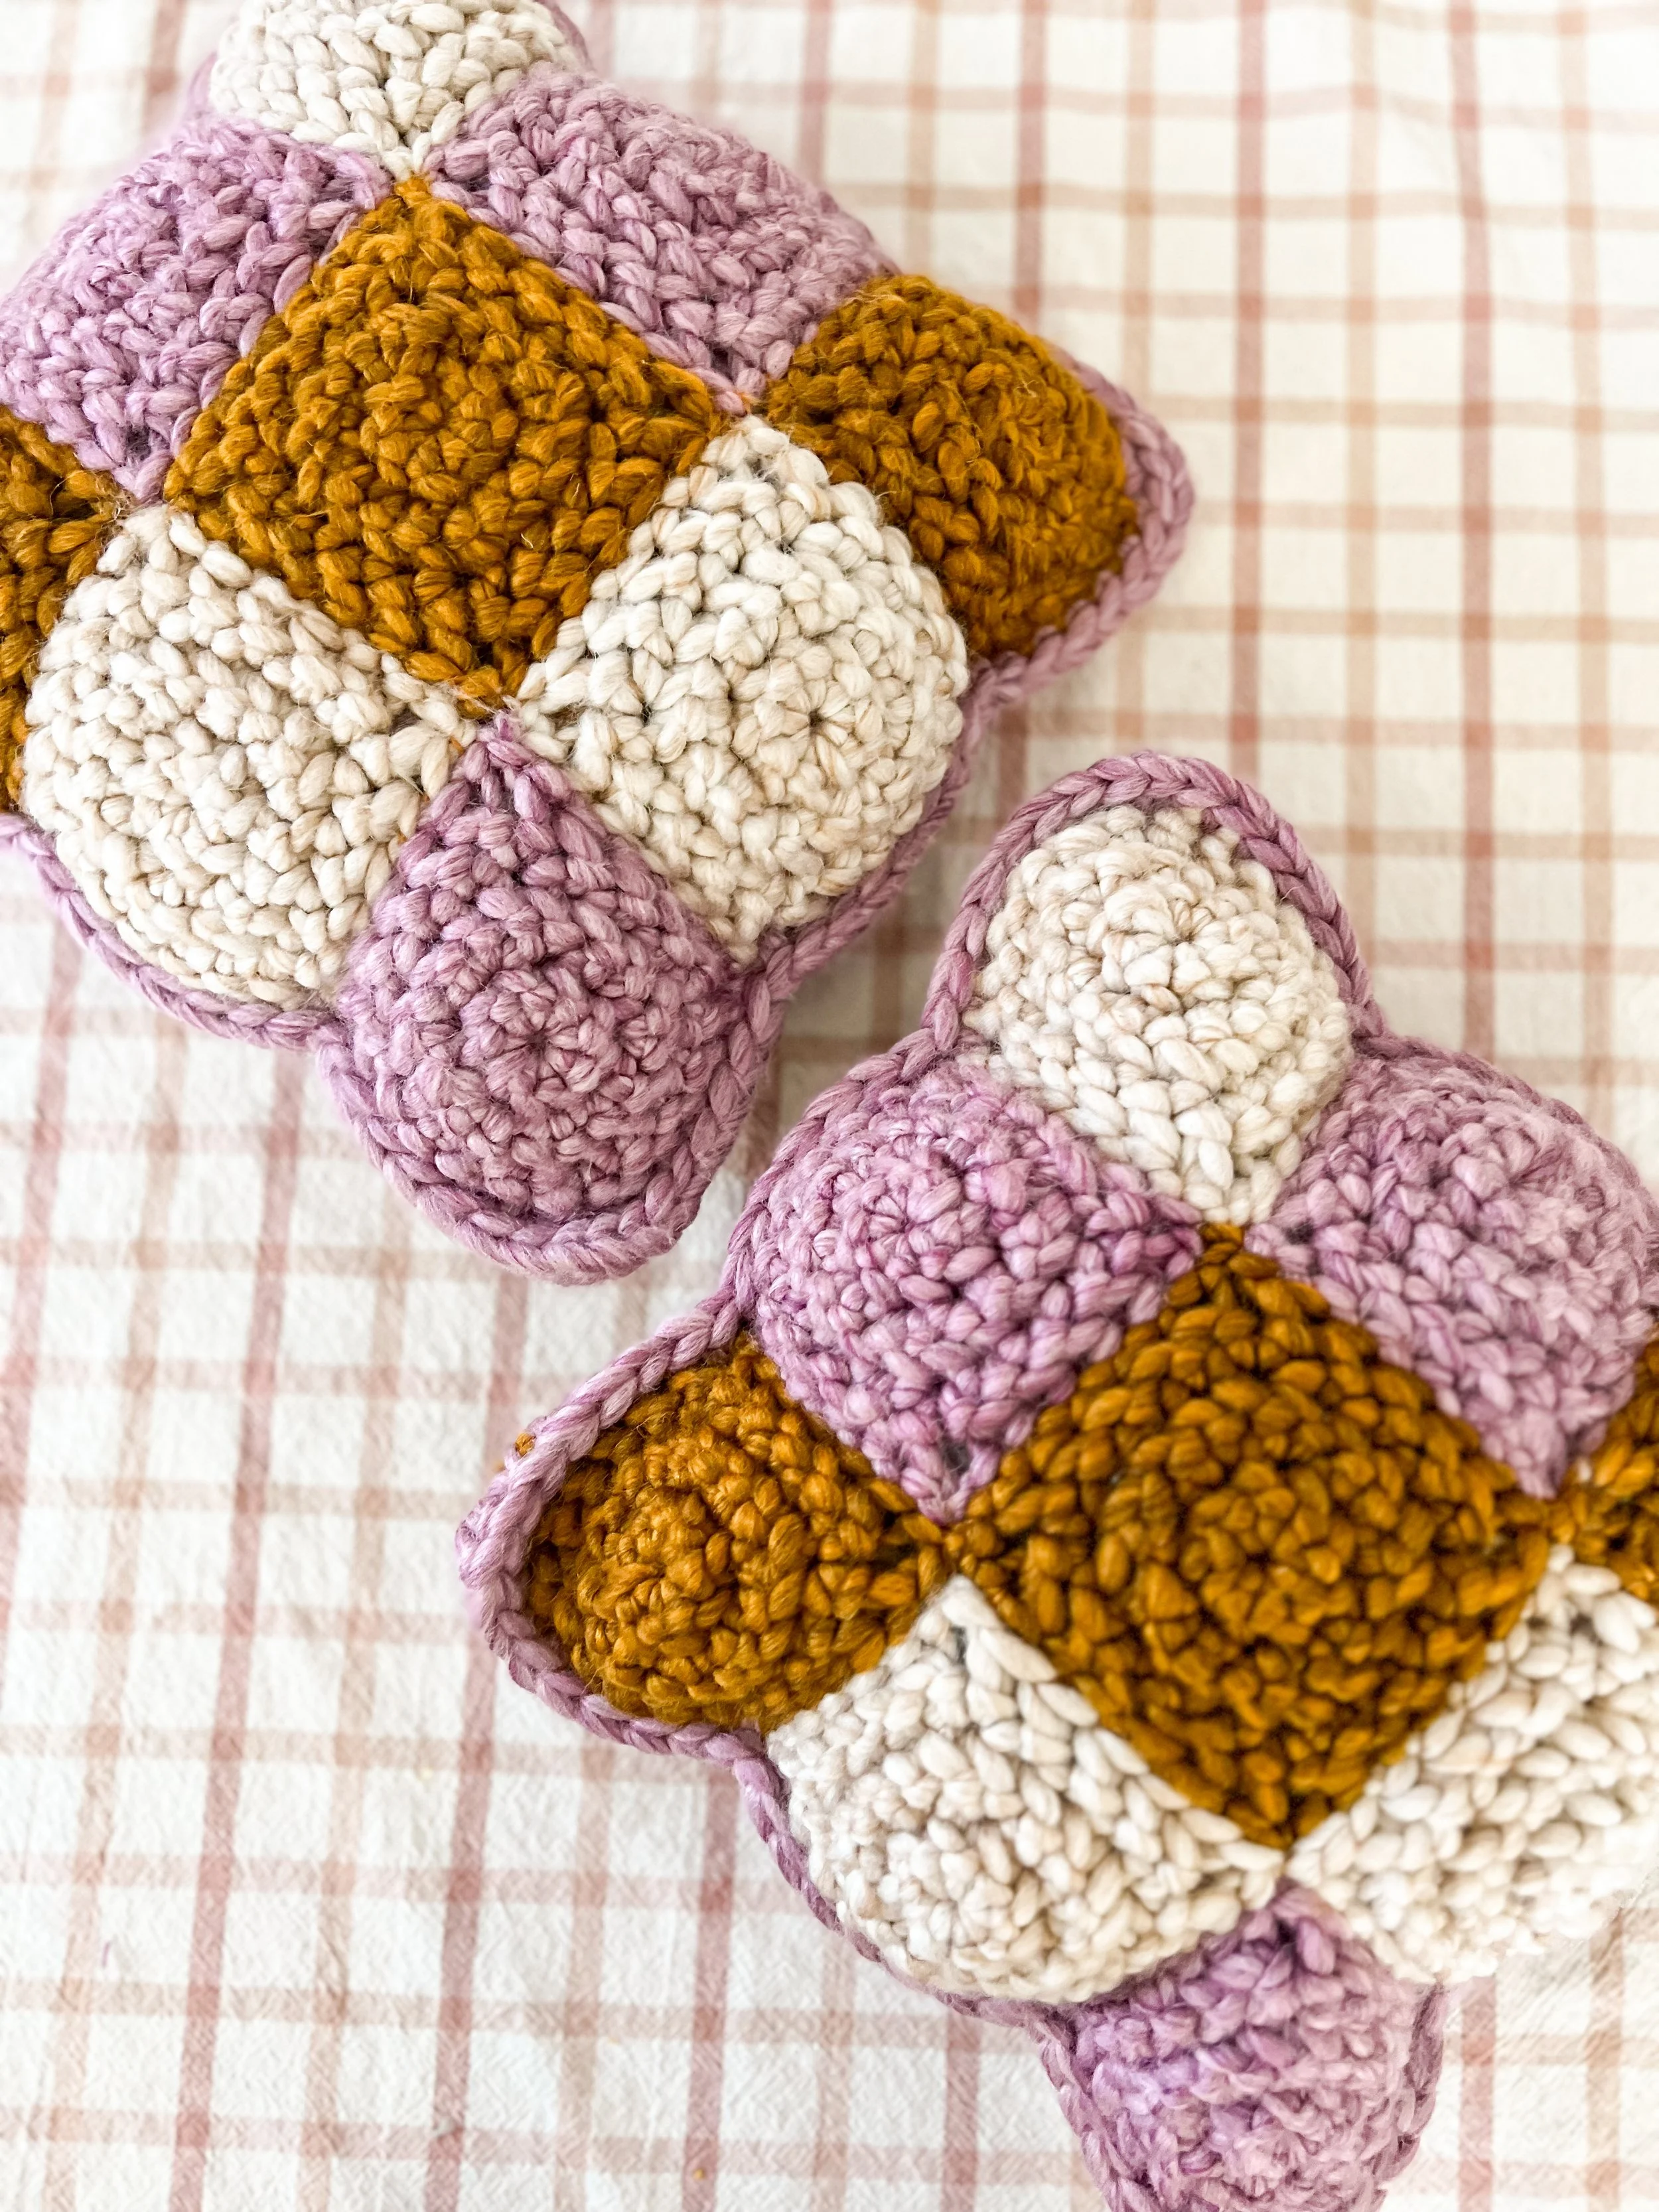
Friendly Tip: The stitching instructions provided below create a great seam that should mostly hide your stitches in the front of your work. However, while not required, using a light size 3 (I really liked Hobbii Rainbow Cotton 8/4 as shown in the photo) weight yarn instead of bulky yarn will help hide those seams even more.
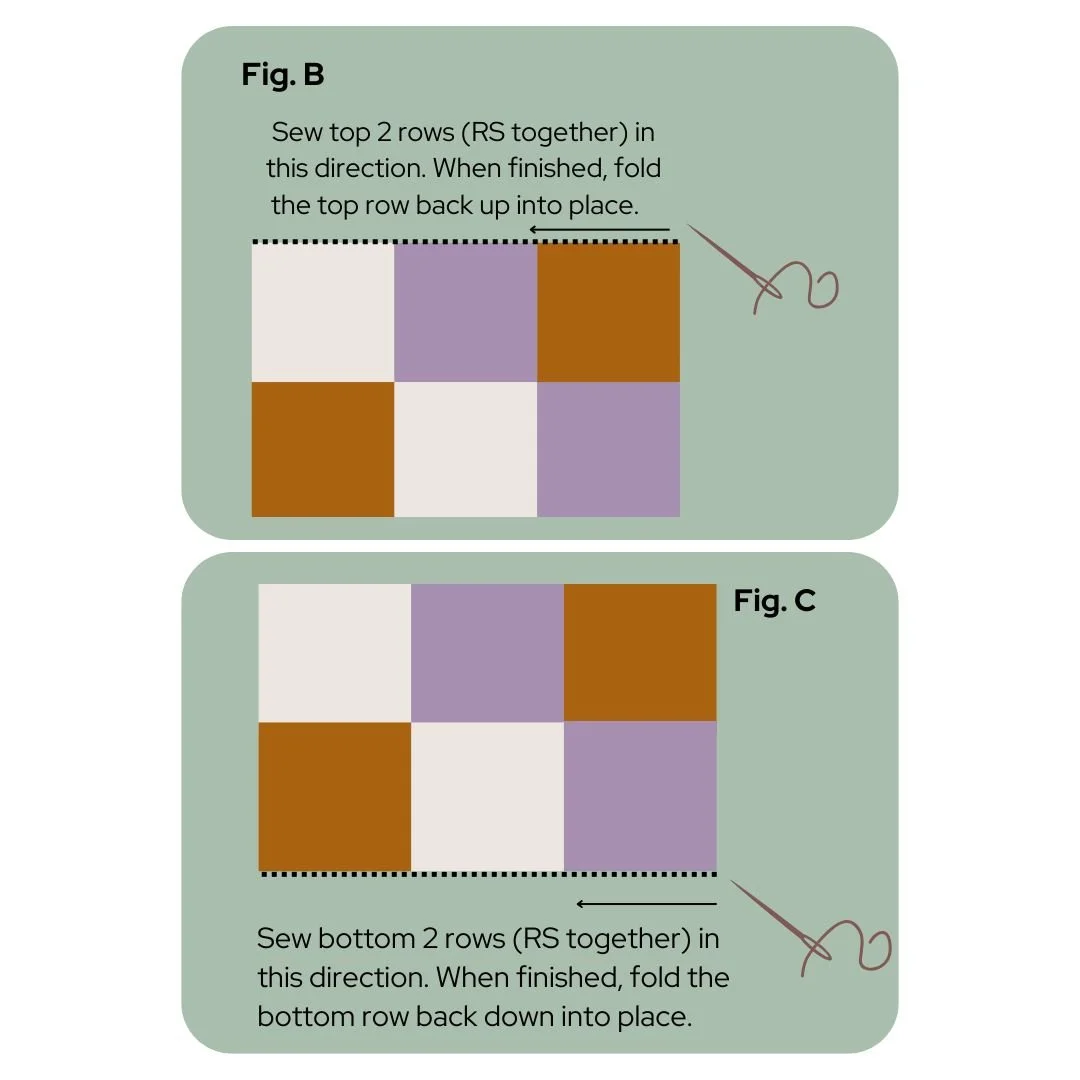
To sew the front and back panels together, I like to lay all of my squares on a flat surface with the RS facing up first. Then, fold the top row down so the RS of each top row square is now laying on the RS of row 2. Using a tapestry needle, sew the top 2 rows together from one side to the other as shown in Figure B using the stitching instructions below.
After sewing the top 2 rows together you will now sew the bottom 2 rows together.
With the RS of your panel facing up, fold each square of the bottom row up so the RS of each bottom row square is now laying on top of the RS of row 2. Using a tapestry needle, sew the bottom 2 rows together from one side to another as shown in Figure C using the stitching instructions below.
Next, rotate your piece and rep these steps for sewing your right and left columns together. Rep these steps for sewing your second panel together.
Stitching Instructions
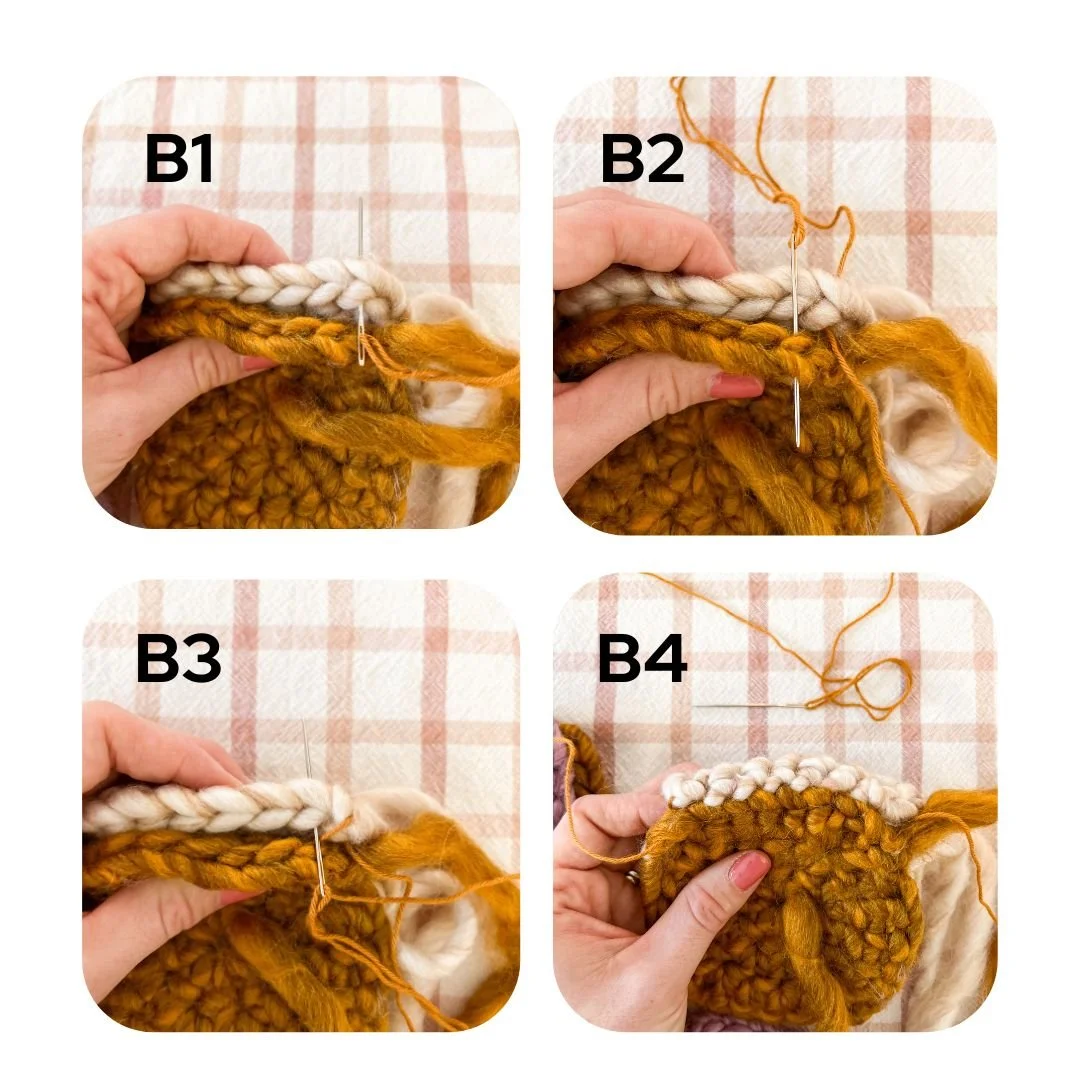
Step 1: starting from the inside of your seam working out (with RS of blocks facing together), insert your threaded tapestry needle underneath both loops of the corner ch st (photo B1) and pull yarn through.
Step 2: insert your needle underneath both loops of the same st in your opposite square (photo B2) and pull the yarn through.
Step 3: rep step 2 for each st across the entire row, gently pulling tightly to be sure your sts do not show.
Rep these steps for all seams on your front and back panels.
Continue to Border.
Border
Place your front and back panels WS together.
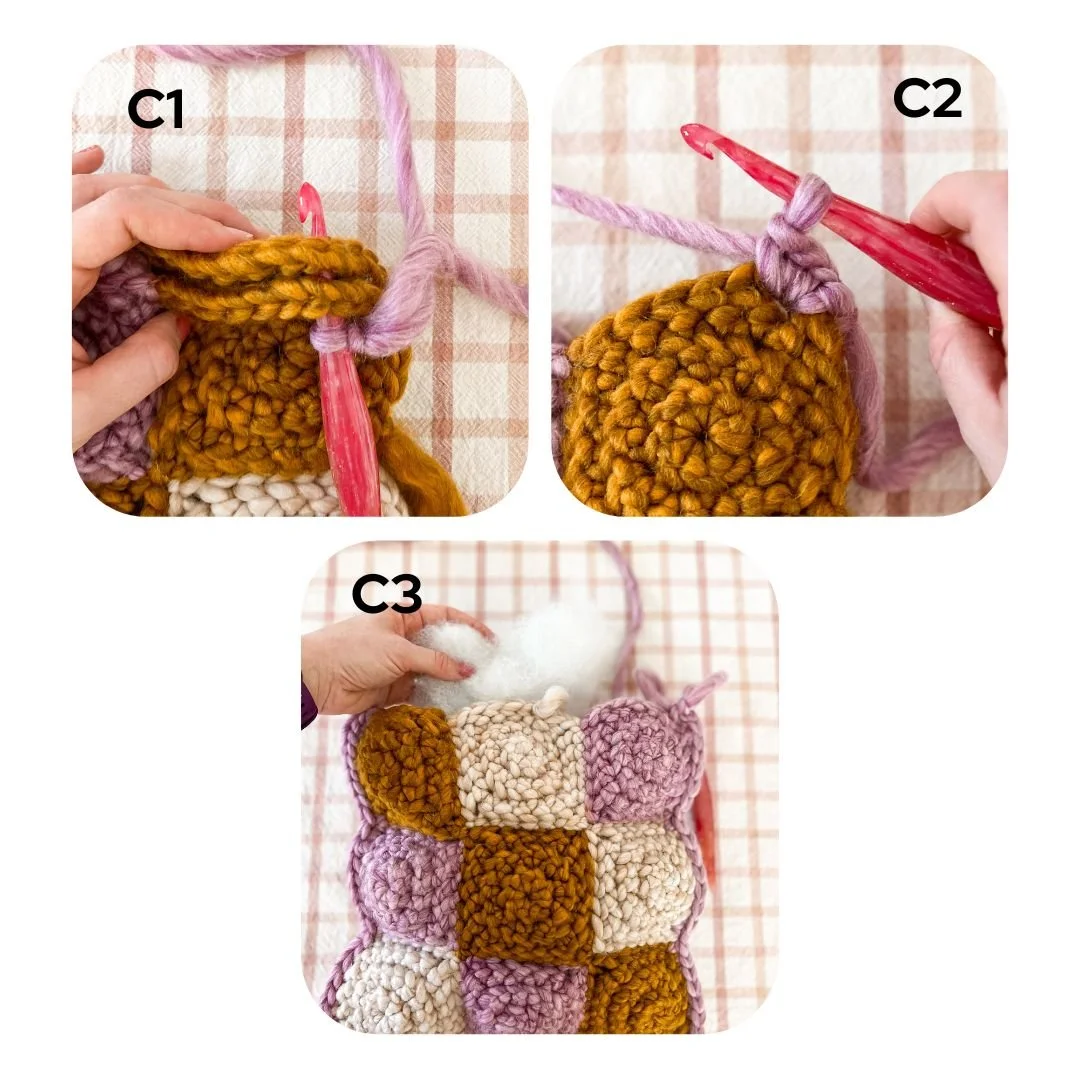
Using Color A (or your desired border color), join with a sl st working through any corner of both the front and back panels (photo C1) and ch 1.
The entire border round is made by working your sts through the front and back panels to connect.
Rnd 1: (sc 3 in corner (photo C2), sc in each st across to next corner) rep from (to) 2 more times, begin stuffing your pillow with fiberfill stuffing or with your pillow insert (photo C3), sc 3 in next corner, sc in each st across to beg corner (continuing stuffing lightly as you go), join to first corner sc with a sl st. (approx. 20-22 sc sts along each edge).
As long as the sts are worked evenly around, it’s okay if the st count is off by a couple of stitches.
Fasten off and weave in your end to complete your pillow!
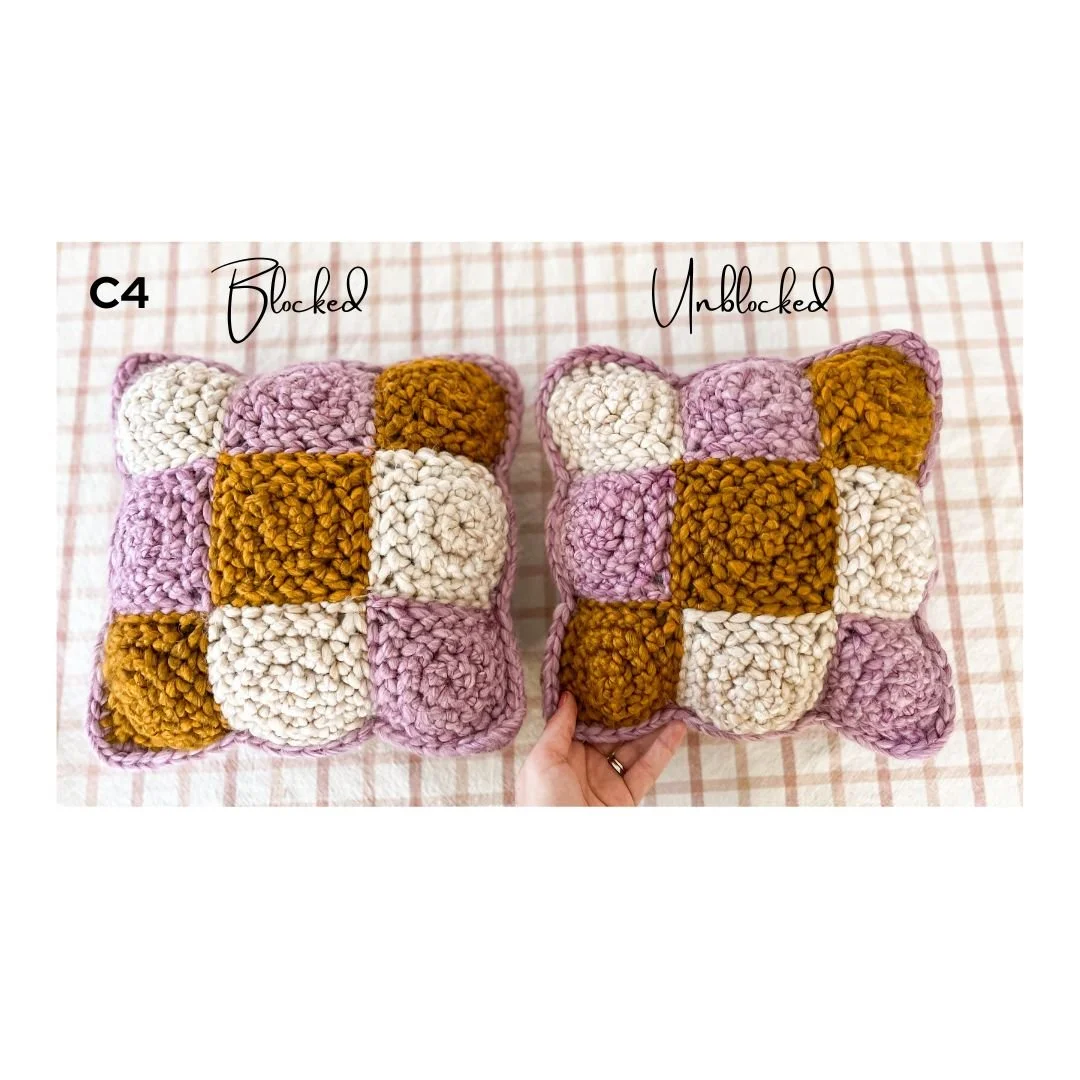
BLOCKED vs UNBLOCKED
To see the difference between blocked and unblocked squares, refer to photo C4. As you can see, the pillow with blocked squares has a smoother look to it. It’s also much softer and has less of a stiff and bulky feel compared to the unblocked pillow. If you’ve never wet blocked before, I suggest checking YouTube for some tutorials.
As mentioned before, blocking your squares is completely optional and just depends on how you’d like your finished pillow to look.
Thank you so much for reading and I hope you enjoy your finished Mirabel Pillow!!
This pattern is copyright © 2023 of Kristen Moore of Junebug and James. Pattern and photos can not be used for resale purposes. Distribution in part or in whole of this pattern is strictly forbidden. Any Mirabel Pillow created using this pattern may be sold, but please remember to give credit to Junebug and James. | junebugandjames.etsy.com


Subscribe to my channel on YouTube
Check out my other printable, downloadable patterns in my shop on Etsy!
Please feel free to reach out to me if you have any questions or pattern assistance needs! If you share your finished MIrabel Pillow on social media, please feel free to tag me so I can see and share your work!
